Editorial Decision After Reviewing Revised Manuscript
Now, let’s see how the editorial user can make a decision after reviewing the updated manuscript submitted by the author.
Once the requested changes have been submitted, the editorial user should review the Updated File and verify whether the author has adequately addressed the requested corrections.
Based on the assessment, the editorial user can:
-
Request Changes Again if further corrections are required.
-
Accept & Send to Review if the manuscript is ready to proceed to peer review.
-
Accept & Initiate APC if the applicable workflow requires APC processing before proceeding.
-
Decline Submission if the manuscript does not meet the journal’s requirements.
-
Transfer Submission if the manuscript is more appropriate for another journal.
The editorial user can select the appropriate action based on the revised manuscript and make the next editorial decision.
Decline Submission
If the manuscript does not meet the journal’s requirements even after revision, or if the editorial team determines that the submission should not proceed further, the manuscript can be declined at the Submission Stage.
How to Decline a Submission
Click Actions and select Decline Submission.
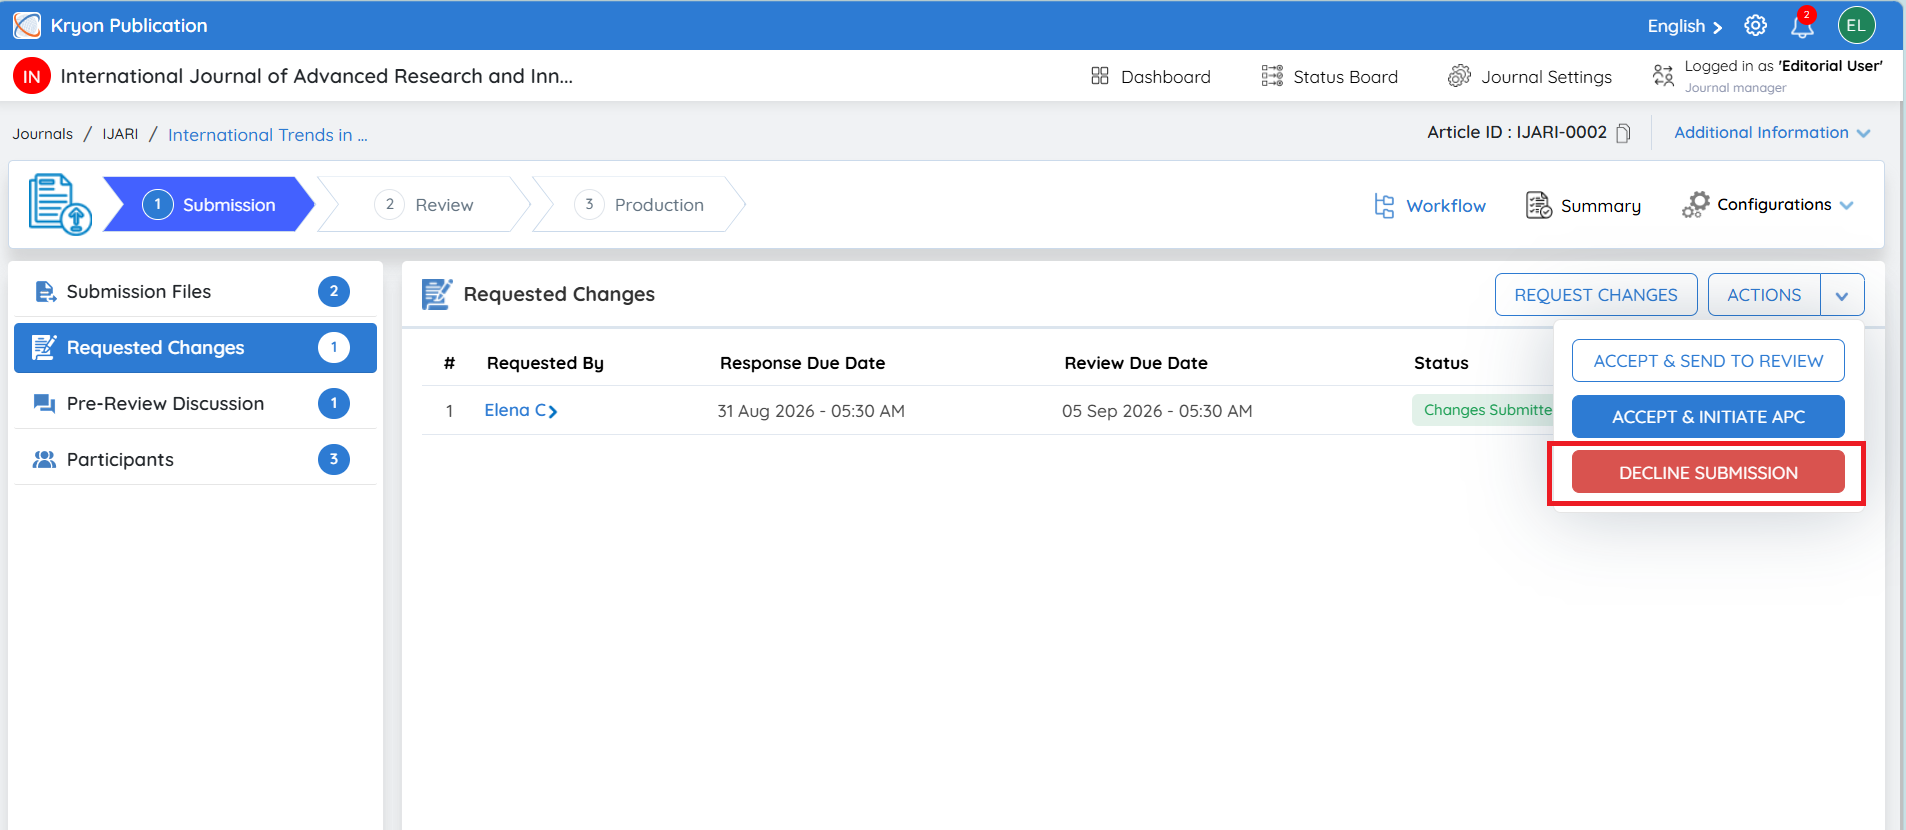
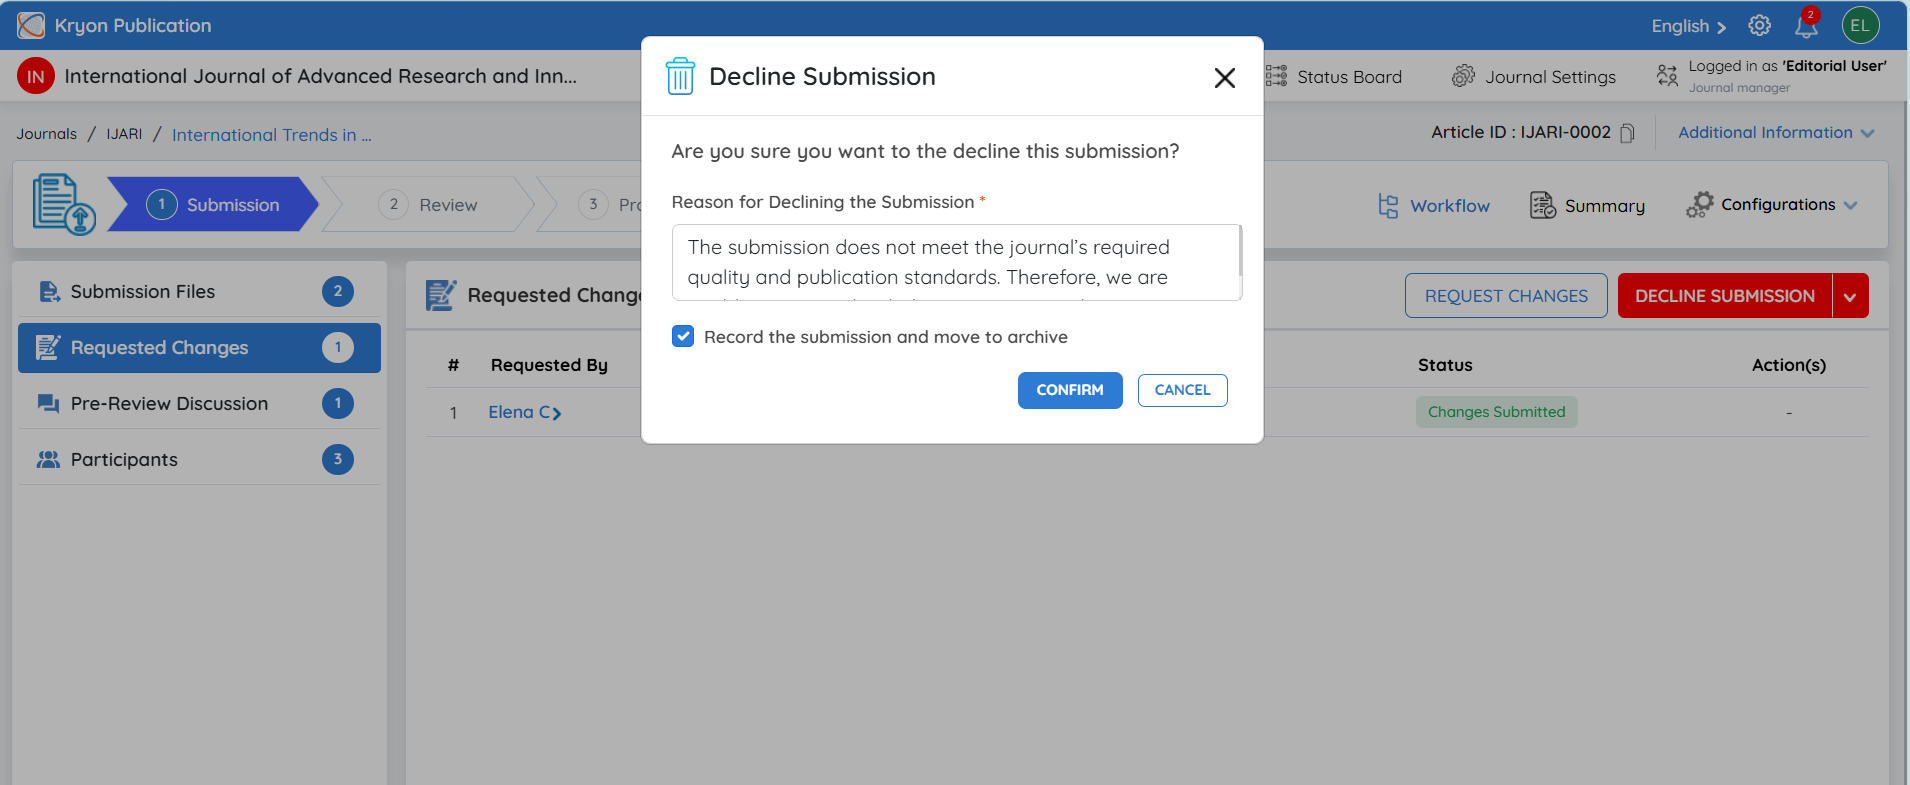
The Decline Submission window will open.
The editorial user must enter the Reason for Declining the Submission. The reason should clearly explain why the manuscript will not proceed further in the editorial workflow.
Record the submission and move to archive
When this option is selected, the declined submission will be retained as part of the journal’s submission record and moved to the archive. This ensures that the manuscript history remains available for future reference and audit purposes.
After entering the reason and selecting the appropriate archive option, click Confirm.
Once confirmed, the submission will be declined and will no longer proceed to the Review stage.
Transfer Submission
Now, let’s look at the Transfer Submission option.
If the editorial user determines that a manuscript may not be the best fit for the current journal but is more suitable for another journal managed within the same publishing organization, the manuscript can be transferred instead of being declined.
This helps retain a potentially suitable manuscript within the publisher’s journal portfolio while avoiding the need for the author to create an entirely new submission.
Step 1: Initiate the Transfer
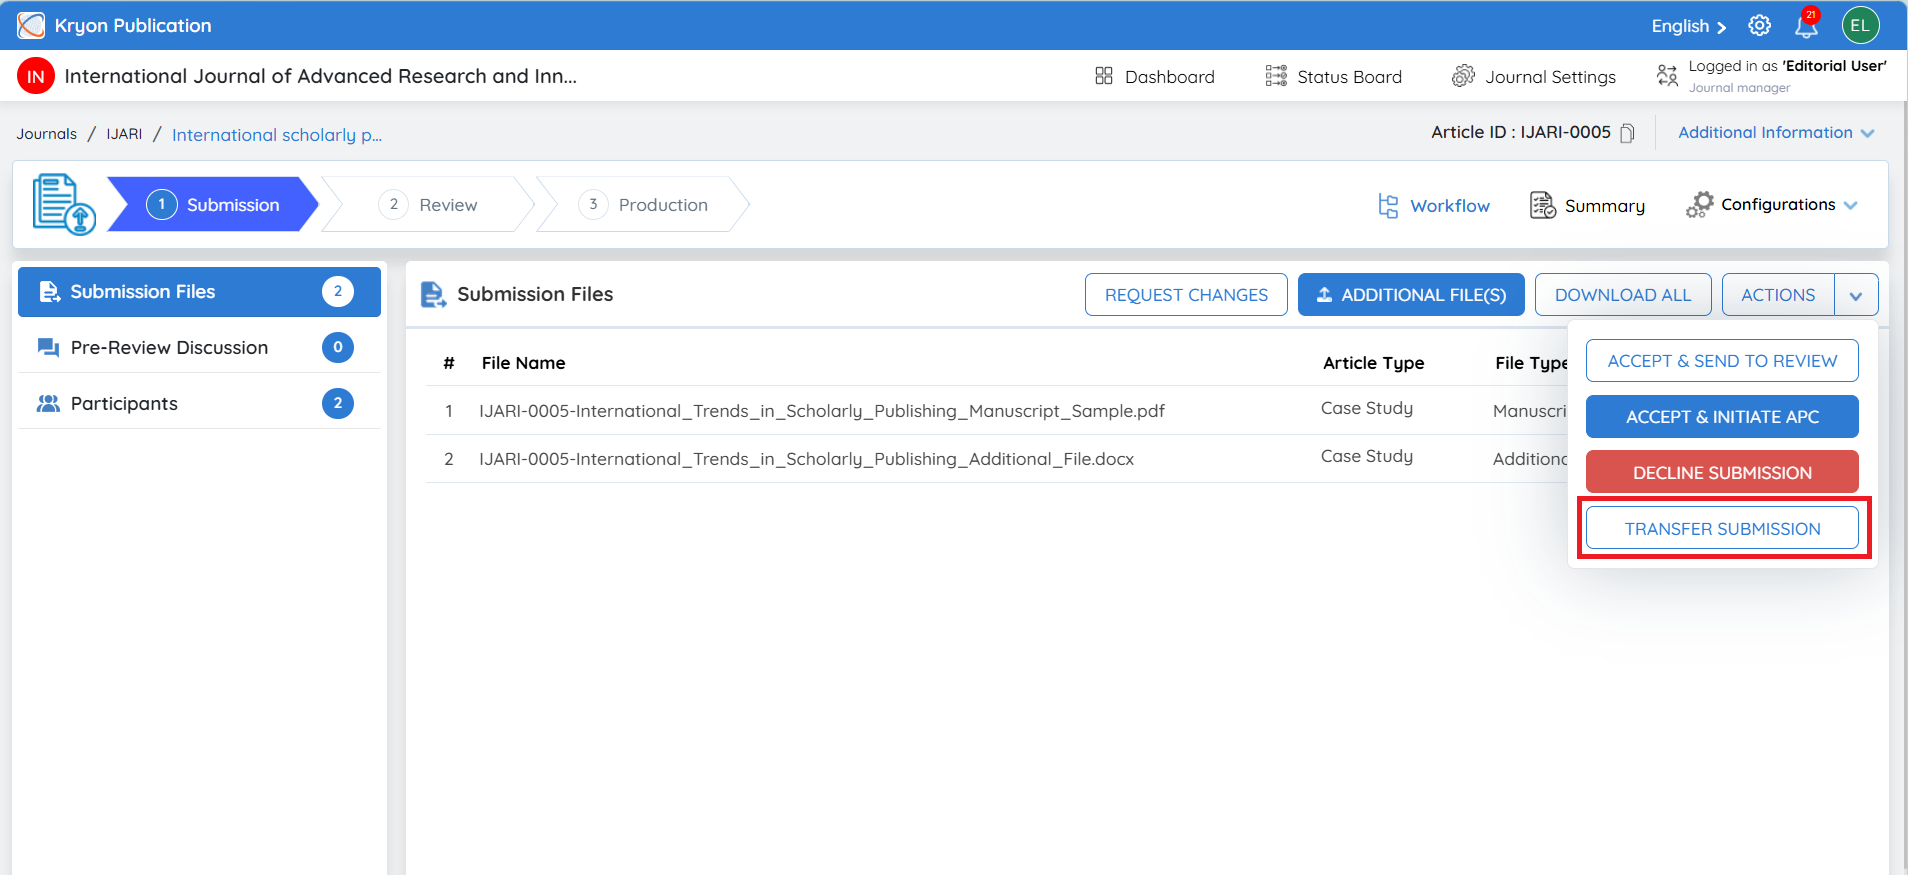
From the manuscript workflow, click Actions and select Transfer Submission.
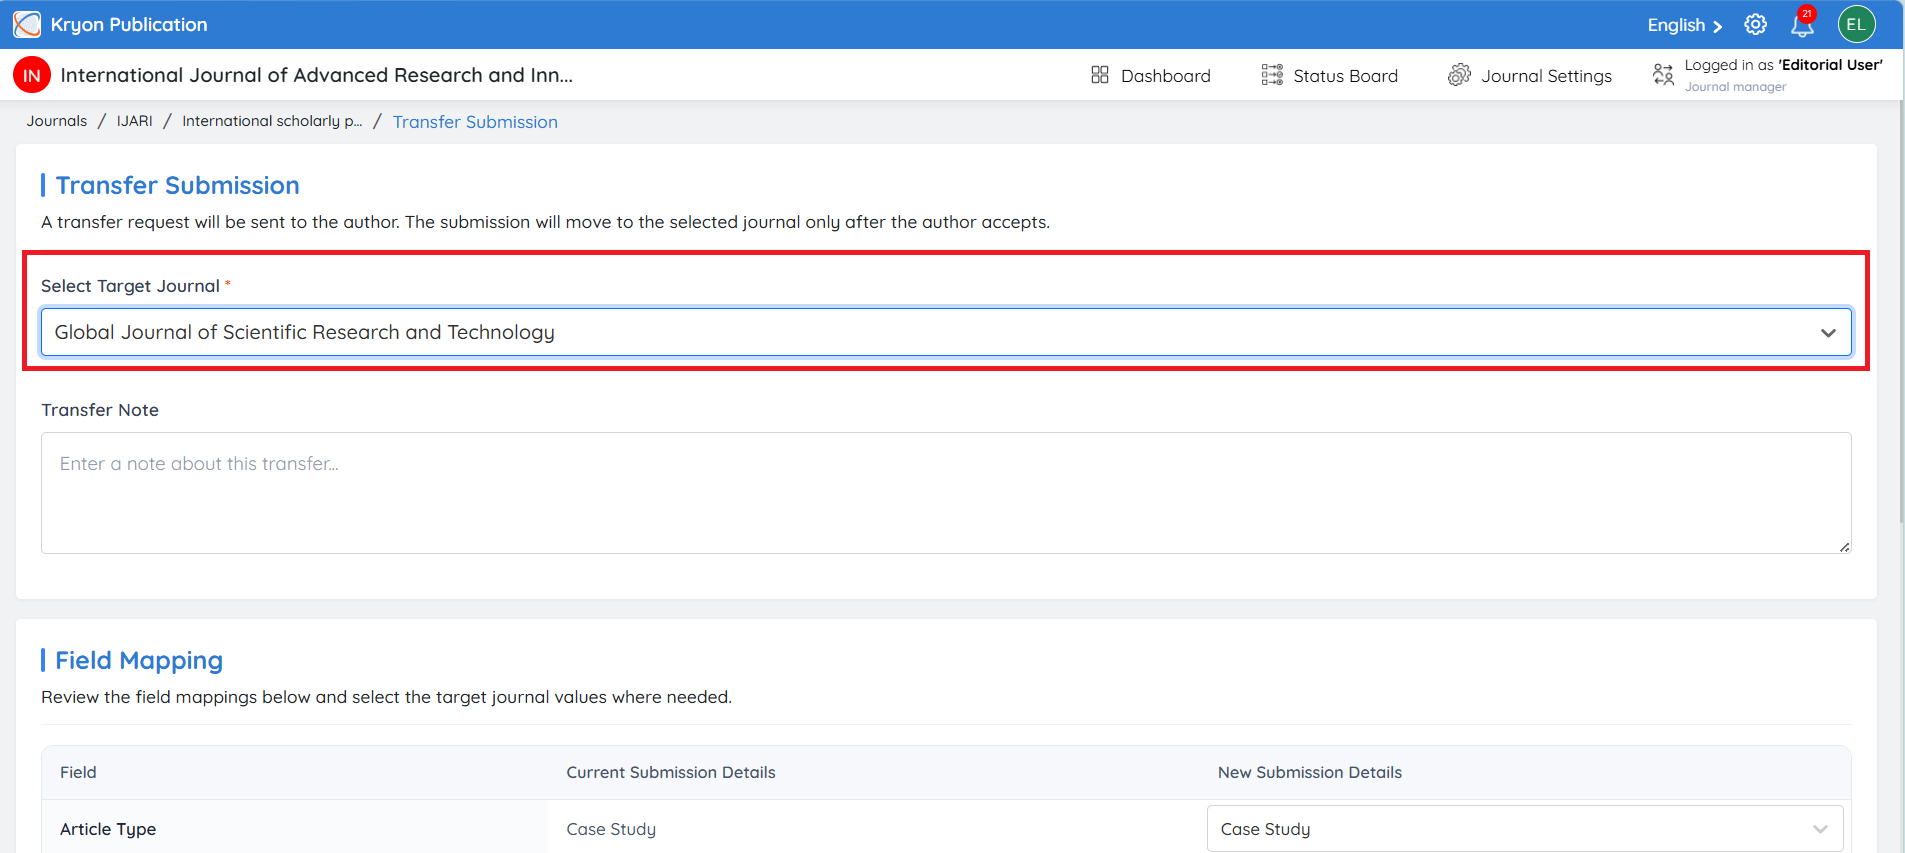
The Transfer Submission page will open.
Step 2: Select the Target Journal
Under Select Target Journal, choose the journal to which the manuscript should be transferred.
Only an appropriate journal within the available publishing environment should be selected.
In the Transfer Note field, provide the reason or relevant information about the proposed transfer.
For example:
The manuscript is outside the current journal’s scope but may be more suitable for the selected journal based on its subject area.
Step 3: Review and Map the Submission Details
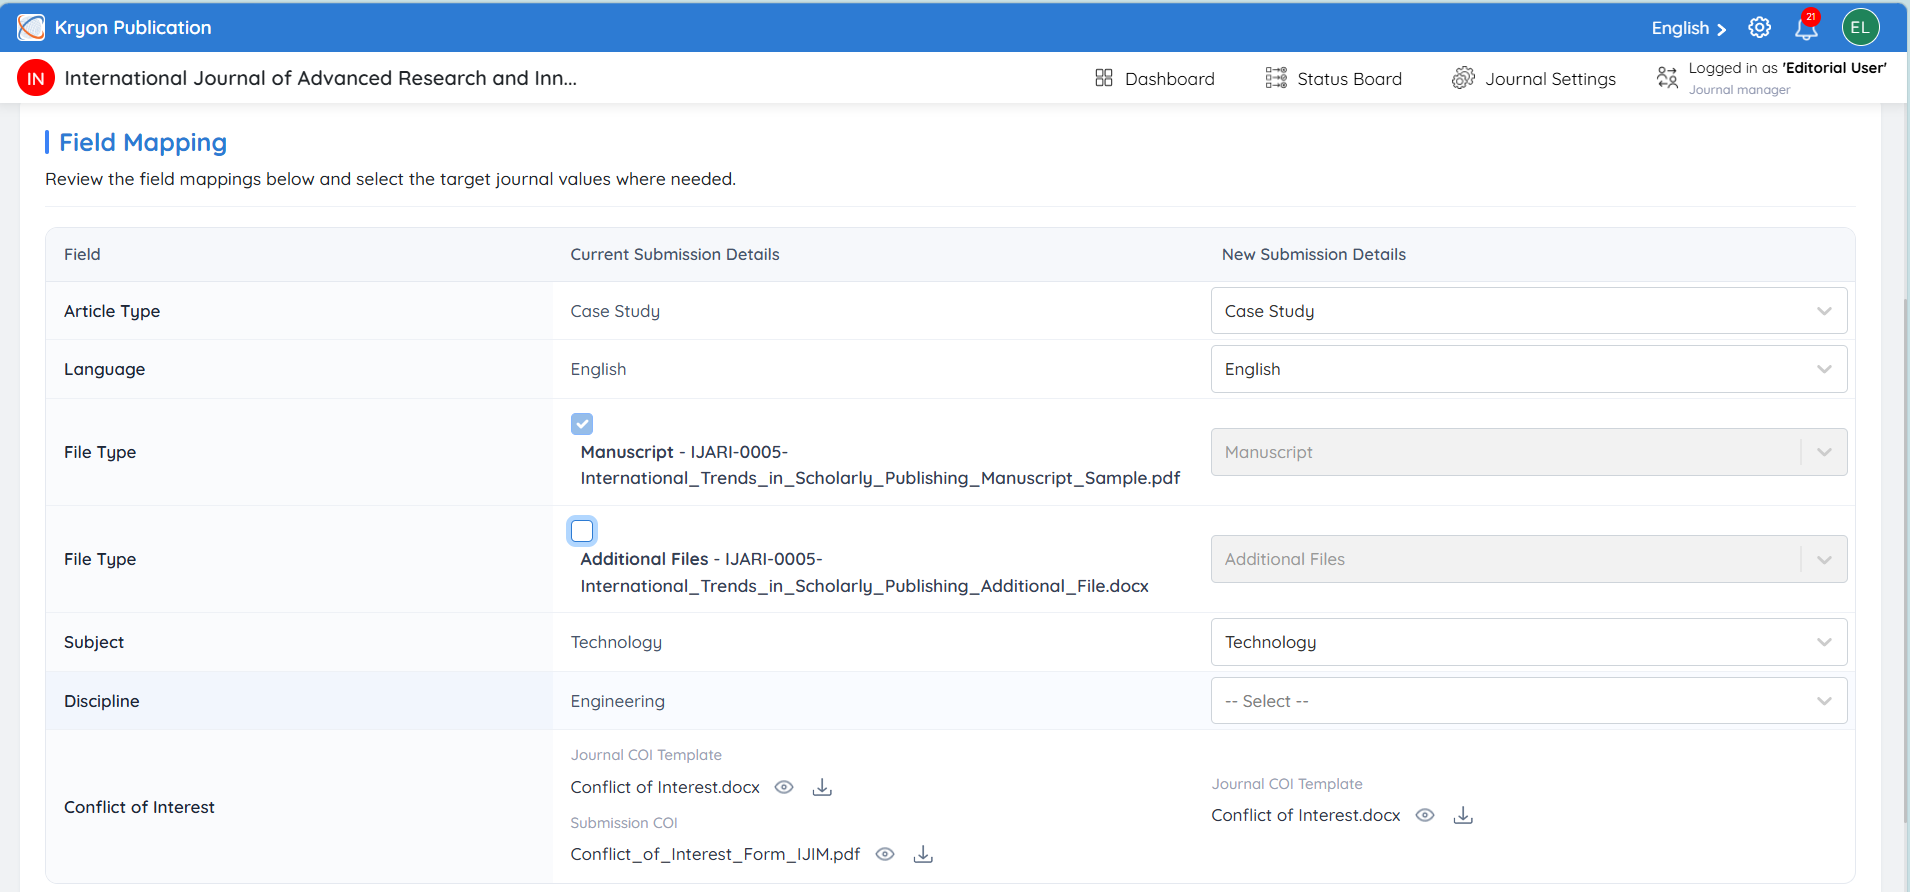
Once the target journal is selected, the Field Mapping section displays:
Current Submission Details – information associated with the existing journal submission.
New Submission Details – corresponding information that will be used for the target journal.
The editorial user should review and map the required fields according to the target journal’s configuration. These may include:
-
Article Type – Select the corresponding article type available in the target journal.
-
Language – Confirm or select the appropriate submission language.
-
File Type – Select the files that should be transferred and map them to the appropriate file types in the target journal.
-
Subject – Map the manuscript to an appropriate subject configured for the target journal.
-
Discipline – Select the relevant discipline for the target journal.
-
Conflict of Interest – Review the applicable Conflict of Interest information or template.
This mapping is important because the configuration of the target journal may differ from the current journal. For example, a Research Article in the current journal may need to be mapped to another available article type in the target journal.
Step 4: Send the Transfer Request
After reviewing the target journal and completing all required field mappings, click Send Transfer Request.
The manuscript is not transferred immediately.
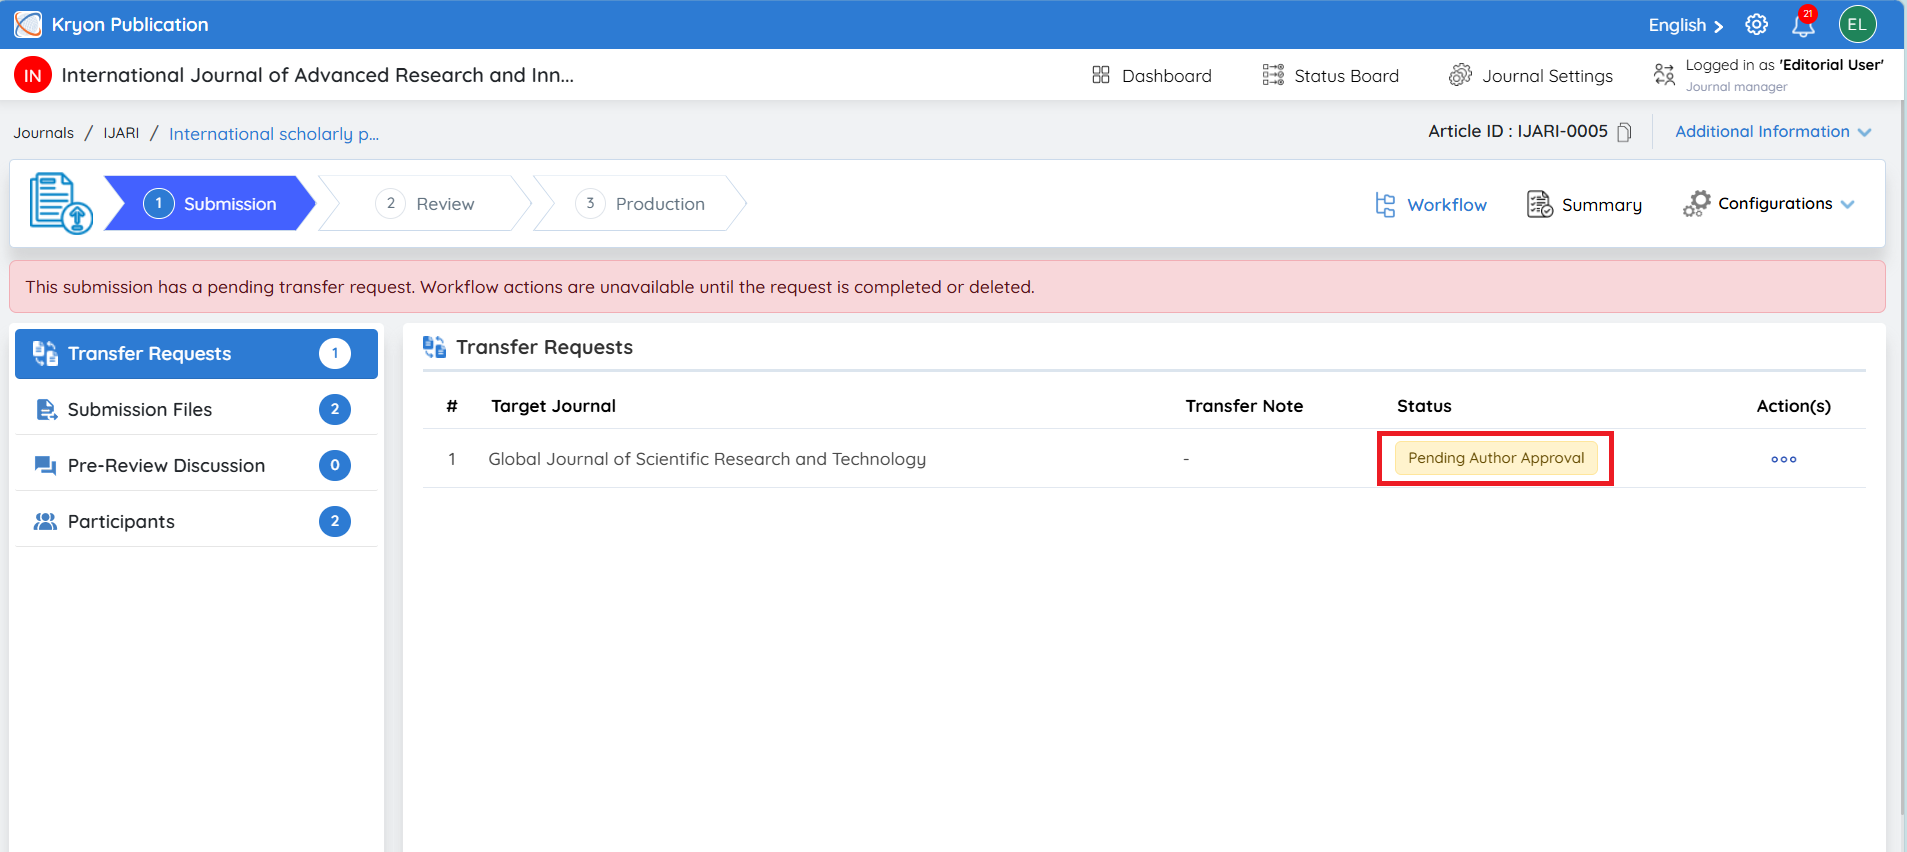
A transfer request will first be sent to the author, and the status will display:
Pending Author Approval
The author will also receive an email notification informing them about the proposed journal transfer.
Step 5: Author Reviews the Transfer Request
The author should log in to Kryoni JMS and open the relevant manuscript.
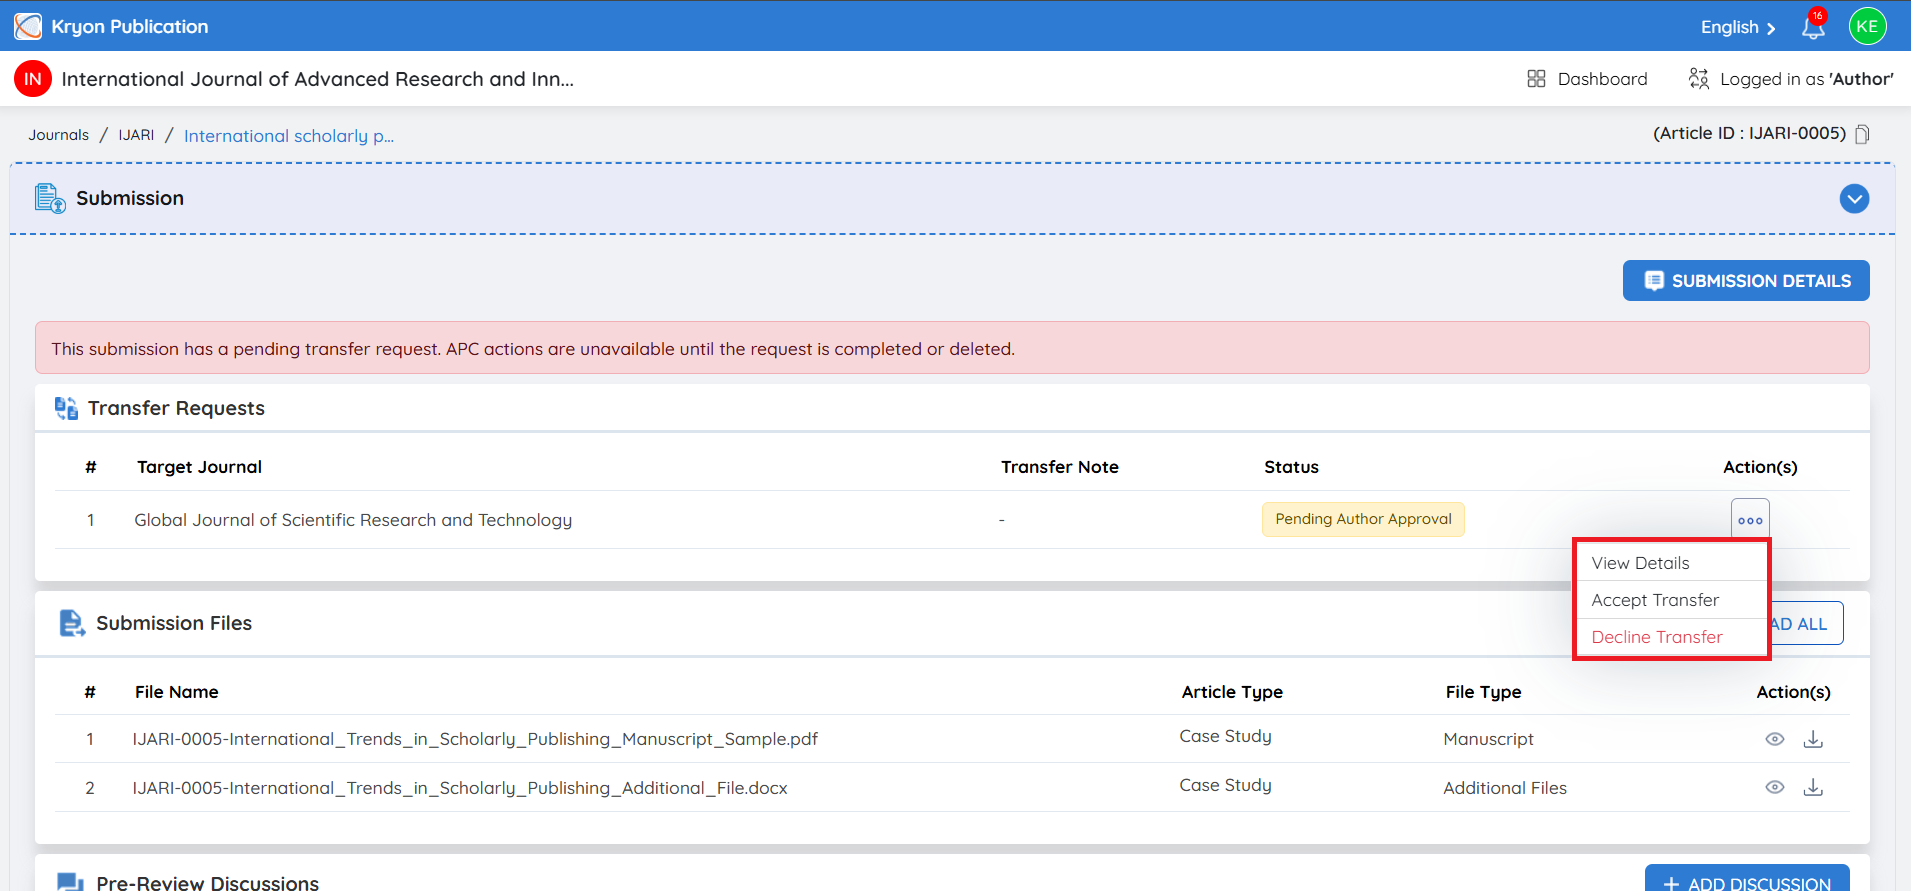
The Transfer Requests section will display the proposed transfer, including the Target Journal, Transfer Note, and current Status.
Under Action(s), the author can:
View Details – Review the complete transfer information, including the target journal, transfer note, submission details, and field mappings.
Accept Transfer – Approve the proposed transfer to the selected journal.
Before accepting the transfer, the author should carefully review all the mapped submission details. If any field mapping needs to be changed, the author can edit the applicable fields and select the appropriate values based on the target journal’s configuration.
Once all the submission details and field mappings have been reviewed and verified, click Accept Transfer to confirm the transfer and move the manuscript to the selected journal.
Decline Transfer – Reject the proposed transfer. If the author does not wish to transfer the manuscript to the selected journal, click Decline Transfer, provide the reason for declining, and confirm the action.
Step 6: Author Accepts or Declines the Transfer
If the author selects Accept Transfer, the author confirms consent to move the submission to the selected target journal. The submission can then proceed according to the target journal's workflow and mapped configuration.
If the author selects Decline Transfer, the manuscript will not be transferred to the proposed journal, and the transfer request will be recorded accordingly.
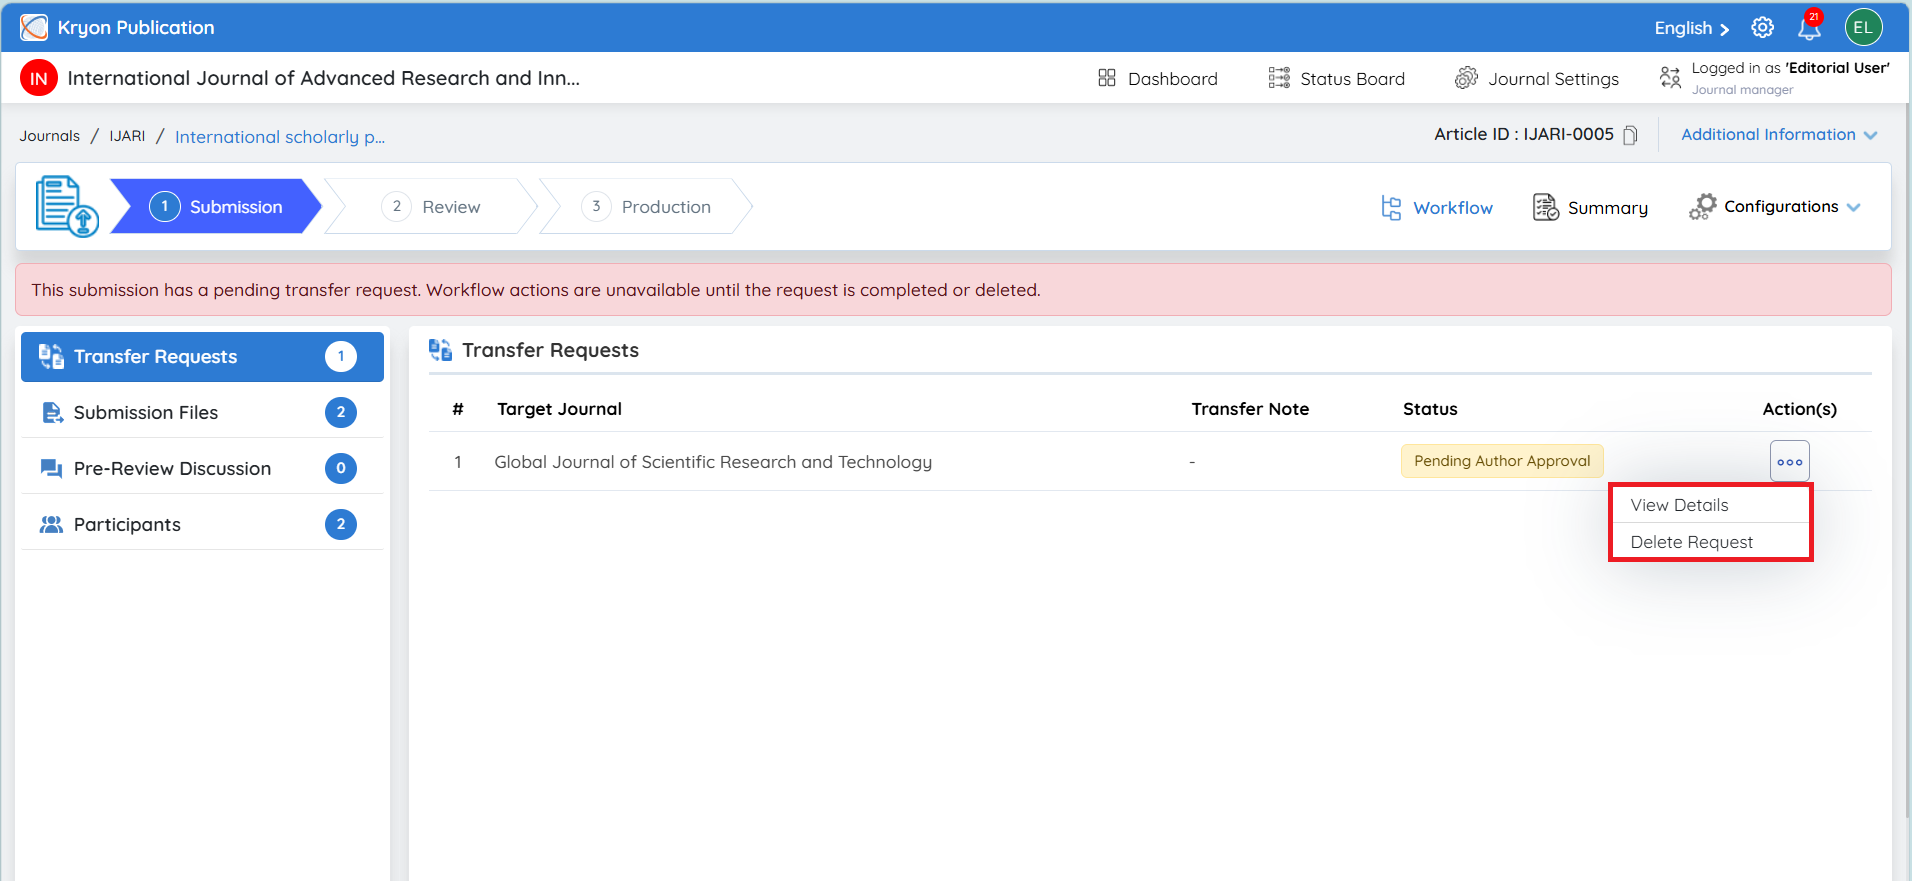
Managing a Pending Transfer Request – Editorial User
While the request is awaiting the author's response, the editorial user can view it under Transfer Requests.
Under Action(s), the editorial user can:
View Details – Review the transfer request and its mapped information.
Delete Request – Cancel the pending transfer request when required.
Important: A transfer initiated by the editorial user is a request, not an immediate manuscript movement. The manuscript will move to the selected target journal only after the author accepts the transfer request.
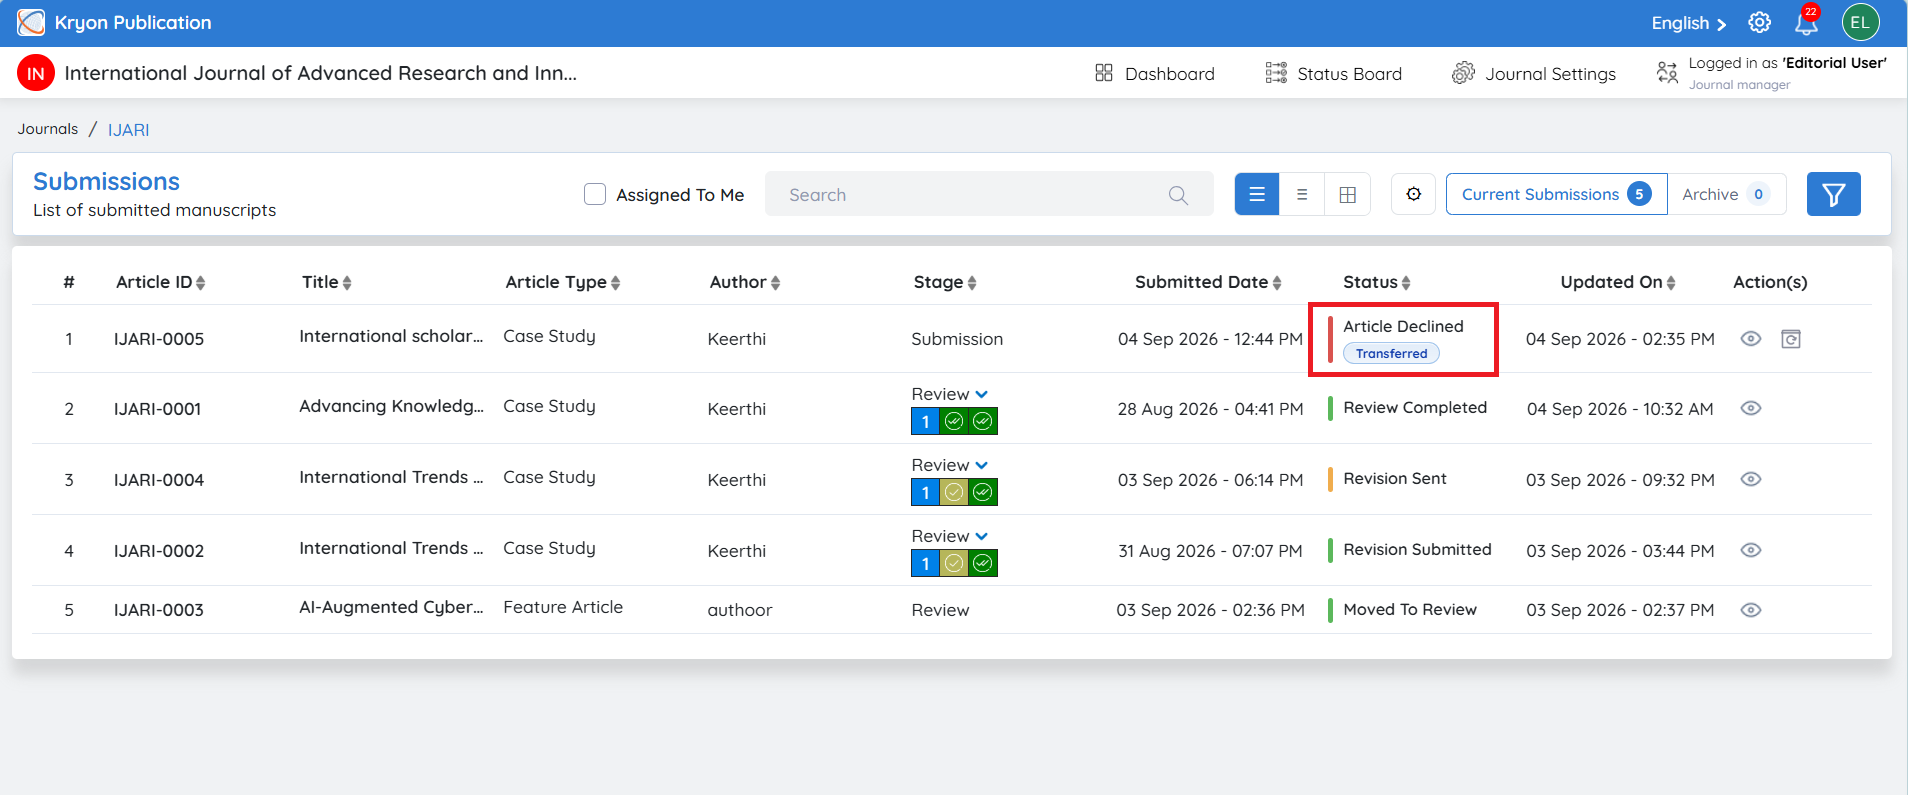
If the Author Accepts the Transfer Request
Once the author accepts the transfer request, the article will be closed and marked as declined in the current journal and transferred to the selected target journal.
The manuscript and mapped submission details will then be available in the target journal, where the editorial workflow can continue.
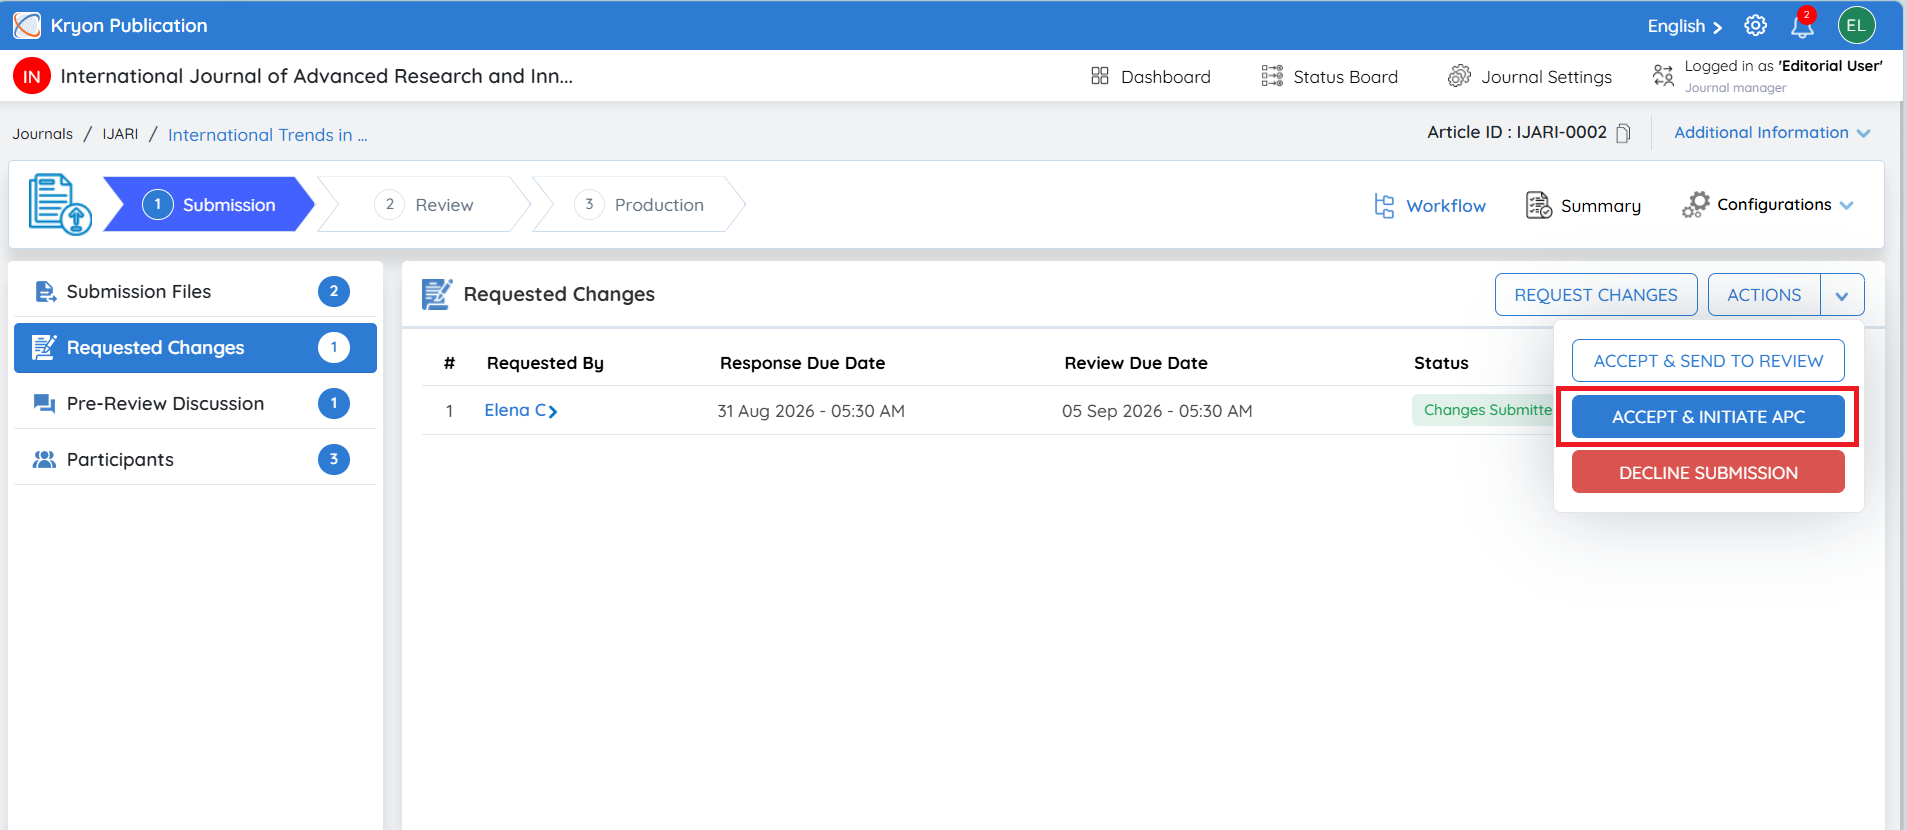
Accept & Initiate APC
If the editorial user wants to accept the manuscript and initiate the Article Processing Charge (APC) during the Submission Stage, click Accept & Initiate APC.
This option allows the editorial team to begin the APC process before moving the manuscript further in the editorial workflow.
The complete APC workflow, including APC initiation, author notification, payment-related actions, and subsequent workflow steps, will be explained in detail in the Review Stage section.
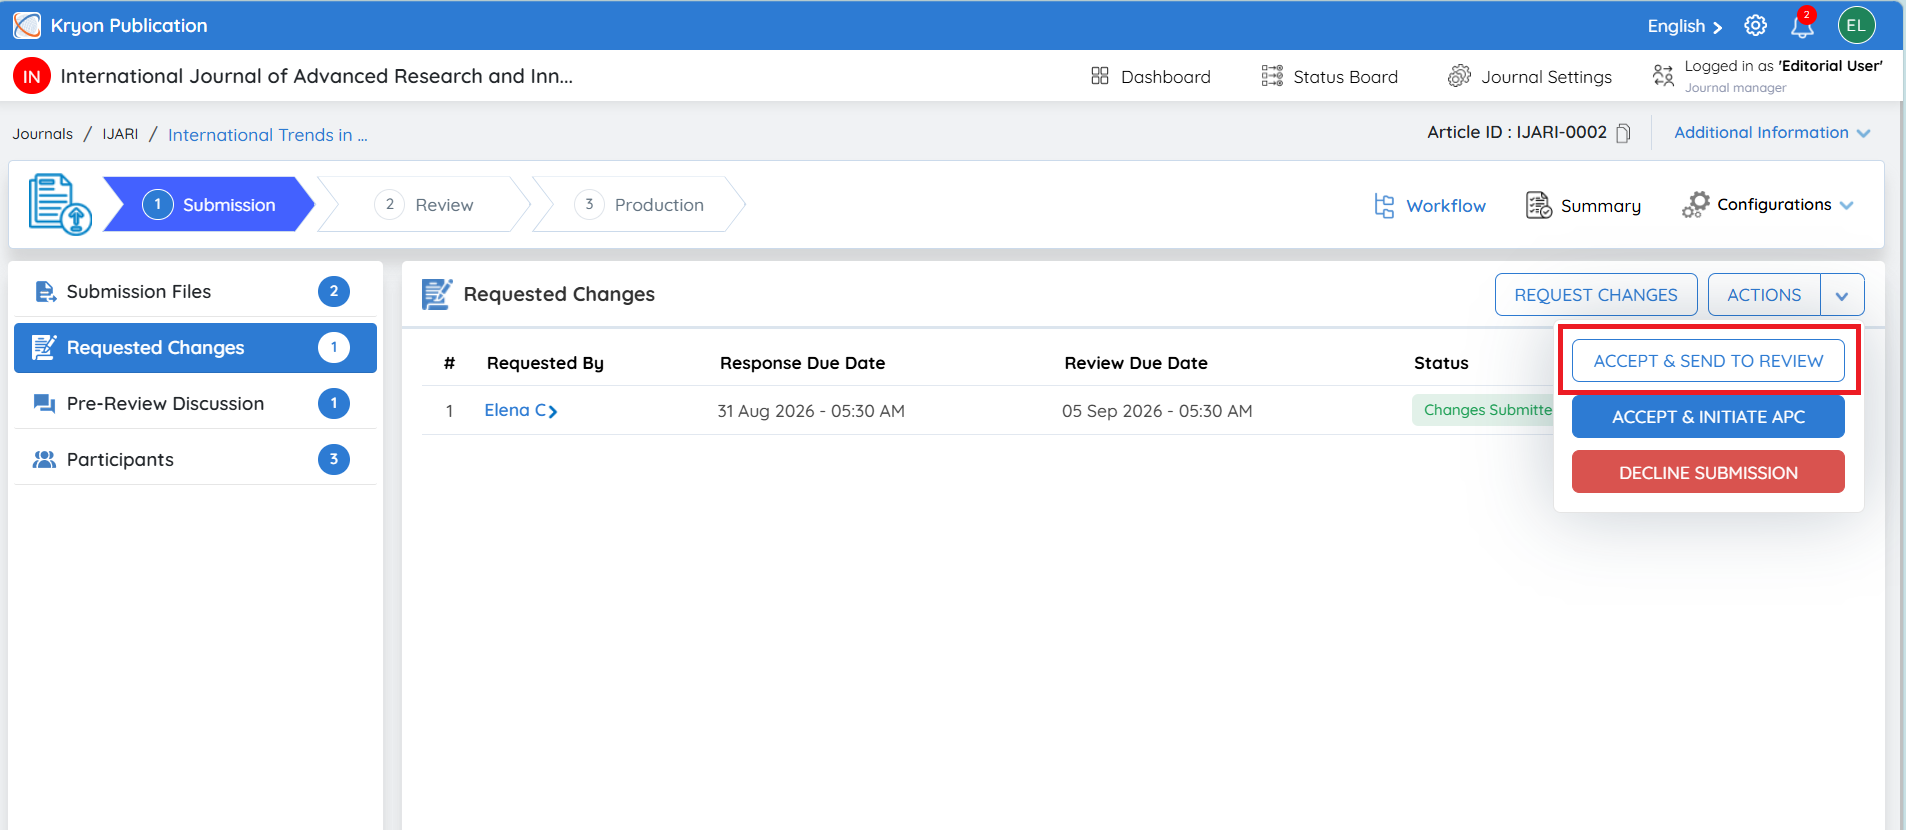
Accept & Send to Review
If the manuscript has successfully completed the initial editorial screening and is ready for peer review, the editorial user can move it to the Review Stage.
Click Accept & Send to Review.
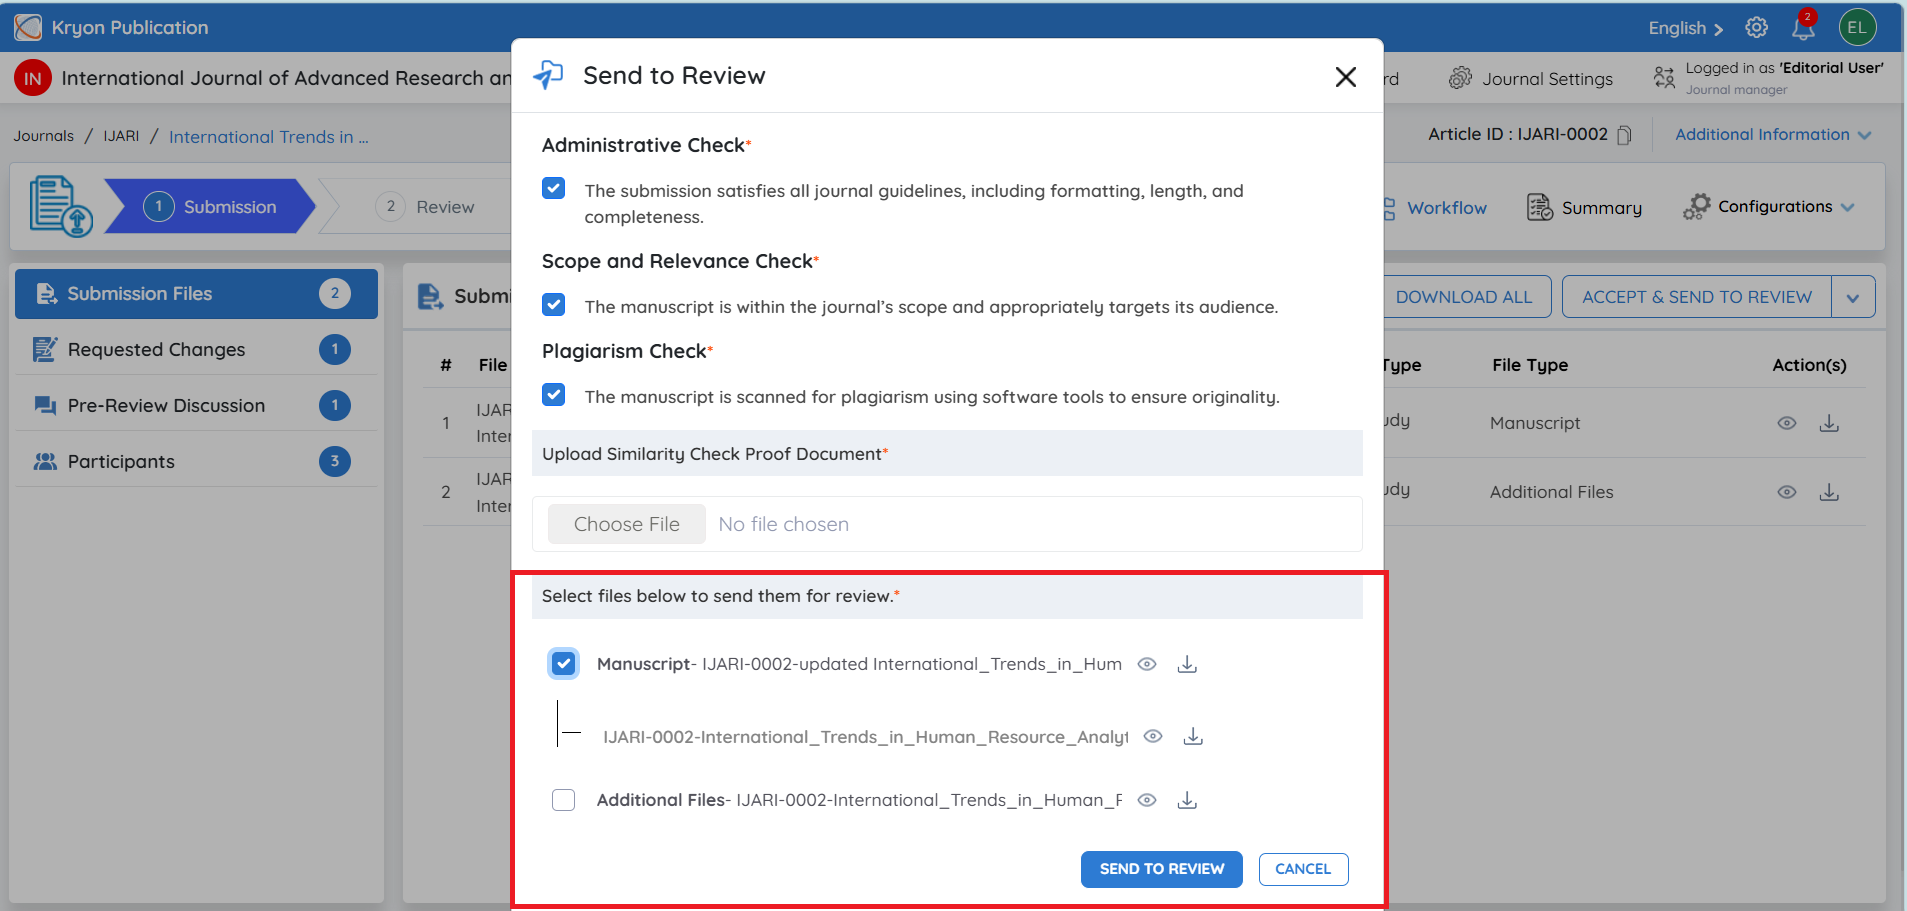
The Send to Review window will open. Before proceeding, the editorial user must complete the required pre-review checks.
Administrative Check
Confirm that the submission satisfies the journal’s administrative and submission requirements, including formatting, length, required information, files, and overall completeness.
Scope and Relevance Check
Confirm that the manuscript falls within the journal’s aims and scope and is relevant to its intended subject area and readership.
Plagiarism Check
Confirm that the manuscript has undergone the required similarity/plagiarism screening in accordance with the journal’s editorial policy.
Upload Similarity Check Proof Document
Upload the supporting similarity or plagiarism check report as evidence that the screening has been completed.
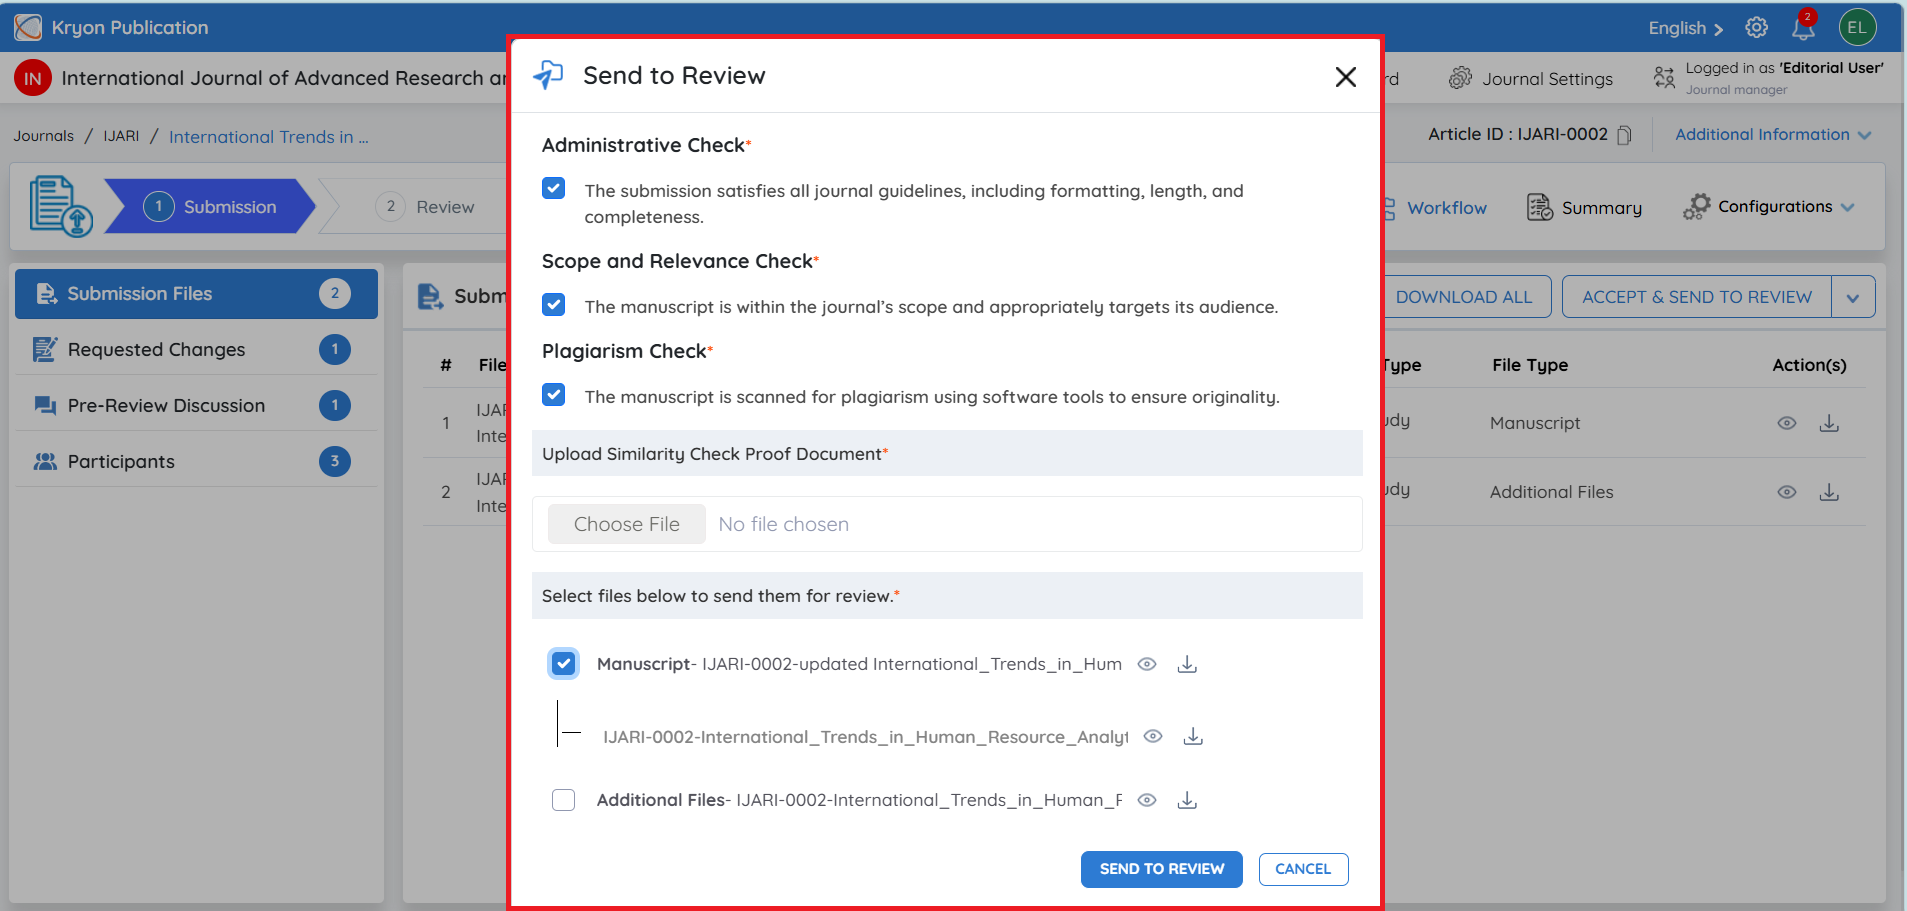
Select Files for Peer Review
The system displays the available submission files.
Select the appropriate files that should be made available during the peer-review process. For example, the editorial user may select the latest Manuscript and any other supporting files required for reviewer evaluation.
After completing all mandatory checks and selecting the required files, click Send to Review.
The manuscript will then move from the Submission Stage to the Review Stage, where the peer-review workflow can begin.