Import Reviewers
Overview
The Import Reviewers feature allows journal administrators to add multiple reviewers to the journal in a single operation using an Excel template. This is especially useful when onboarding a large reviewer database, eliminating the need to invite reviewers individually.
Importing Reviewers
To import reviewers:
-
Navigate to Journal Configuration.
-
Click User Roles and Settings.
-
Select the Reviewers tab.
-
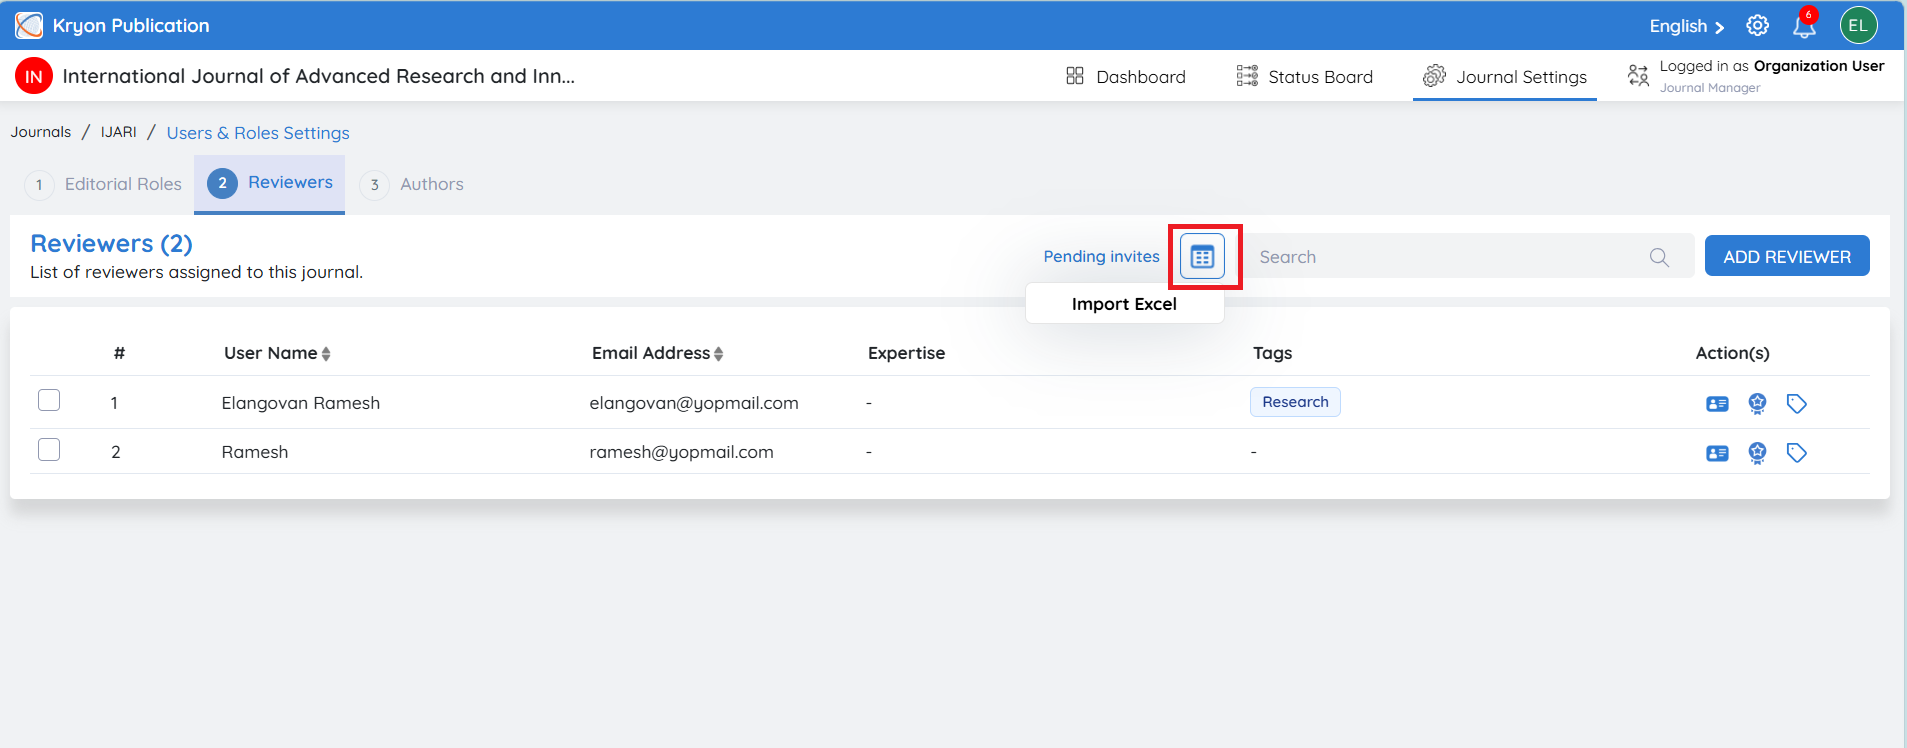
Click the Import Reviewers icon.
-
Click Import Excel.
Upload Reviewer List
-
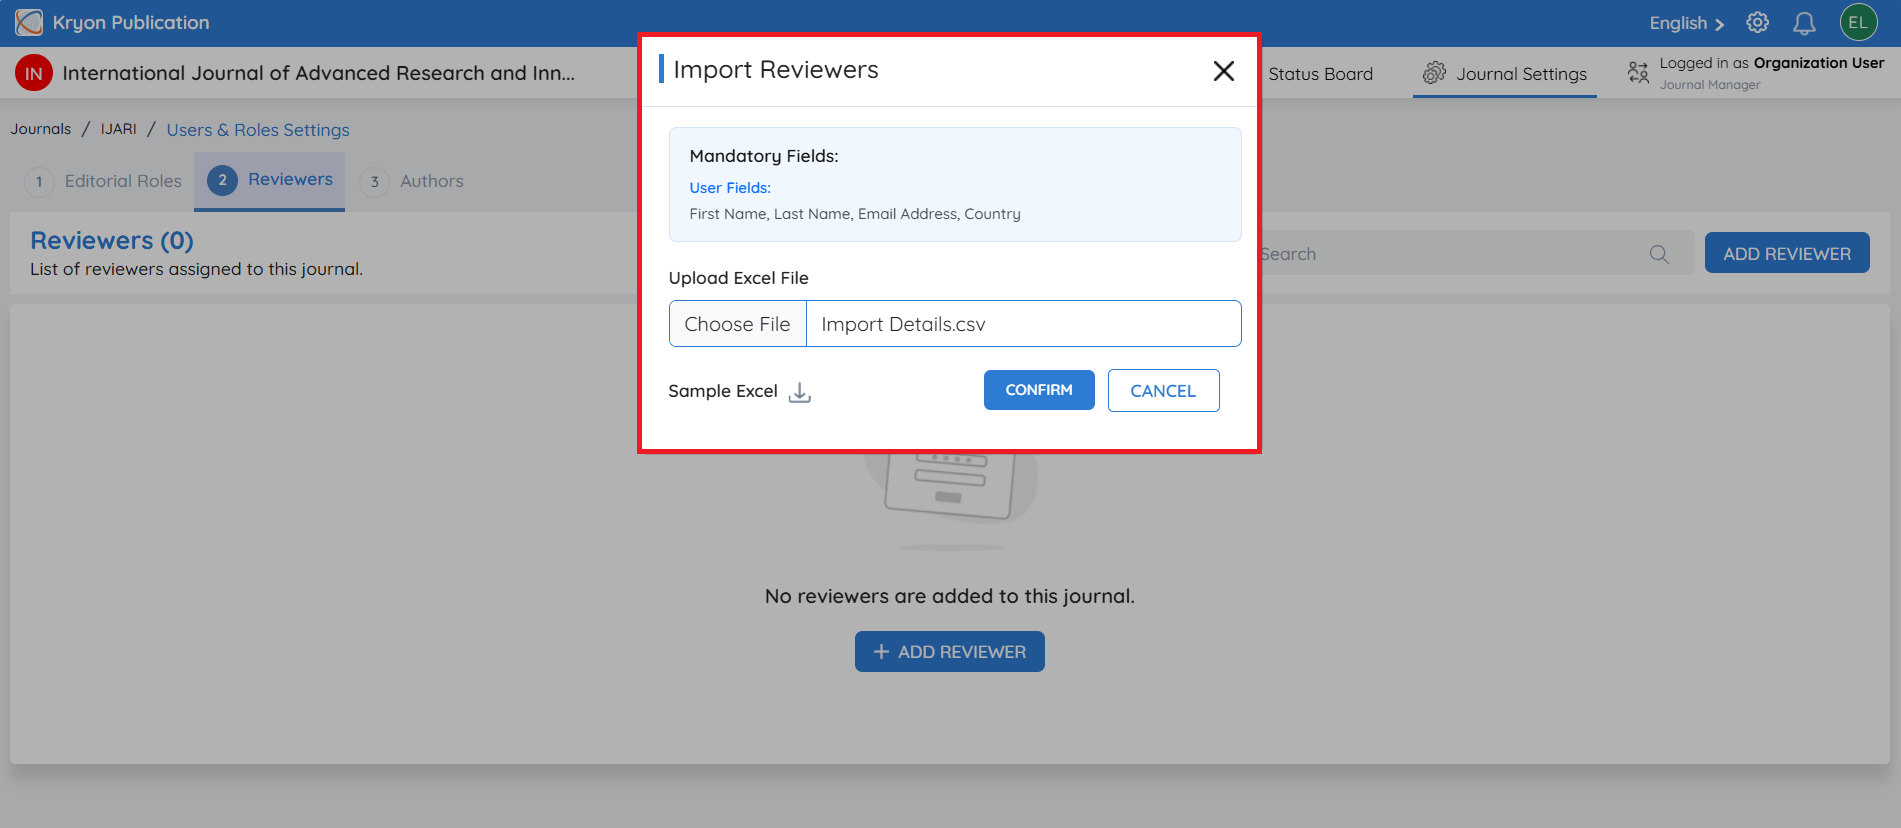
Download the Sample Excel Template.
-
Enter the reviewer details in the required format.
-
Save the completed Excel file.
-
Upload the file by clicking Upload Excel File.
-
Click Confirm
The system validates the uploaded file and imports the reviewer information into the journal.
Invitation Process
After the reviewers are successfully imported:
-
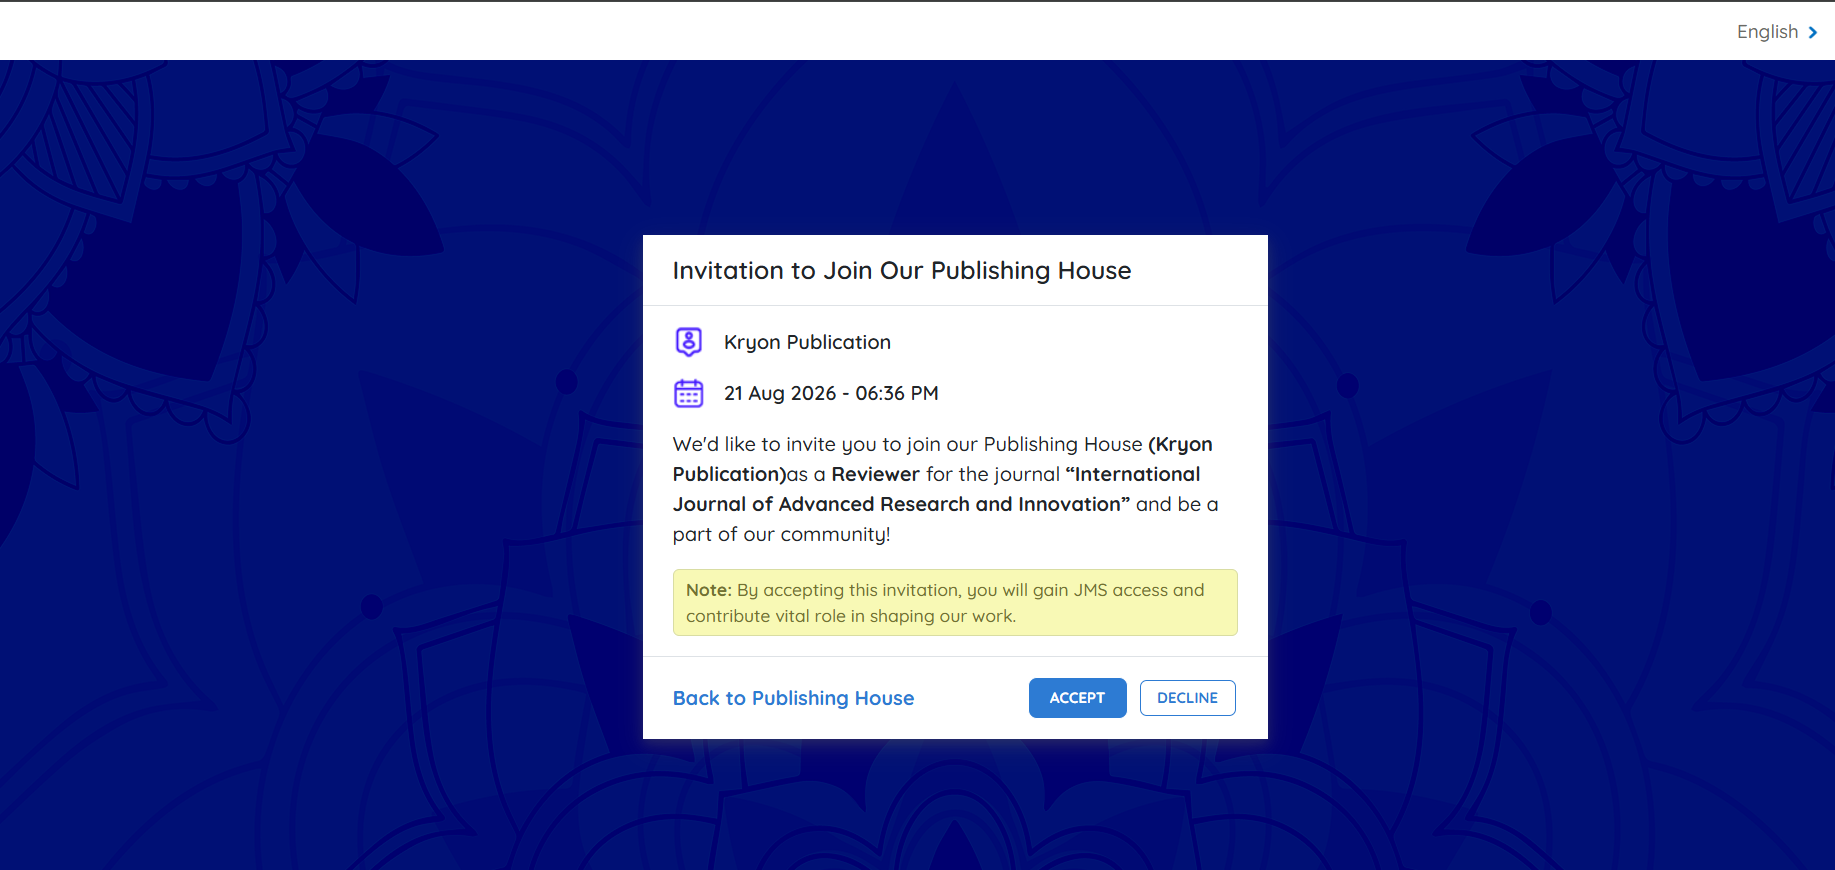
An invitation email is automatically sent to each reviewer.
-
Reviewers can Accept or Decline the invitation.
-
Once a reviewer accepts the invitation, they are added to the journal's reviewer database and become available for manuscript assignments.
Pending Invitations
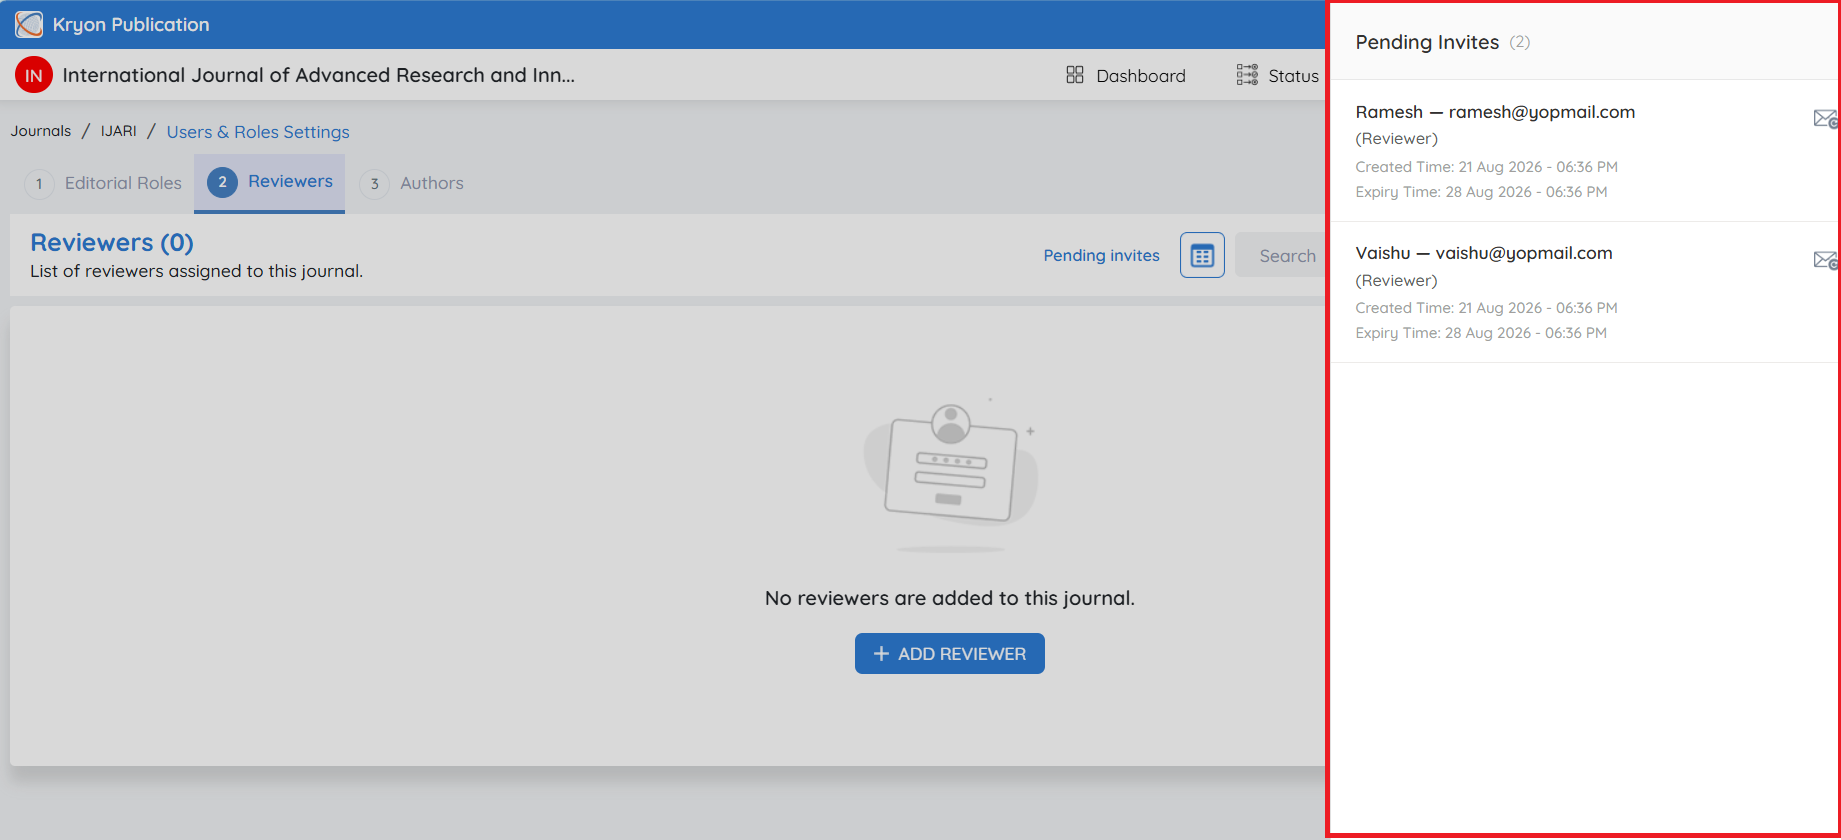
The Pending Invitations section displays all reviewer invitations that have been sent but have not yet been accepted.
Administrators can monitor the invitation status and take further actions if required.
To access pending invitations:
-
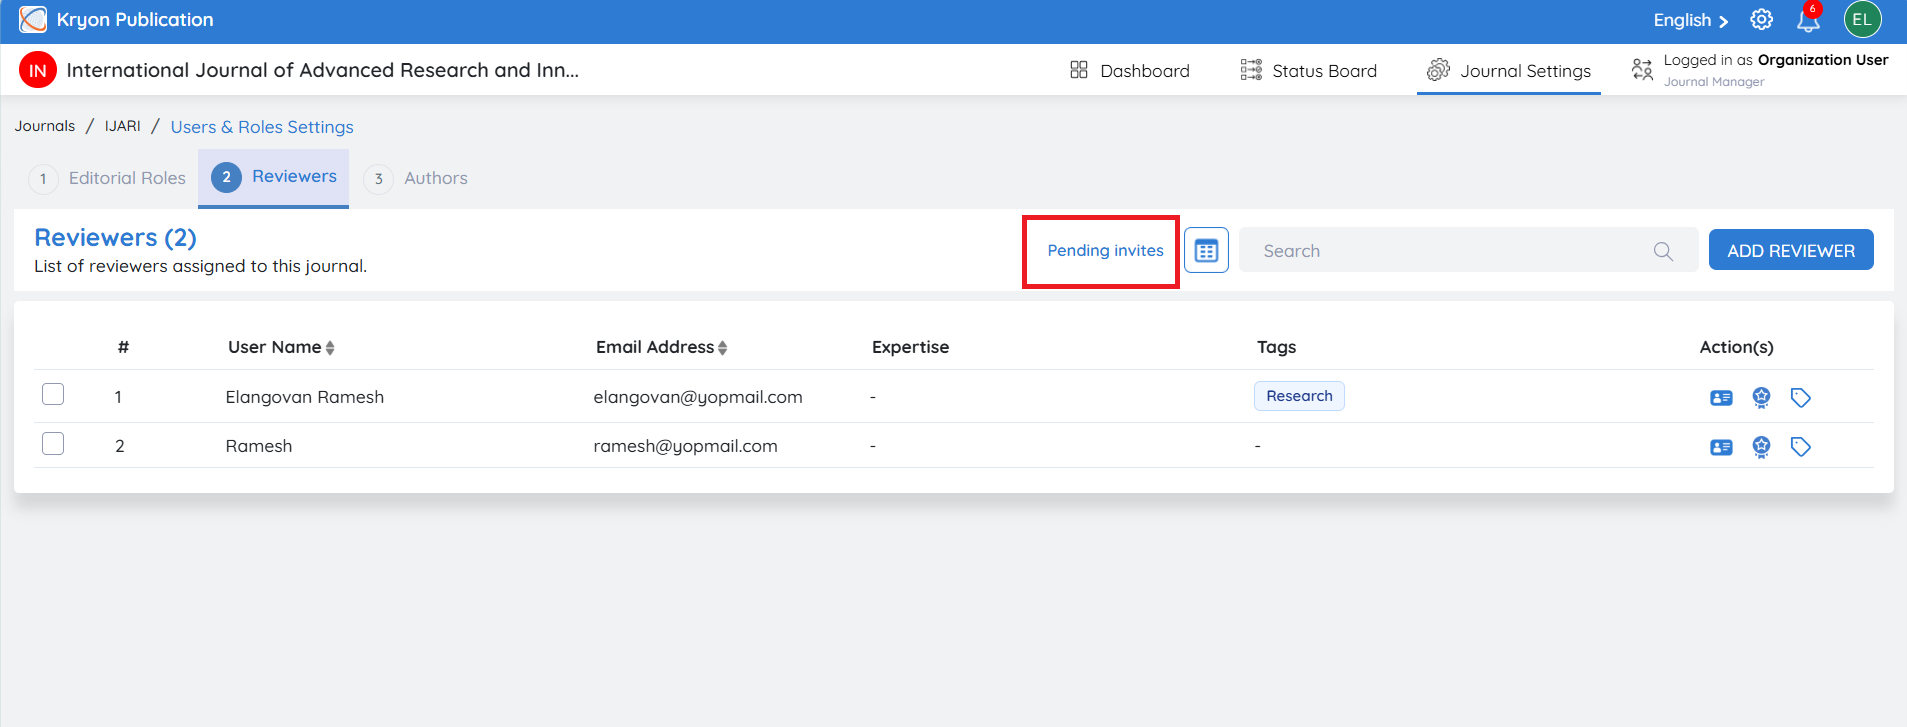
Navigate to Journal Configuration → User Roles and Settings → Reviewers.
-
Click Pending Invitations.
The list displays reviewers who have not yet responded to their invitation.
For each pending invitation, the following information is displayed:
- Reviewer's Name
• Email Address
• Role (Reviewer)
• Created Time – The date and time the invitation was sent.
• Expiry Time – The date and time the invitation will expire.
Available Actions
For each pending invitation, administrators can:
-
Resend Invitation – Click the Resend icon to send the invitation email again if the reviewer has not received or responded to the original invitation.
-
Delete Invitation – Click the Delete icon to cancel and remove the pending invitation.
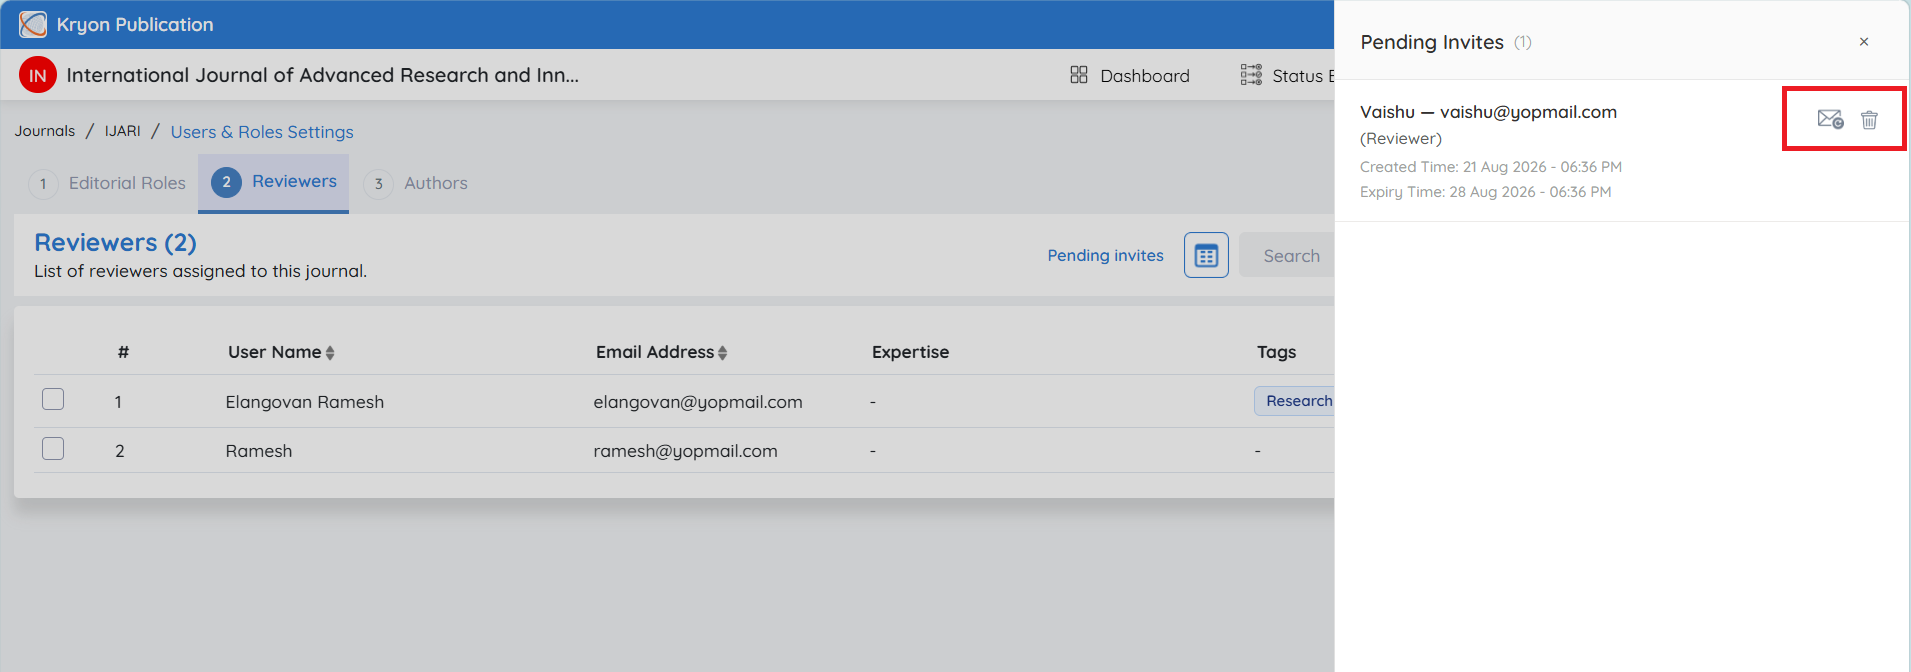
Once the reviewer accepts the invitation, they are automatically removed from the Pending Invitations list and added to the journal's active reviewer database.
Reviewers who have not accepted their invitation cannot log in to the journal or be assigned to manuscript reviews until their invitation is accepted.
Deactivating a Reviewer
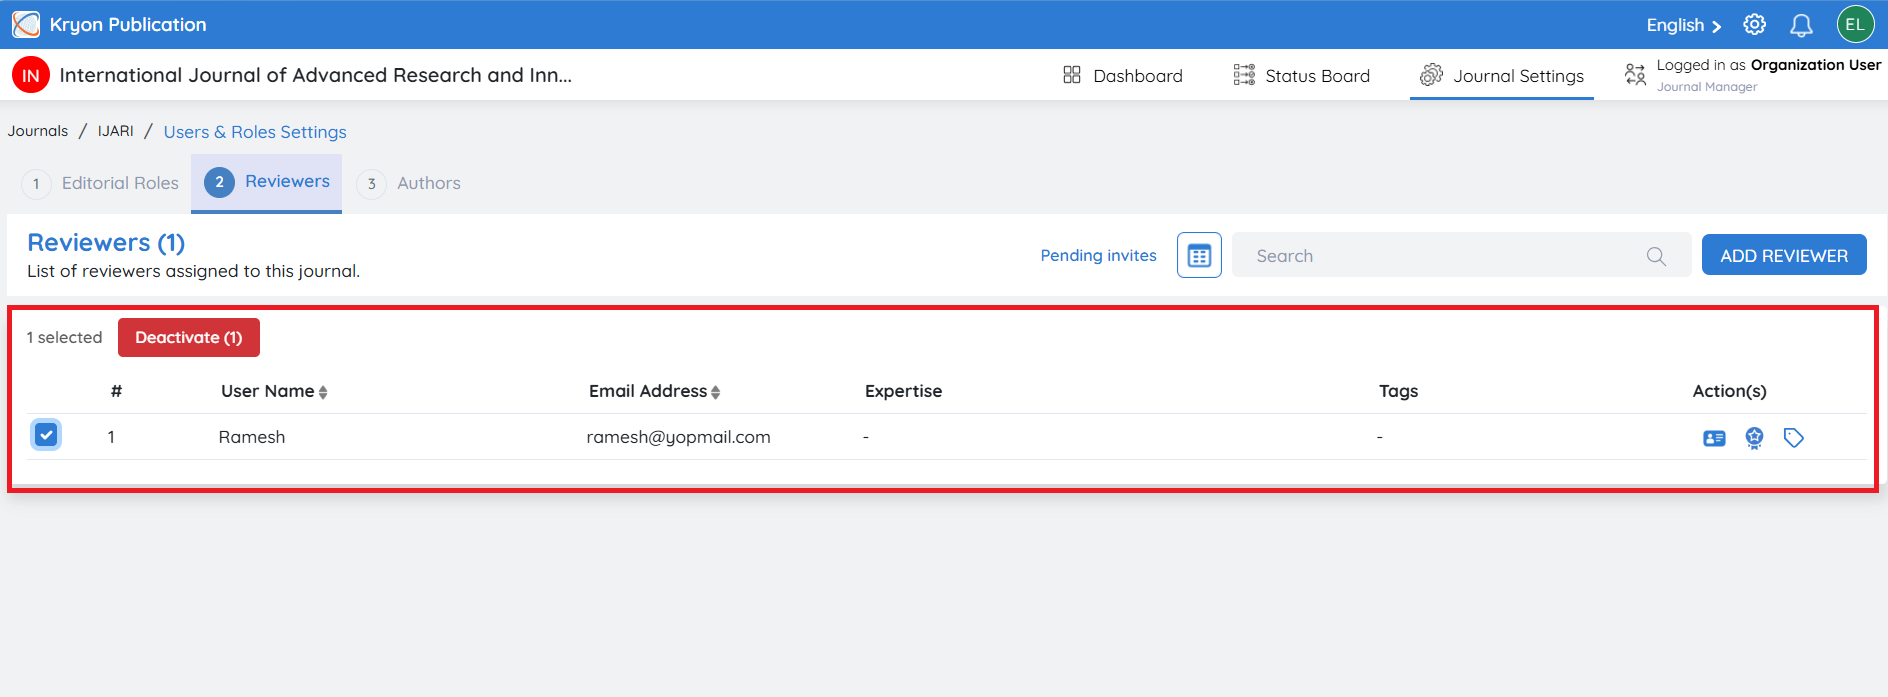
If a reviewer should no longer receive review assignments, you can deactivate their account for the journal.
To deactivate a reviewer:
-
Navigate to Journal Configuration → User Roles and Settings → Reviewers.
-
Select the reviewer.
-
Change the reviewer's User Status to Inactive.
The reviewer will no longer be available for new manuscript assignments until they are reactivated.
Deactivating a reviewer does not remove their review history or previous review records.
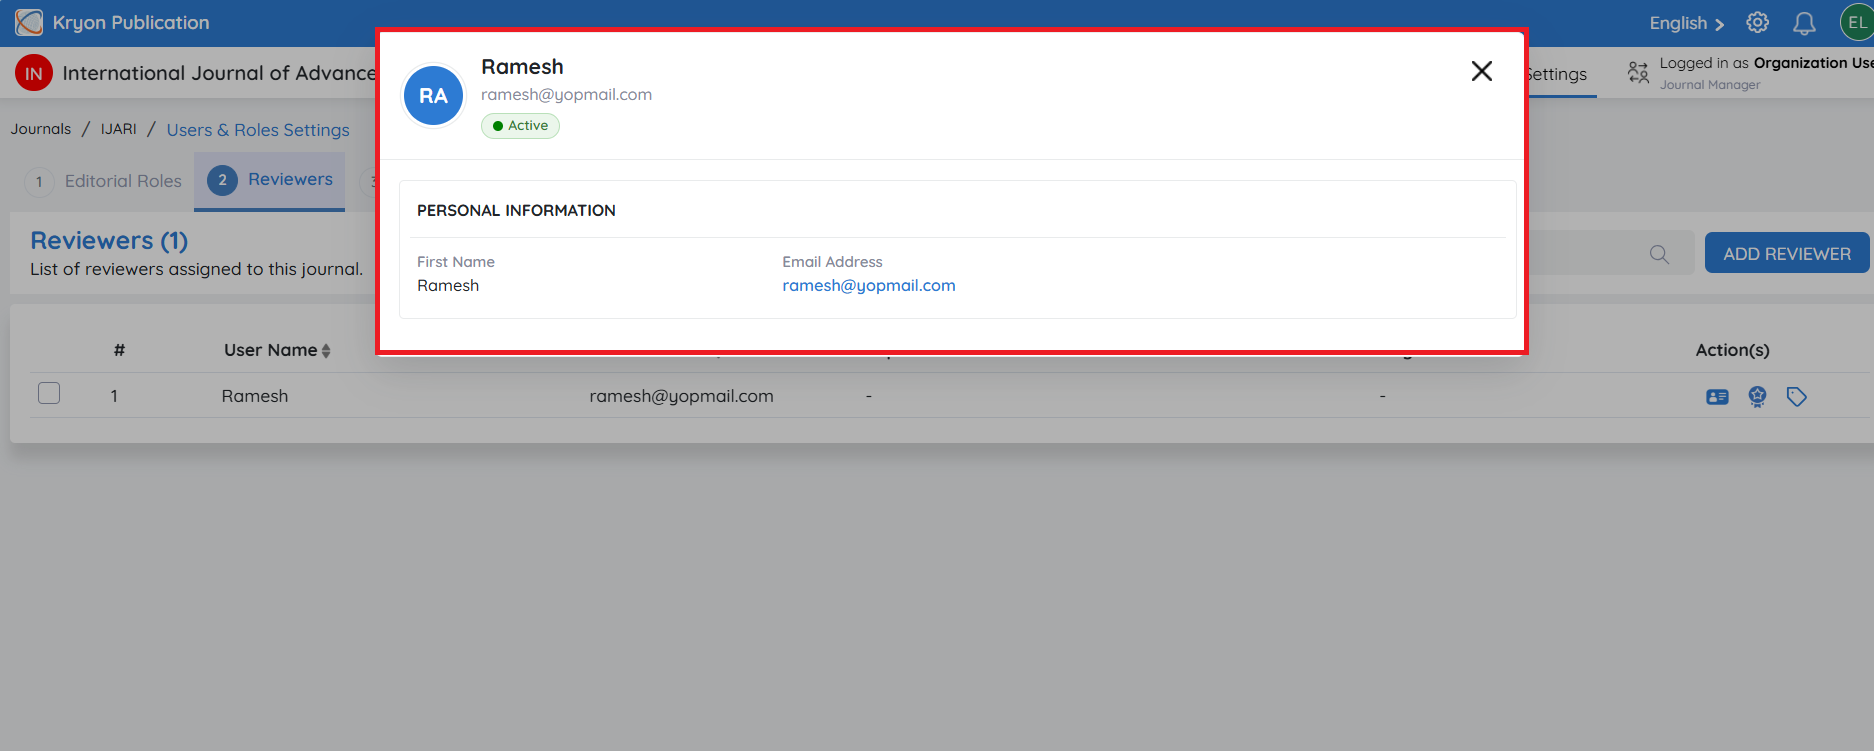
Viewing a Reviewer Profile
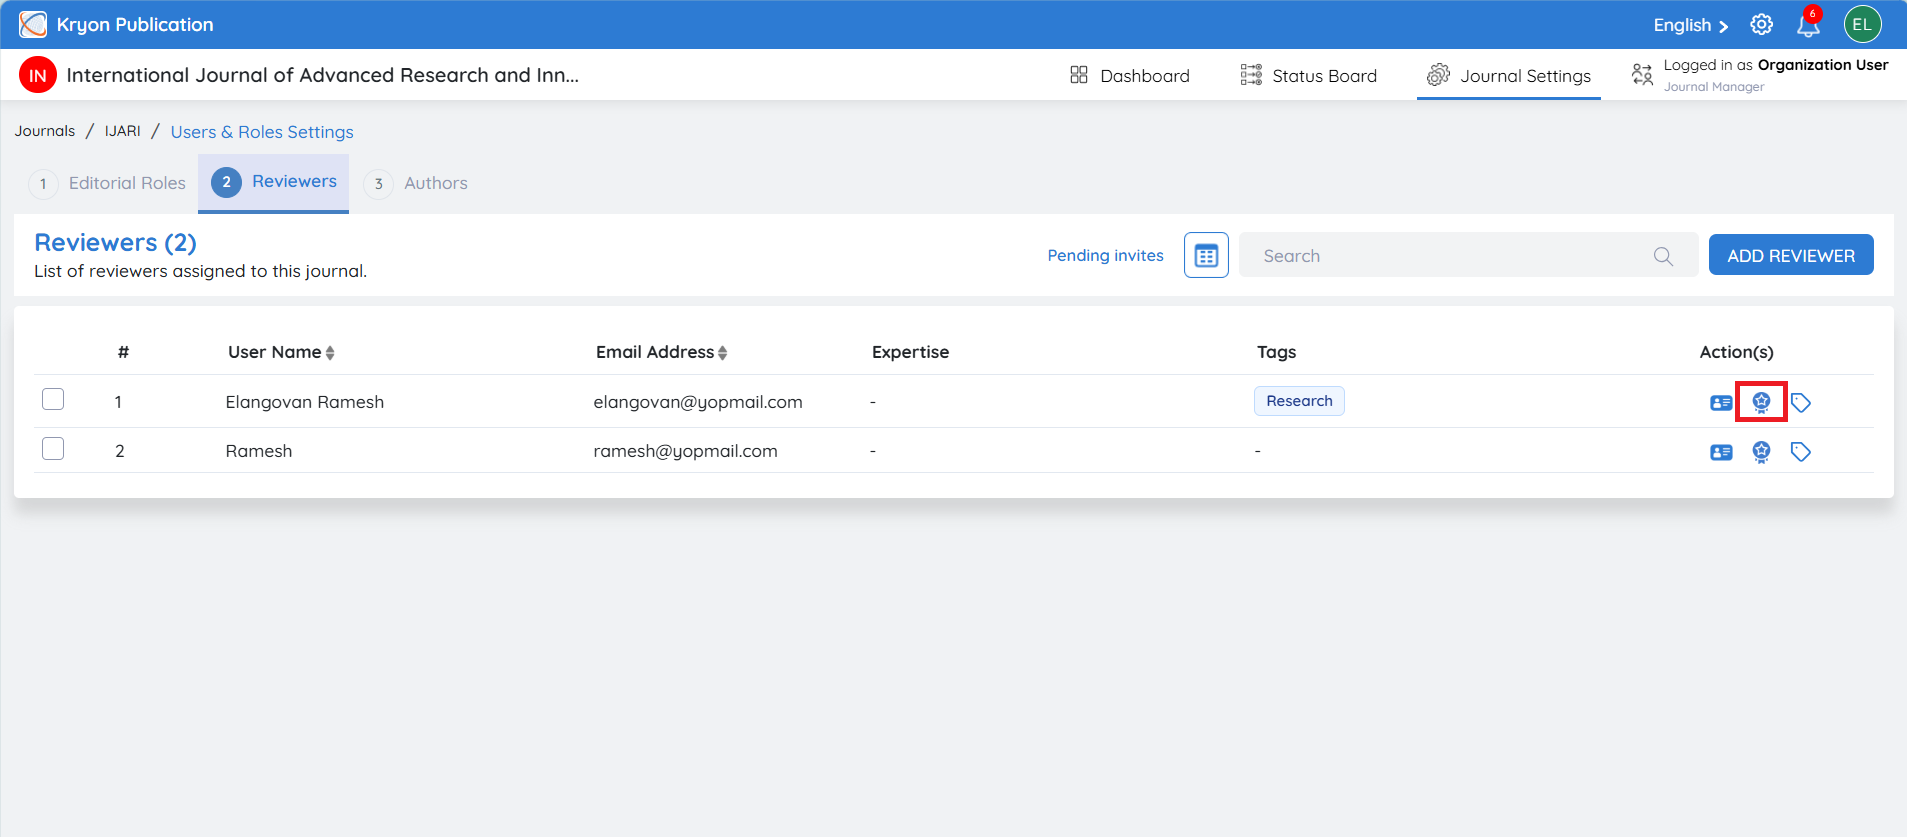
To view a reviewer's information:
-
Navigate to the Reviewers section.
-
Under the Actions column, click the View Profile icon
Adding Expertise
The Expertise feature allows administrators to update a reviewer's areas of specialization. Keeping reviewer expertise up to date helps editors quickly identify and assign the most suitable reviewers for manuscripts.
To add or update a reviewer's expertise:
-
Navigate to Journal Configuration → User Roles and Settings → Reviewers.
-
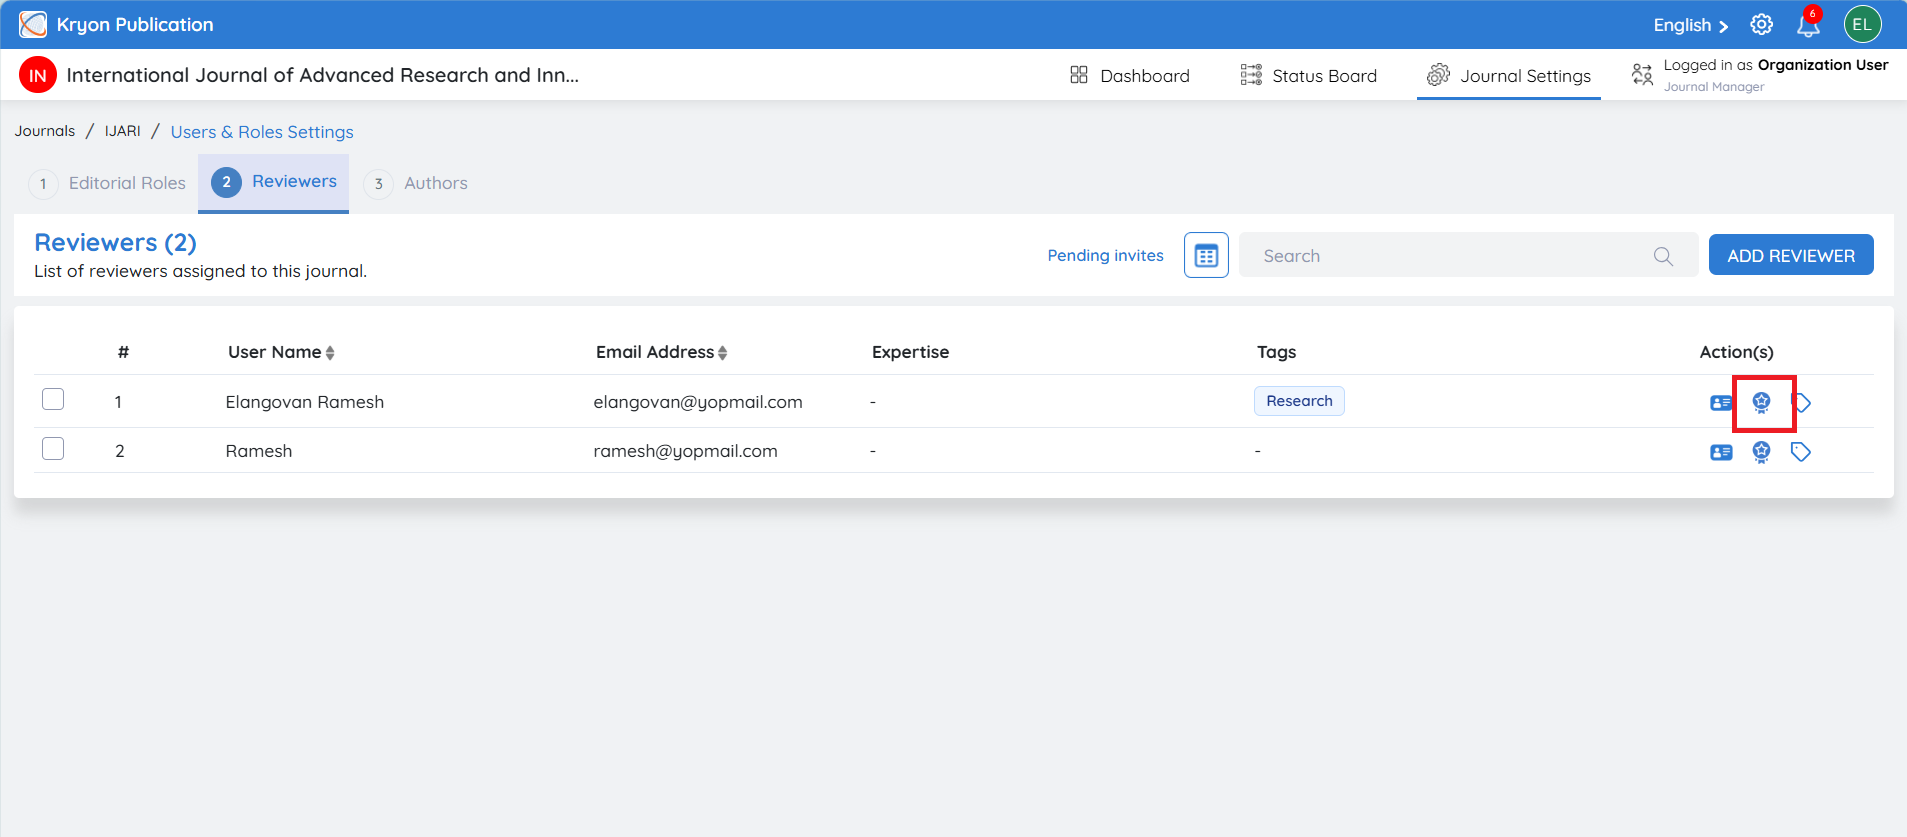
Locate the required reviewer.
-
Under the Actions column, click the Expertise icon.
-
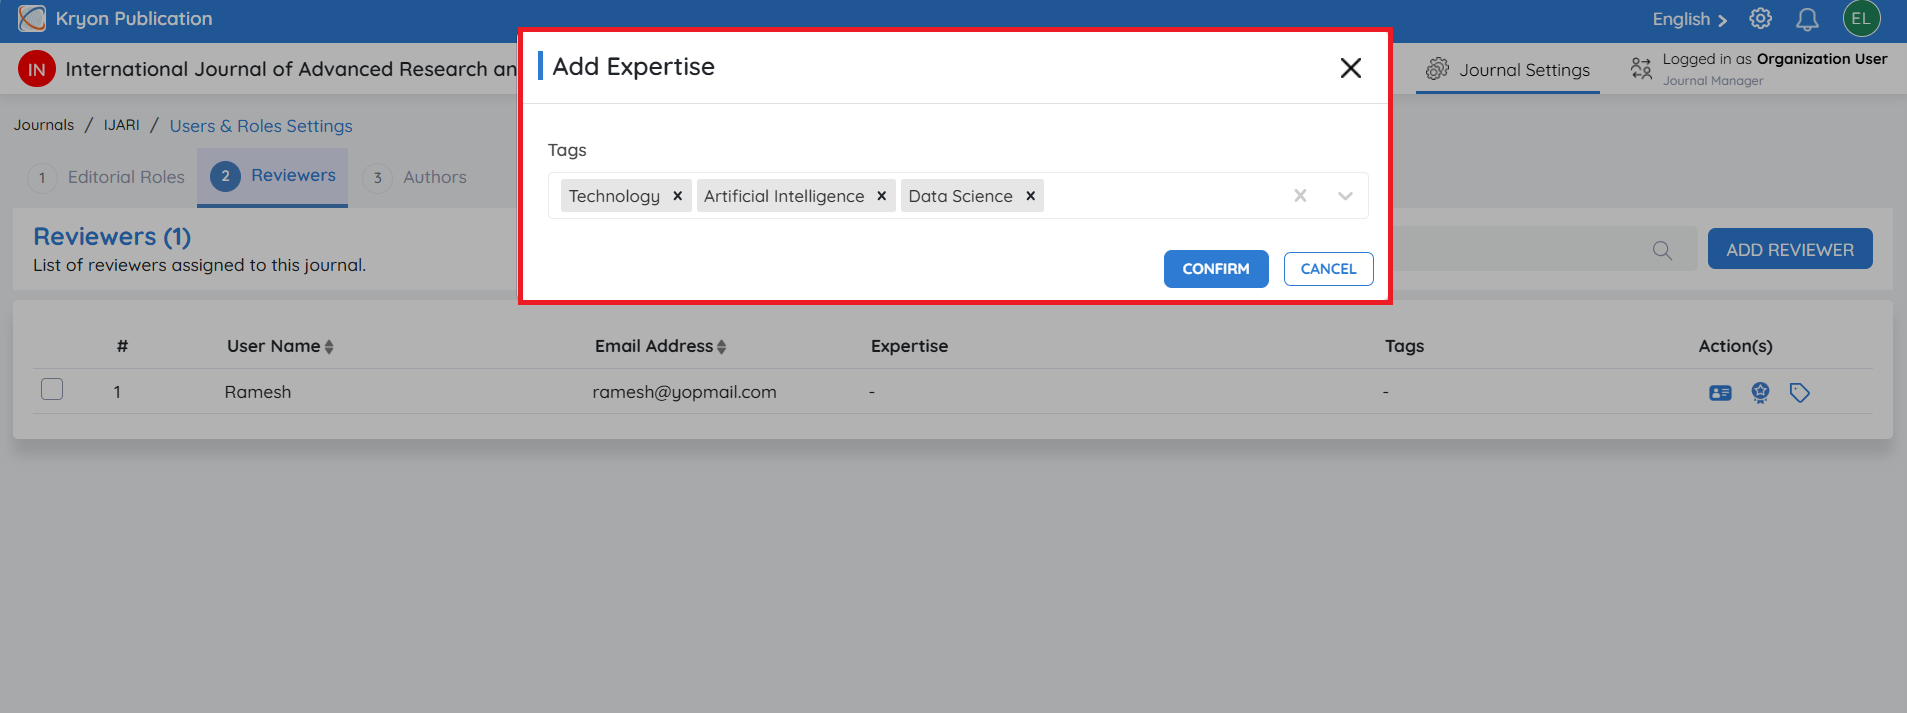
The Add Expertise dialog box opens.
-
In the Tags field, enter one or more areas of expertise.
You can add multiple expertise areas by entering each keyword and pressing Enter.
- Click Confirm to save the expertise.
The updated expertise tags are displayed in the reviewer's profile and are available during reviewer selection.
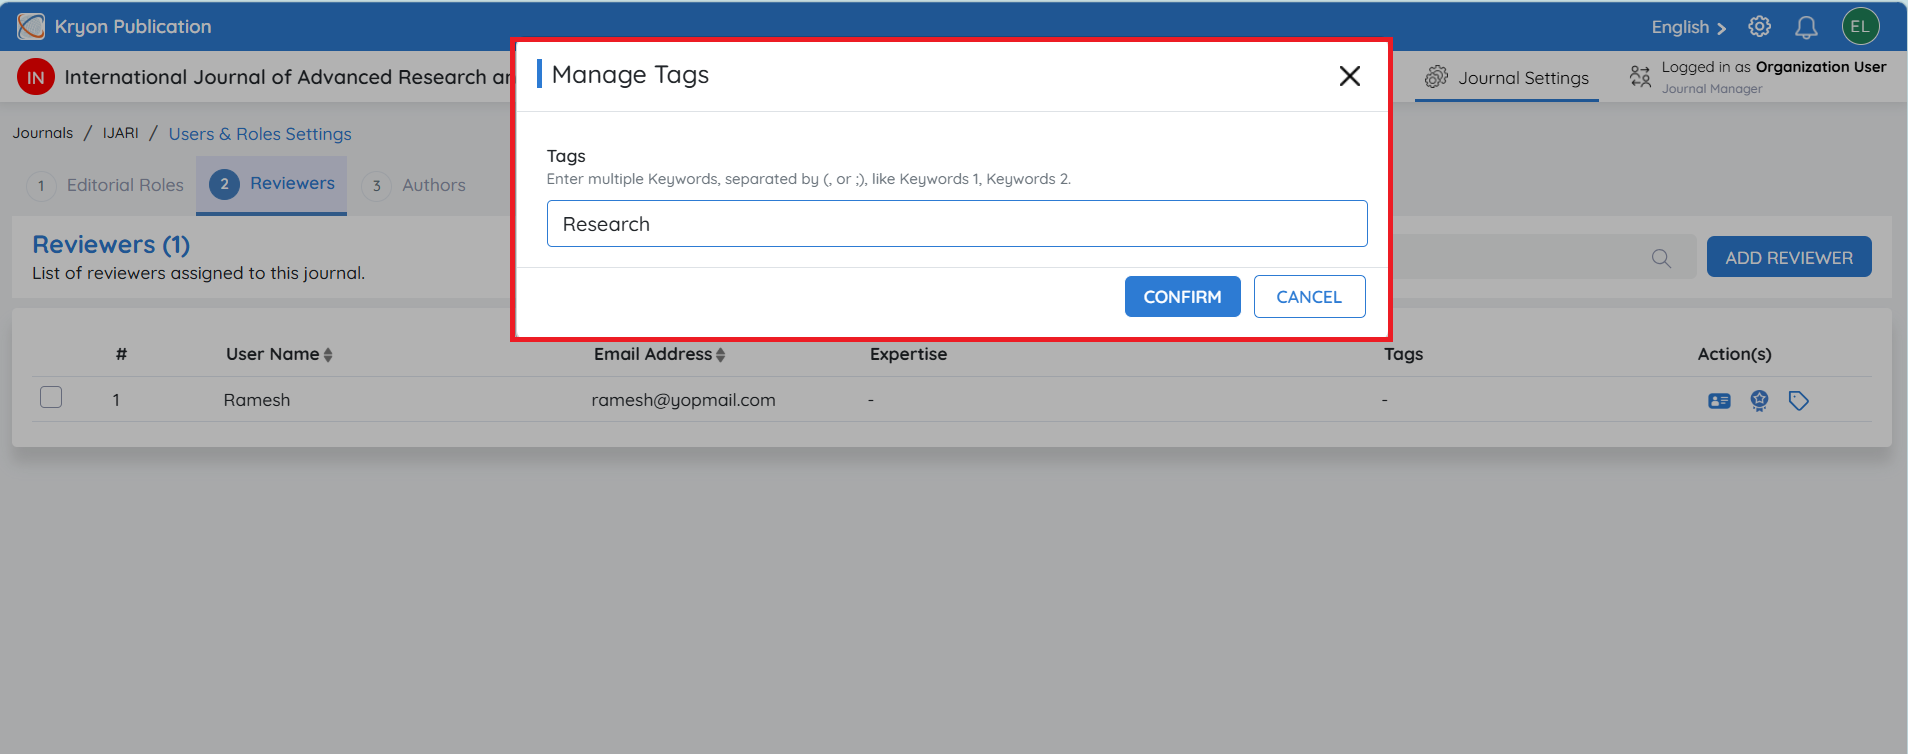
Adding Tags
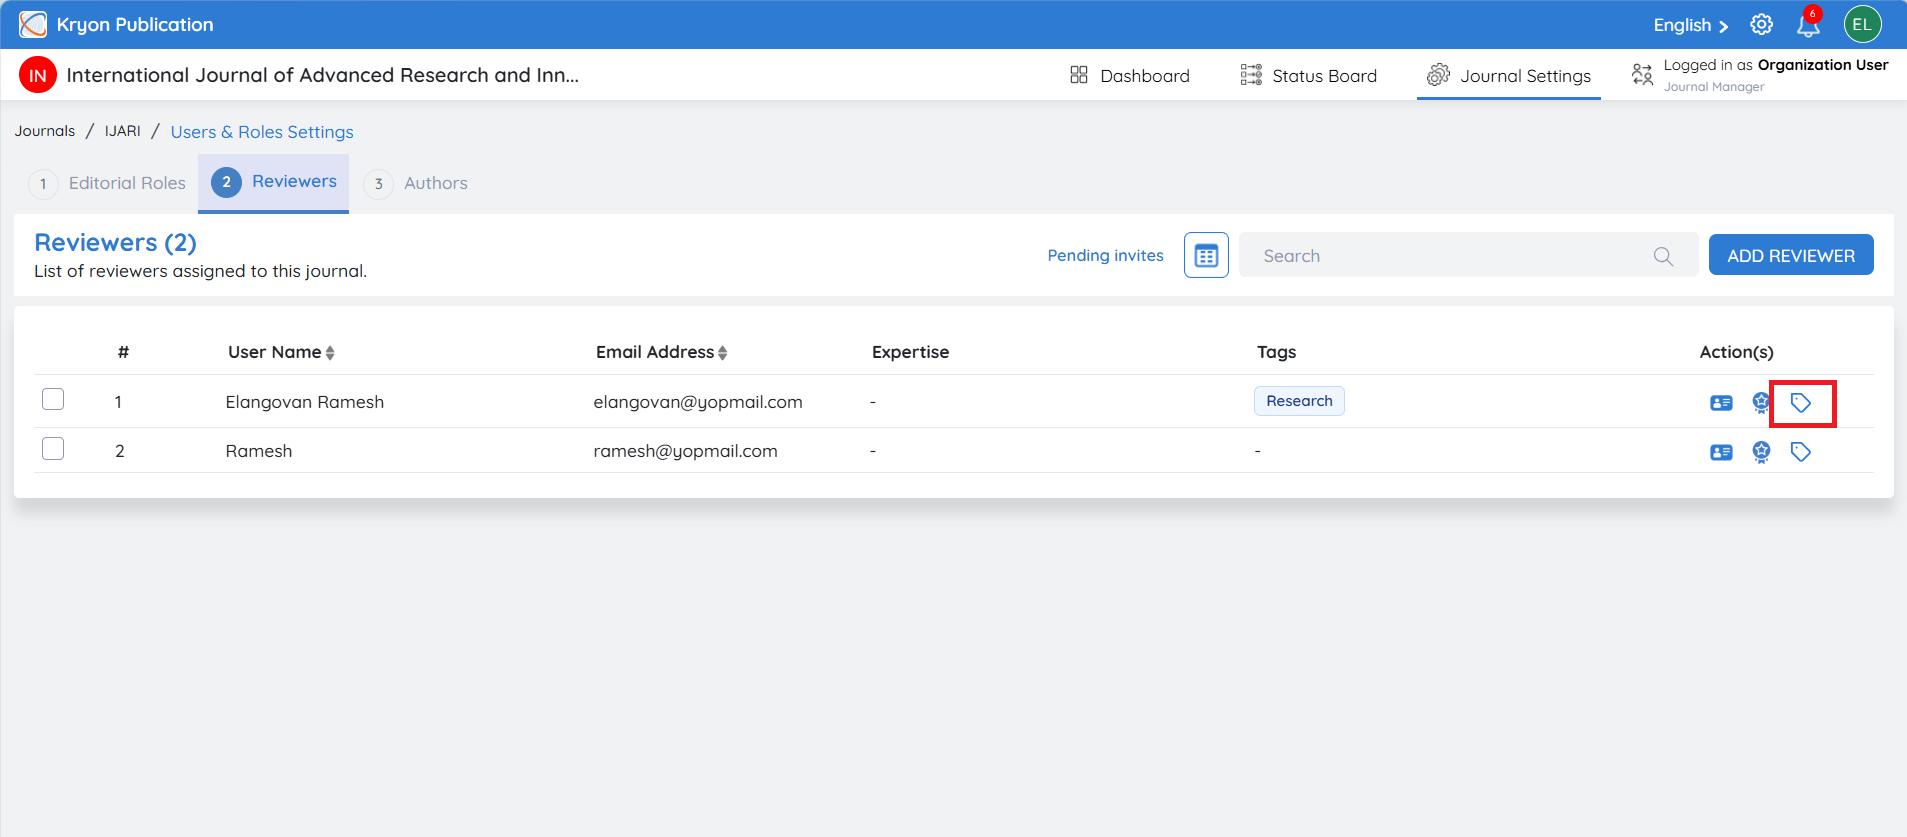
Tags help organize reviewers and make them easier to identify.
To add tags:
-
Under the Actions column, click the Tags icon.
-
Enter one or more tags.
-
Click confirm
Examples of tags:
-
AI
-
Cyber Security
-
Data Science
Reactivating an Inactive Reviewer
If a reviewer has been deactivated, they can be reactivated at any time.
To reactivate a reviewer:
-
Navigate to Journal Configuration → User Roles and Settings → Reviewers.
-
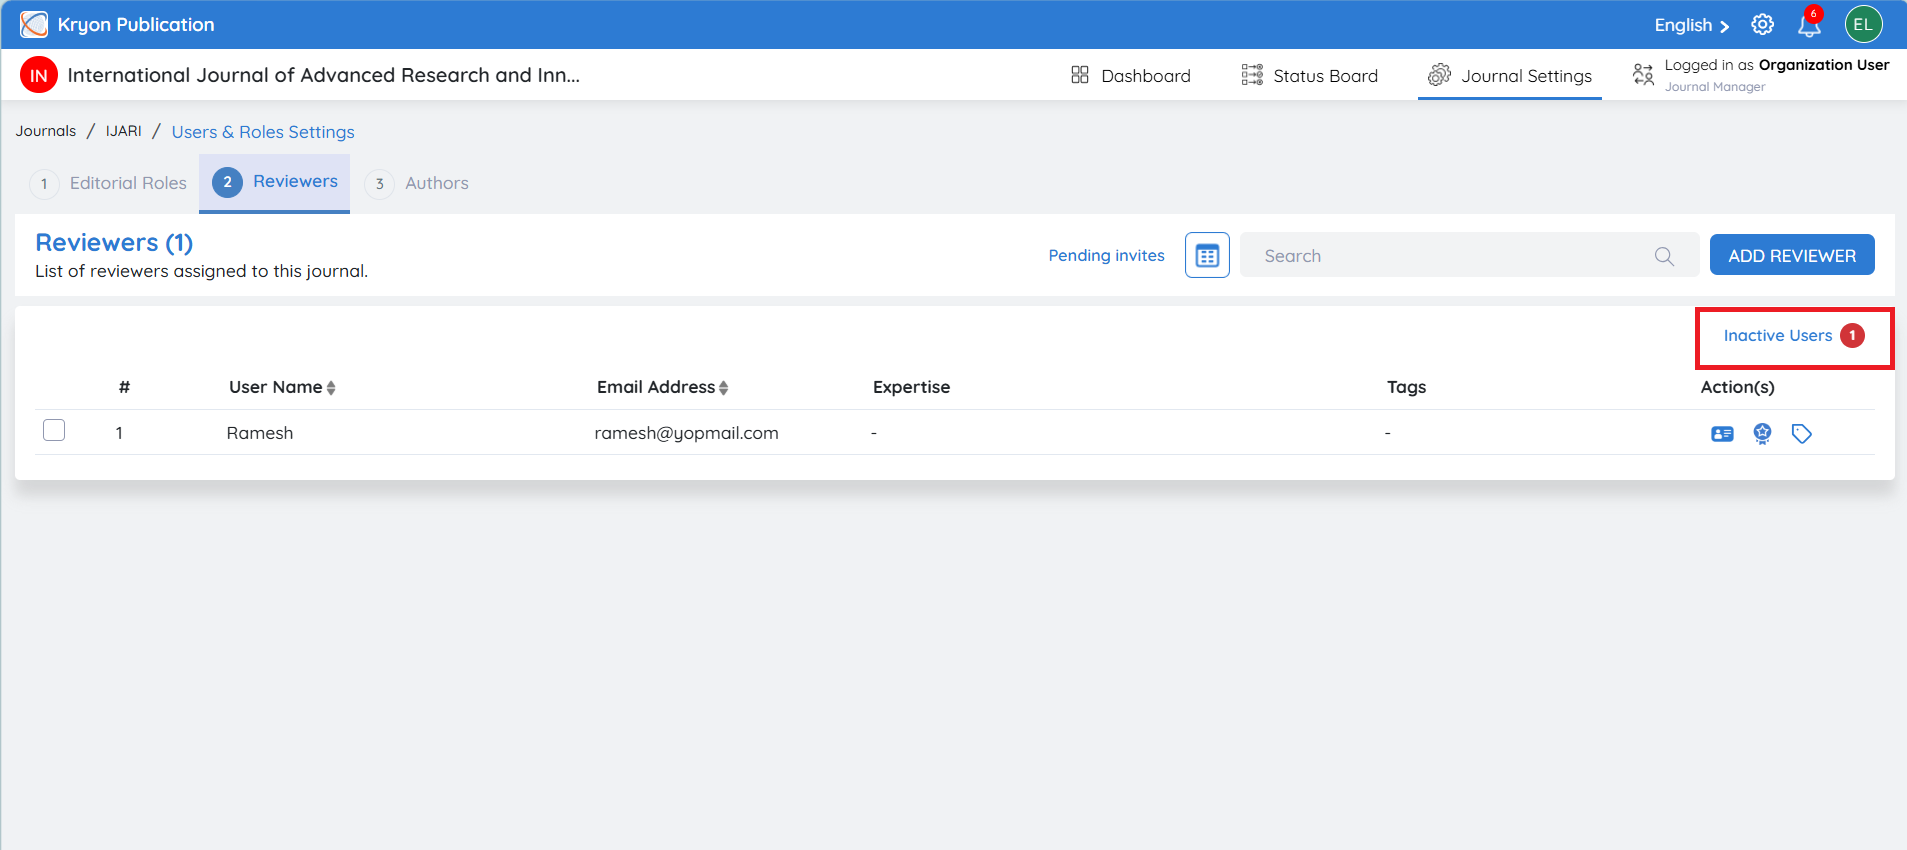
Click Inactive Users.
-
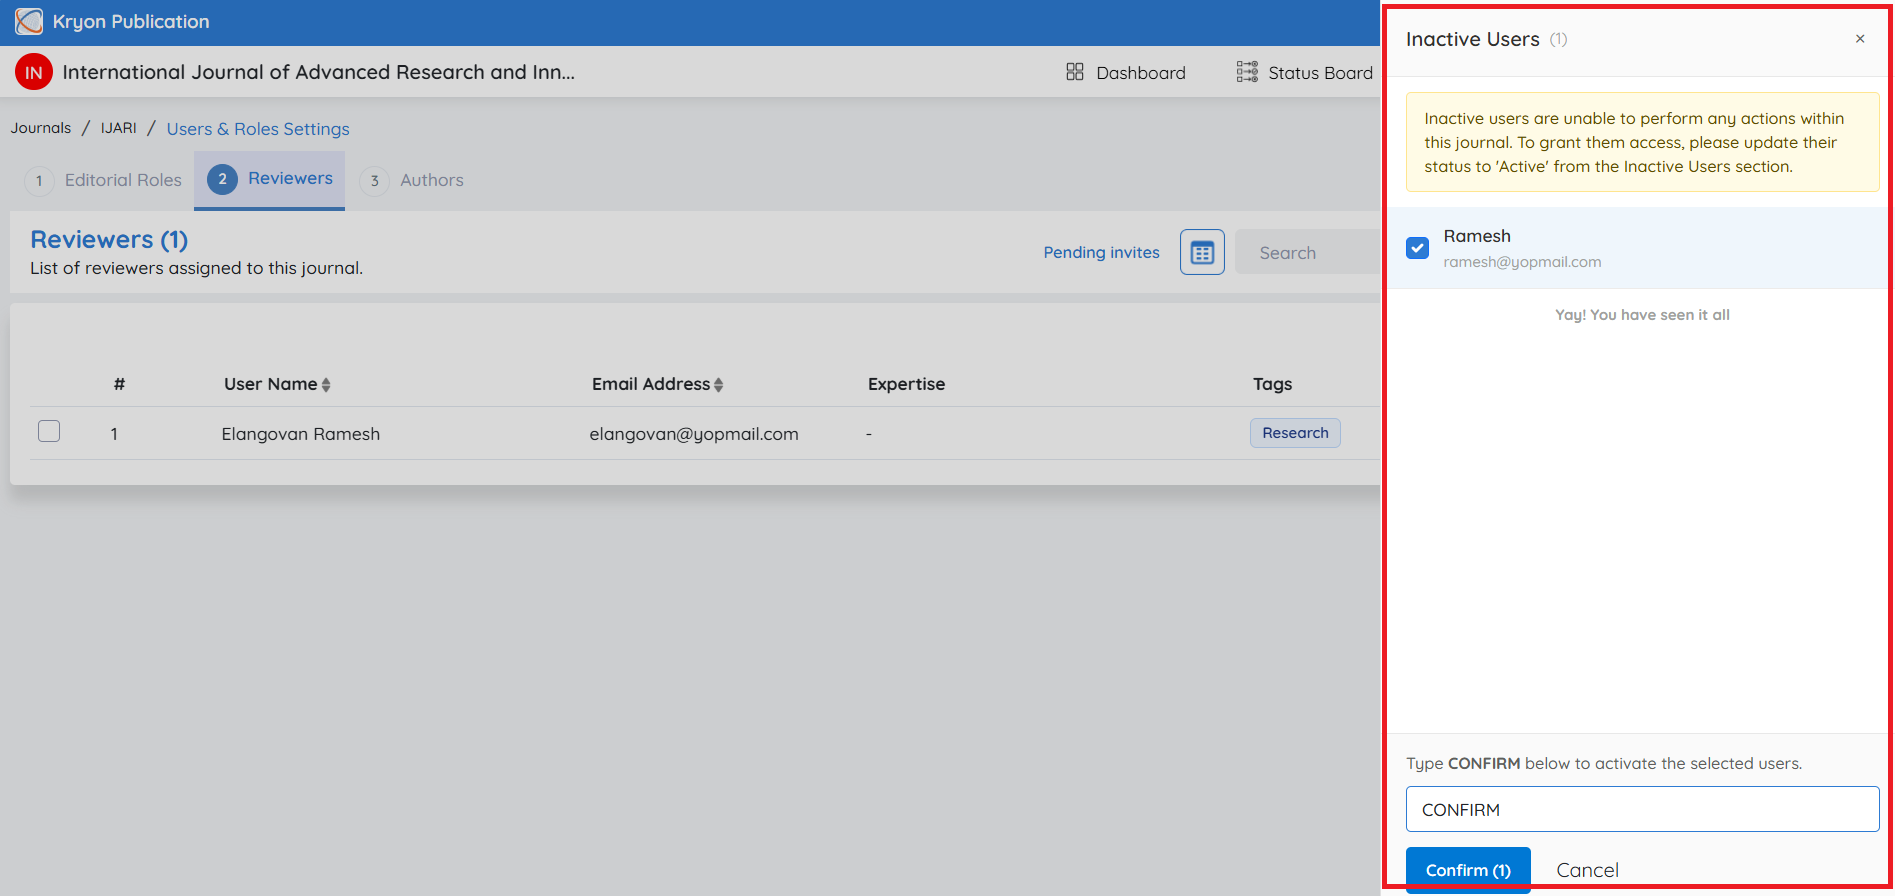
The list of inactive reviewers is displayed.
-
Select the reviewer(s) you want to reactivate.
-
Type CONFIRM in the confirmation box.
-
Click Confirm.
The selected reviewer is reactivated and becomes available for future manuscript assignments.
Inactive reviewers cannot be assigned to new manuscripts. Once reactivated, they regain access to the journal and become available for reviewer selection without requiring a new invitation.