Adminstrator View / Editorial Workflow
Editorial Workflow – Managing New Submissions
Once an author submits a manuscript, it enters the editorial workflow, where it is managed by the journal’s editorial team, including administrators and users with Manage Journal permissions. This stage is crucial in ensuring that submitted manuscripts go through a structured and transparent evaluation process before being considered for publication.
Upon submission, an automated email notification is sent to the administrator or editor with Manage Journal permissions. This notification serves as an alert to initiate the next steps in the review and editorial process.
The editorial workflow is designed to maintain the integrity and quality of academic publishing by systematically handling submissions, assigning reviewers, monitoring progress, and facilitating editorial decisions. Administrators and editors play a key role in managing these tasks efficiently using the Journal Management System (JMS).
This section will guide you through the next steps after manuscript submission, including:
- Manuscript Access & Initial Screening
- Reviewer Assignment & Peer Review Process
- Editorial Decision & Revision Handling
- Final Approval & Production Workflow
By understanding this workflow, administrators and editors can effectively oversee manuscript submissions, ensuring a seamless transition from submission to publication. Let’s explore each step in detail.
The Journal Management System (JMS) is designed to streamline the editorial workflow by providing a structured approach to managing new manuscript submissions. Once an author submits a manuscript, the system automatically notifies the administrator or editor with journal management permissions via email. This notification ensures that the editorial team can take prompt action on new submissions.
This section of the user manual provides step-by-step guidance on handling new manuscript submissions, from accessing the system to conducting an AI-assisted evaluation.
Steps to Manage a New Submission
This section guides editorial users through the process of managing new manuscript submissions, including viewing, archiving, and unarchiving submissions within the Kryoni Journal Management System (JMS).
1. Logging In
To begin, log in to the Kryoni JMS platform using your assigned editorial credentials.
Navigate to the Dashboard and select the journal you wish to manage.
2. Accessing the Journal
Click on the desired journal from your list. You will be directed to the Submissions page, which lists all manuscripts currently managed under that journal.
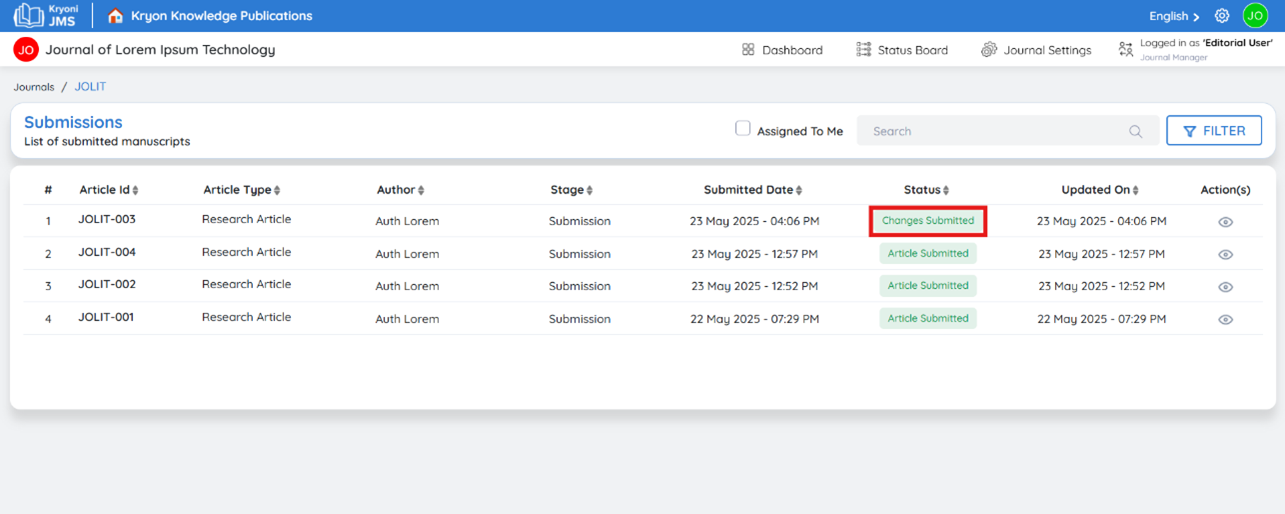
3. View the Submission List
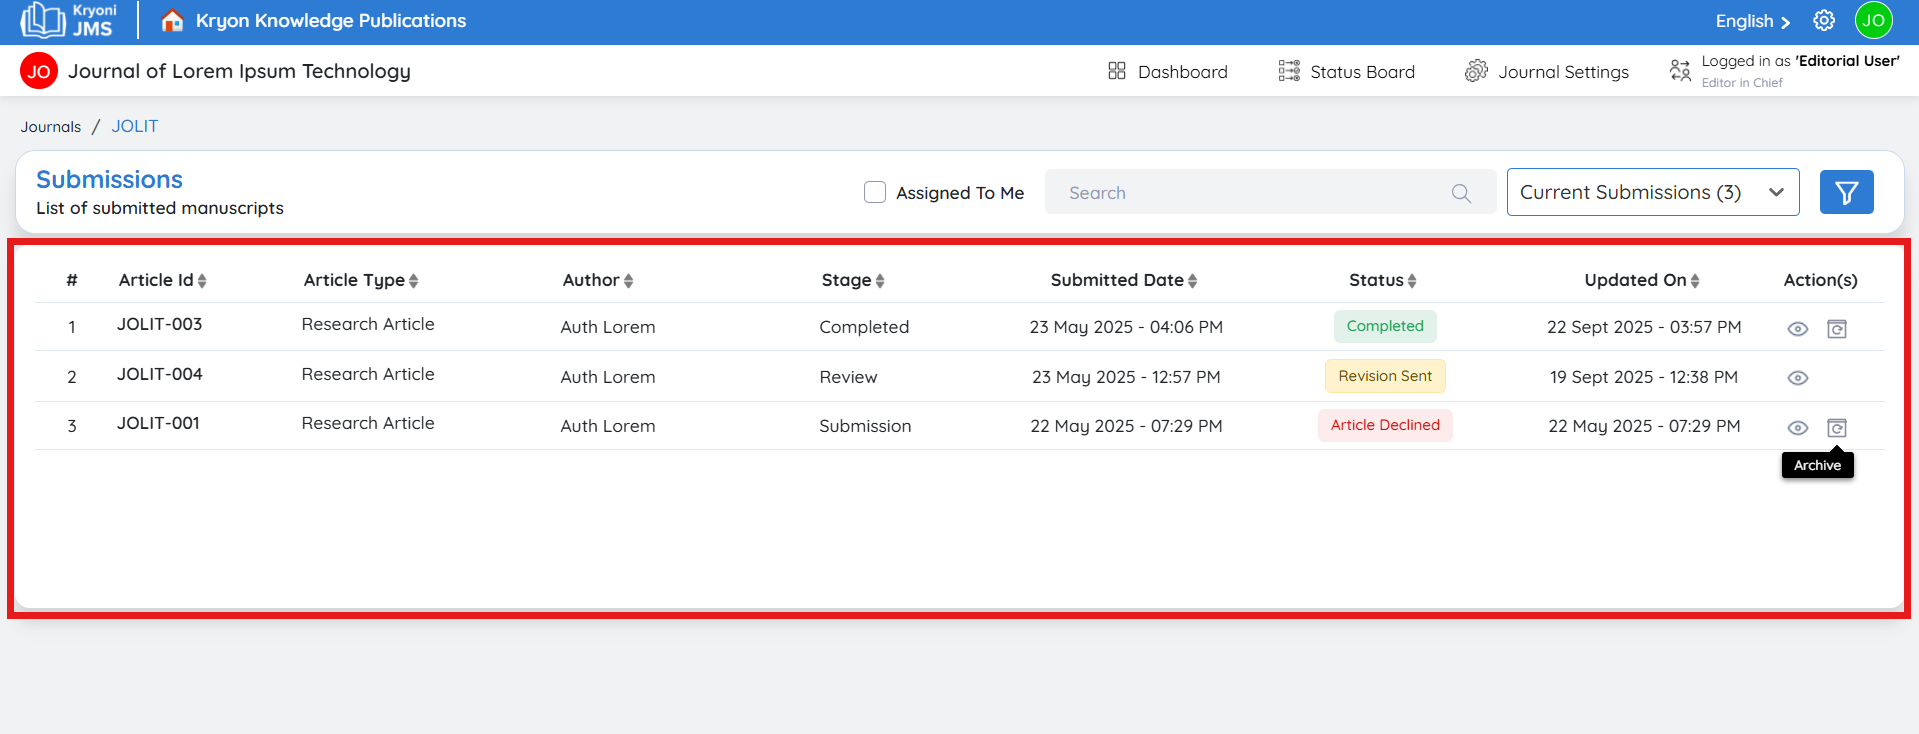
The Submissions List displays all manuscripts along with key metadata for tracking progress through the editorial workflow.
| Field | Description |
|---|---|
| Article ID | A unique identifier assigned to the manuscript. |
| Article Type | The category of submission (e.g., research article, review, case study). |
| Author | The name of the submitting author. |
| Stage | The current status of the manuscript in the editorial workflow. |
| Submitted Date | The date the manuscript was submitted. |
| Status | Displays whether the manuscript is submitted, under review, pending, or requires action. |
| Updated On | The last modification date of the submission. |
| Actions | Provides icons for available actions — such as viewing, archiving, or unarchiving the manuscript. |
To view a submission, click the eye icon under the Actions column. This opens detailed submission information, including manuscript files, metadata, and workflow history.
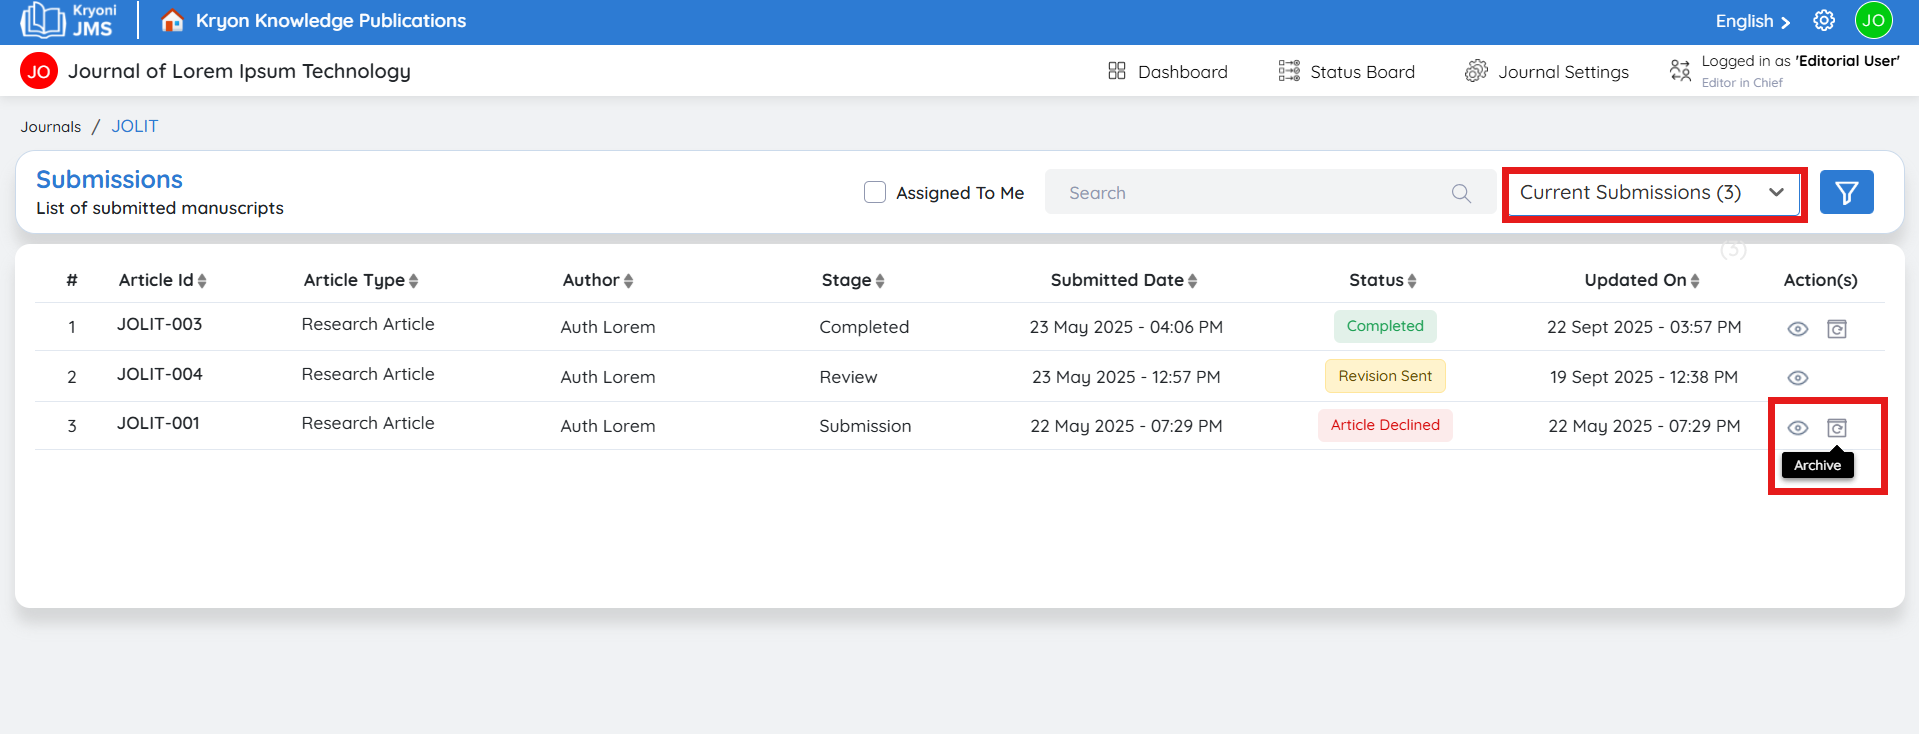
4. Archiving Submissions
Archiving helps maintain an organized workspace by moving inactive or completed submissions out of the main list.
To archive a submission:
-
Click the Archive icon from the Actions column.
-
A confirmation popup will appear:
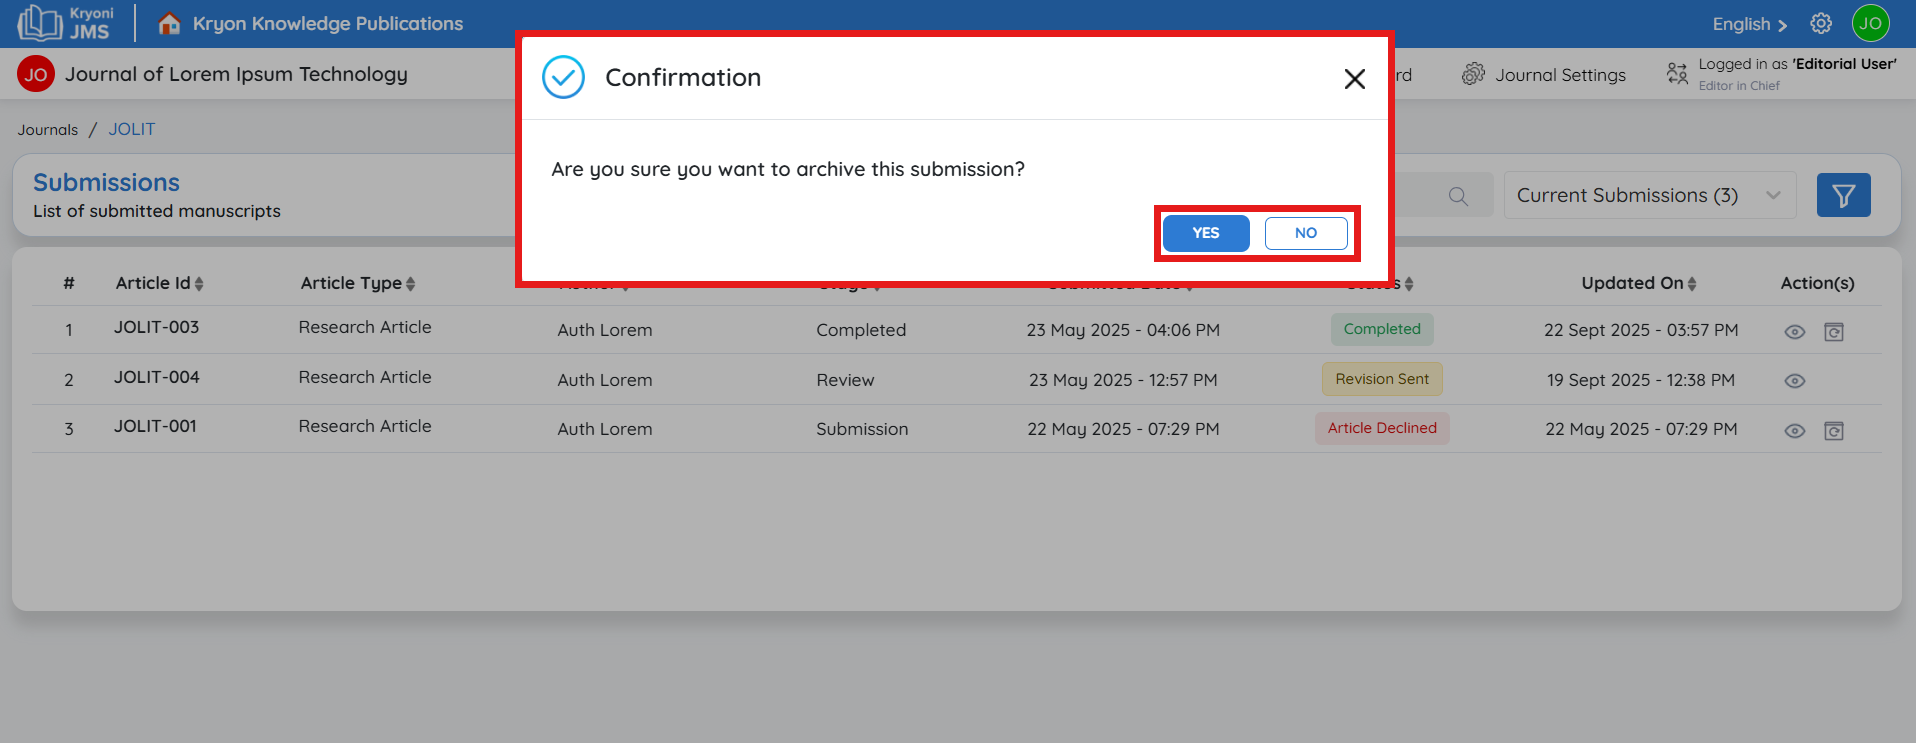
“Are you sure you want to archive this submission?”
-
Click Yes to confirm.
-
The submission will be moved to the Archived section.
Archiving is typically used when:
-
A submission has been declined.
-
The article has moved to production and is completed.
-
You want to store records for reference without cluttering current workflow views.
5.Filtering Between Submissions
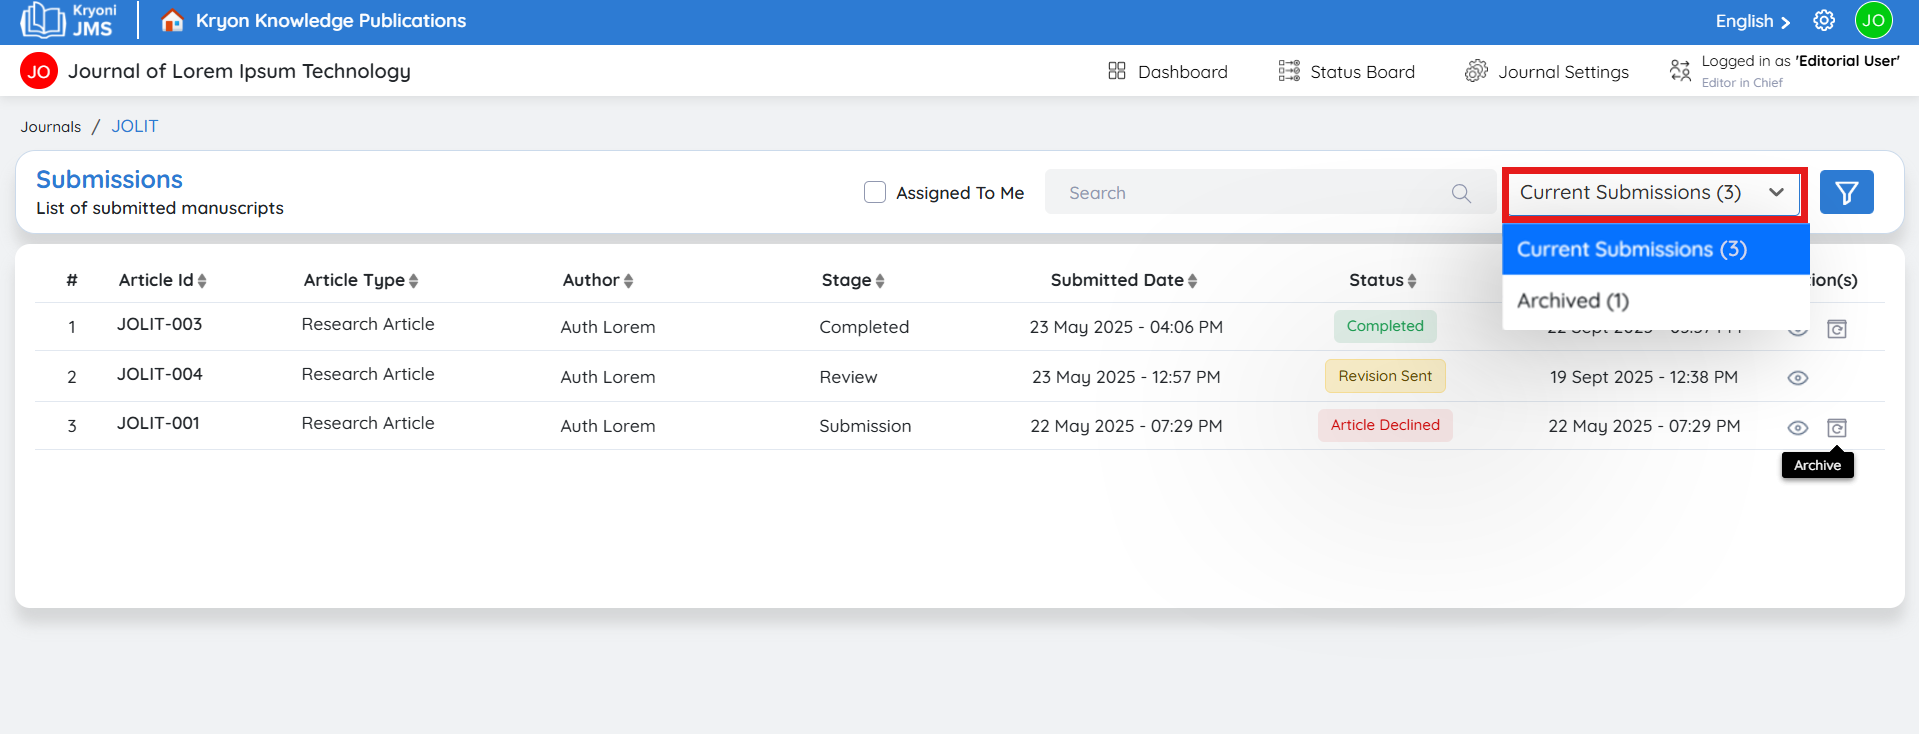
Use the Filter drop-down menu at the top-right of the Submissions page to toggle between:
-
Current Submissions – Displays all active manuscripts in progress.
-
Archived – Displays previously archived submissions.
This allows you to switch views for better management and quick retrieval.
6.Unarchiving a Submission
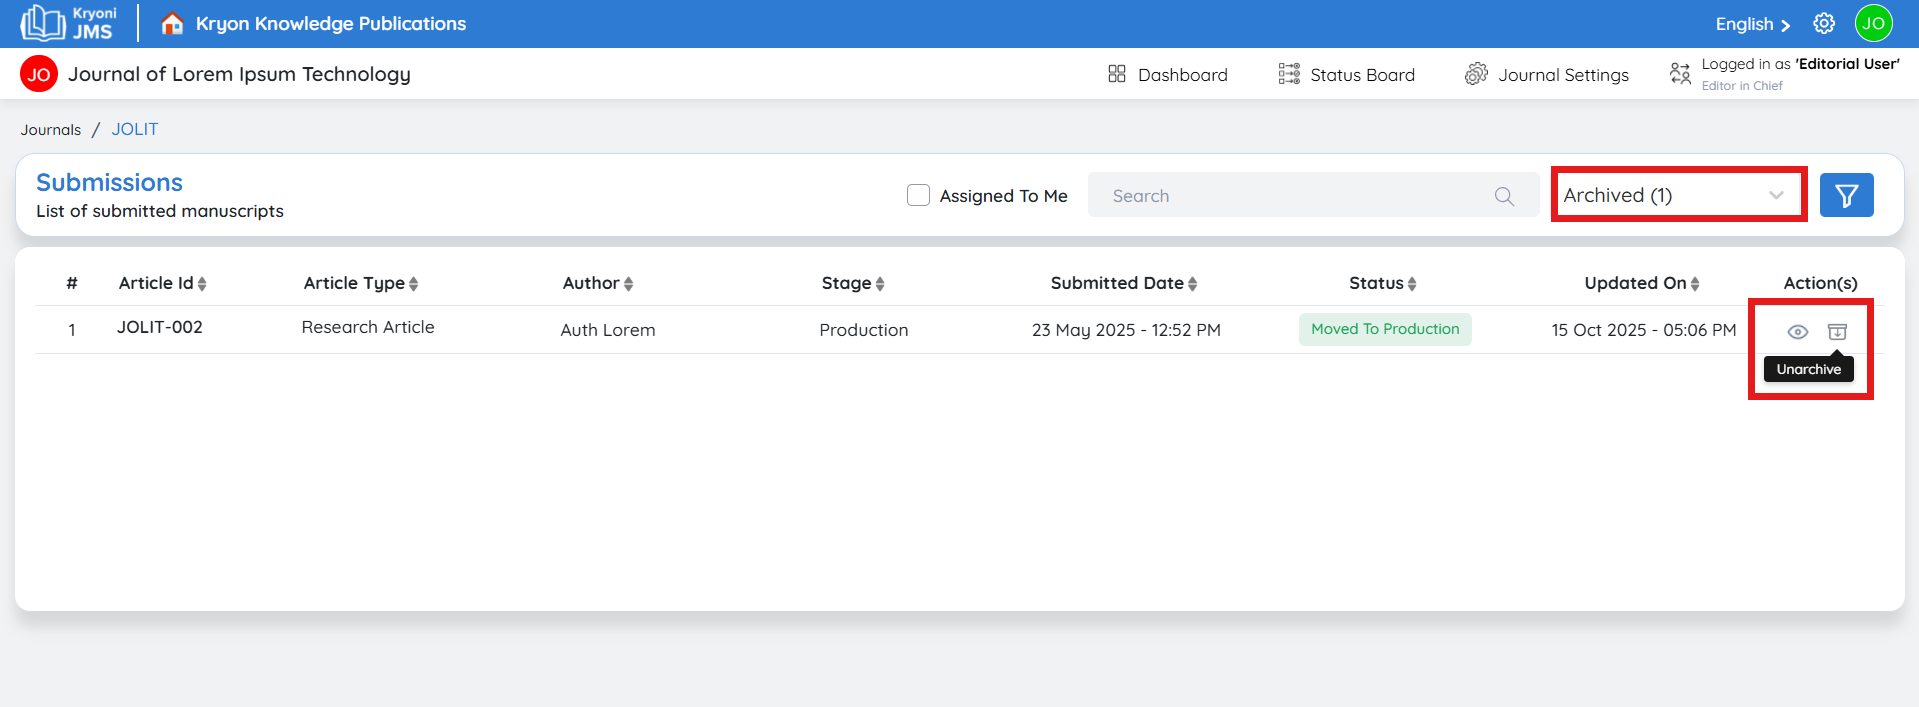
If you need to restore an archived submission back to active status:
-
Select Archived from the filter dropdown.
-
Locate the desired submission.
-
Click the Unarchive icon under Actions.
-
A confirmation message will appear:
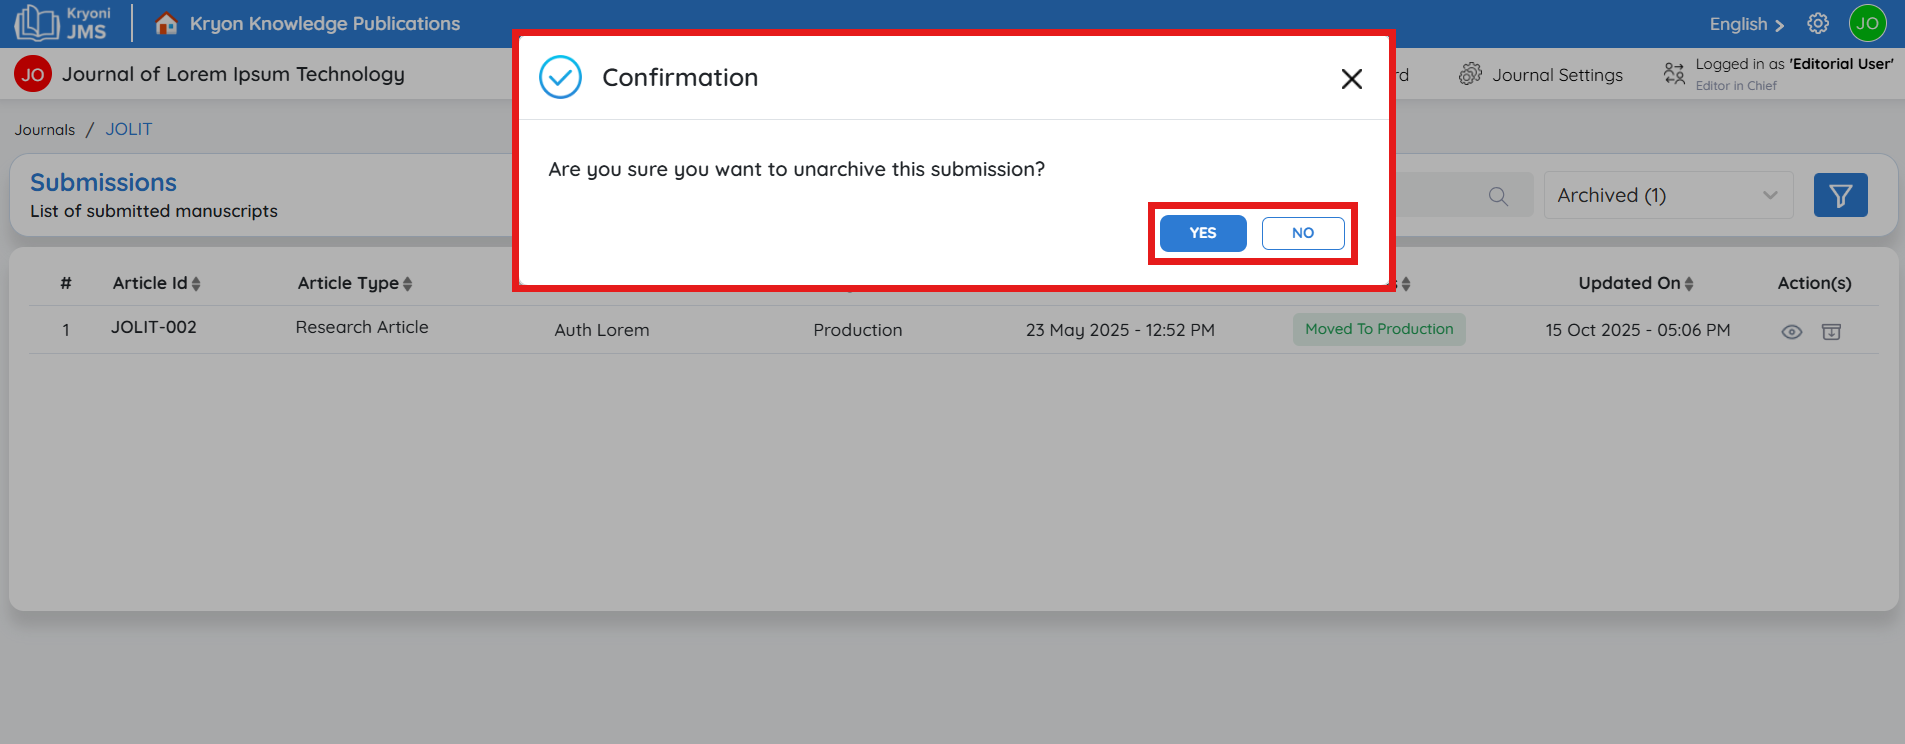
“Are you sure you want to unarchive this submission?”
- Click Yes to confirm.
The submission will return to the Current Submissions list and resume its workflow visibility.
7. Summary
By following these steps, editors and administrators can:
-
Efficiently track new submissions,
-
Maintain workflow clarity through archiving, and
-
Restore any article when required, ensuring a transparent and organized publication process.
This structured submission management system helps streamline journal operations, ensuring every manuscript is traceable from submission to publication.
Evaluating the Submission
Open the Submission Details Page
Once you click on a specific manuscript, the system will present a new interface with three key sections:
1. Workflow
- View all necessary files associated with the submission.
- Send revision requests if needed.
- Take editorial actions such as accept and send review, accept and skip review or decline submission
2. Submission Details
Click "Submission Details" to access comprehensive information about the manuscript, including:

| Field | Description |
|---|---|
| Journal Name | The full name of the journal. |
| Journal Acronym | The abbreviation used for the journal. |
| Journal Abbreviation | The short form of the journal name. |
| Submission Number | A unique identifier for the manuscript submission. |
| Submission Title | The title of the manuscript. |
| Submission Subtitle | A secondary title or tagline of the manuscript. |
| Submission Language | The language in which the manuscript is written. |
| Submission Subject | The subject area or field of study covered in the manuscript. |
-
Additional Checks
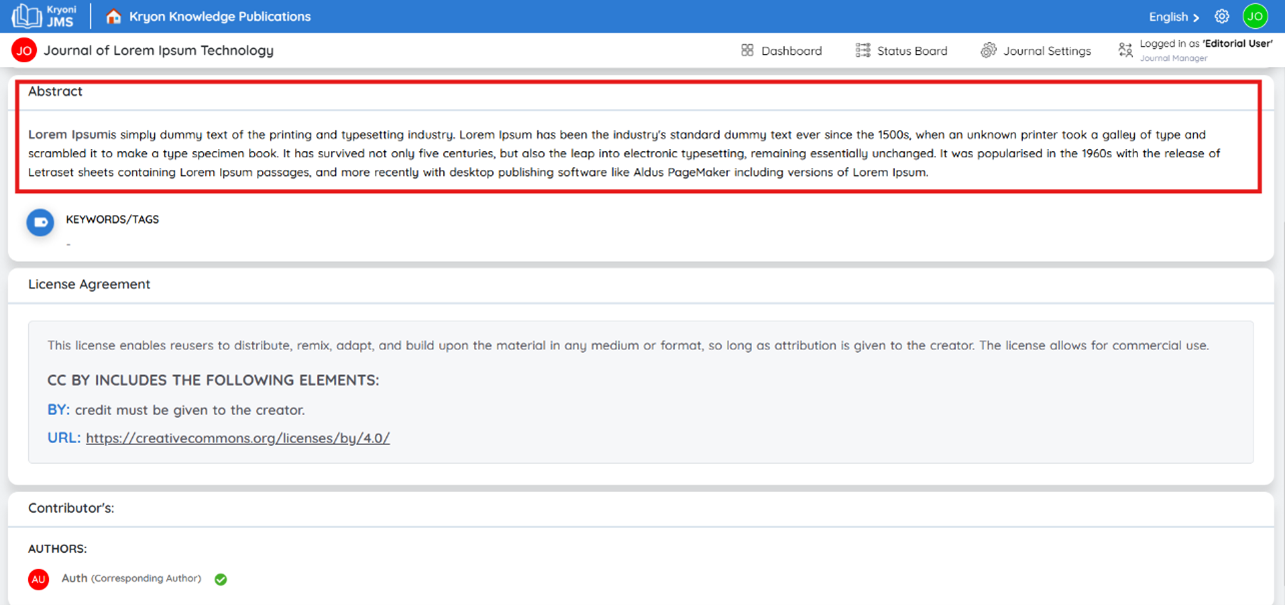
-
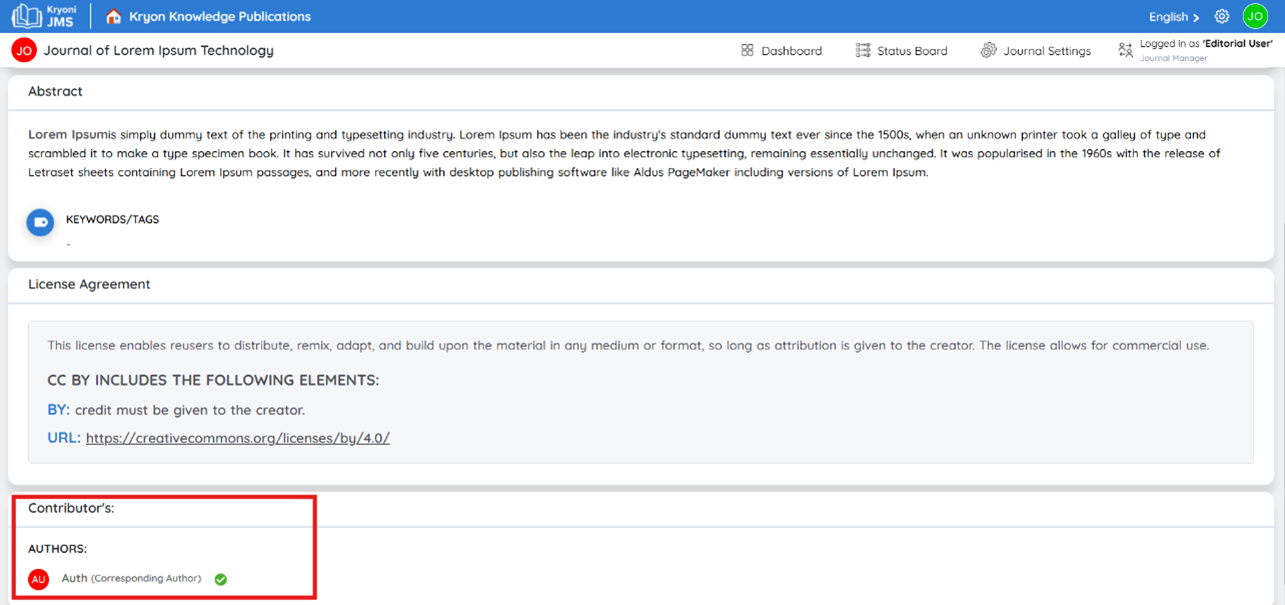
Abstract Review: Ensure that the abstract is well-structured and aligns with the journal’s scope and submission guidelines.
-
Contributor Details: Check the list of authors and contributors, including their affiliations and roles.
3. AI- Review
Utilize AI Tools for Submission Evaluation
The AI Review section within Kryoni JMS provides integrated tools to assist editors in evaluating manuscripts more efficiently.
One of the key AI-assisted features available in Kryoni JMS is the Out-of-Scope (OOS) Score Checker.
AI-Assisted Features Include
OOS Score Checker – Ensuring Manuscript Relevance
What is the OOS Score Checker?
The Out-of-Scope (OOS) Score Checker is an AI-powered tool designed to assess whether a submitted manuscript aligns with the journal’s scope and subject area. It analyzes the manuscript’s content and compares it against predefined journal focus areas to determine its relevance and suitability.
How Does the OOS Score Checker Work?
1. Text Analysis – The AI scans the manuscript’s title, abstract, keywords, and main content to extract key concepts and subject matter.
2. Scope Matching – It compares the extracted data with the journal’s defined subject areas, ensuring alignment with the journal’s focus.
3. Relevance Scoring – The system assigns an OOS Score, indicating the degree to which the manuscript aligns with the journal’s scope.
Why is the OOS Score Checker Important?
- Saves Editorial Time: Instead of manually checking each submission for relevance, the AI quickly evaluates whether a manuscript aligns with the journal’s focus, allowing editors to prioritize relevant submissions.
- Improves Decision Accuracy: Editors receive a data-driven assessment to support their decision on whether to accept or reject a submission based on scope alignment.
- Enhances Author Guidance: If a manuscript is flagged as out of scope, authors can be provided with early feedback, reducing unnecessary review cycle.
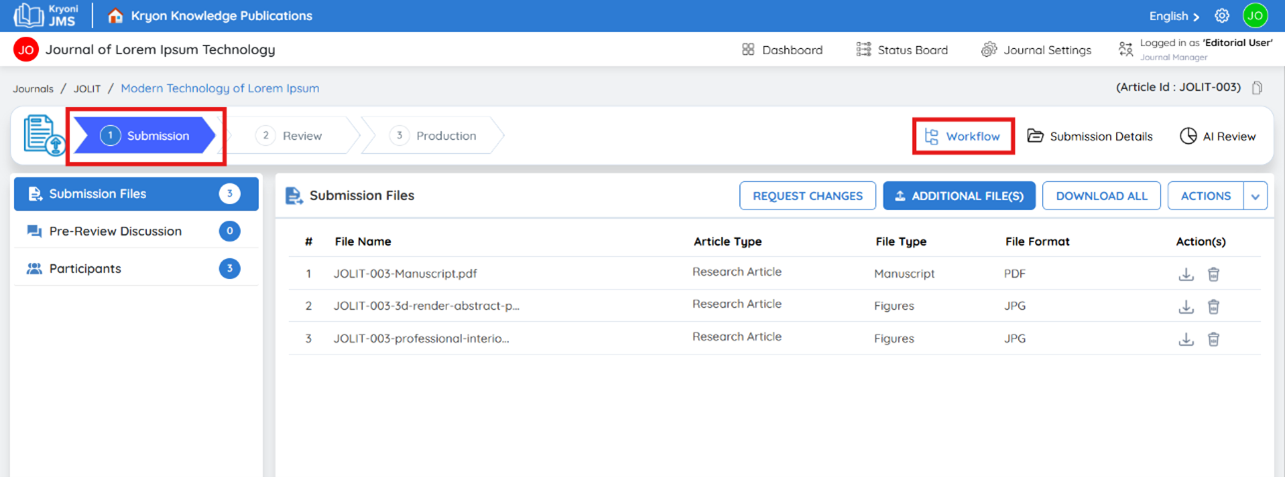
Workflow
This guide explains the three key sections available in the Workflow section:
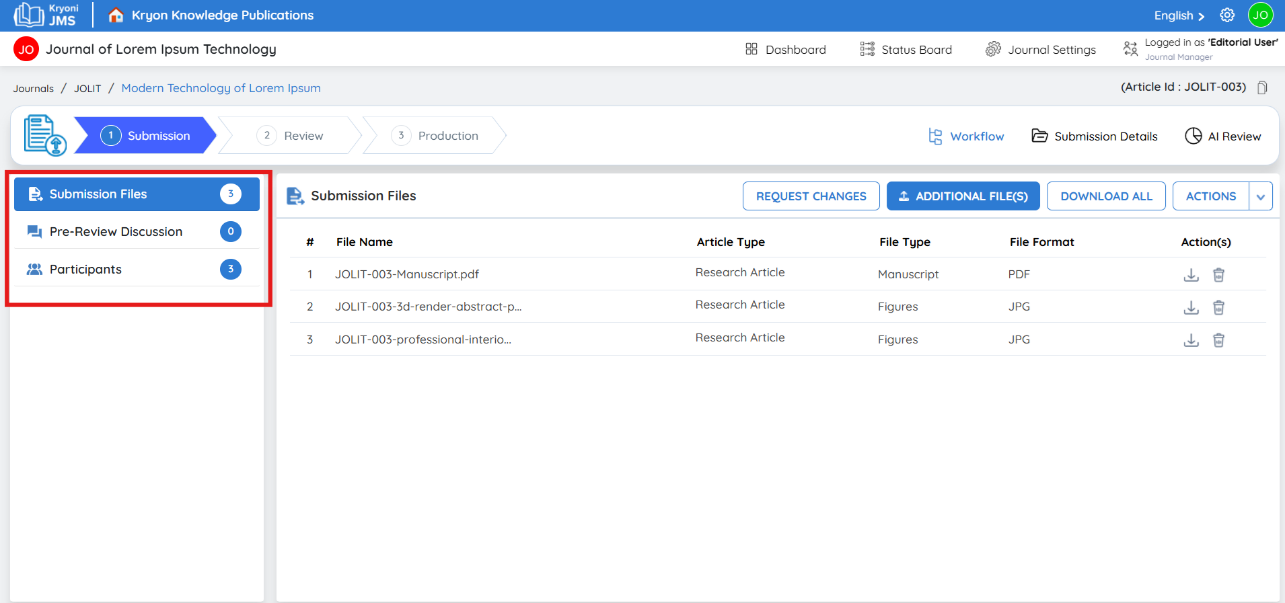
1️. Submission Files – Where you access and review the manuscript files.
2️. Pre-Review Discussion – A communication space for clarifications before reviewing.
3️. Submission Participants – A list of individuals involved in the submission and review process.
Submission Files
The Submission Files section contains all files related to the manuscript under review. These files may include the main manuscript, supplementary materials, figures, and any additional documents required for the review process.
Pre-Review Discussion
The Pre-Review Discussion section allows journal managers, editors, and other participants to communicate about the submission before finalizing the review process.
Purpose of the Pre-Review Discussion
- Clarify any doubts related to the manuscript.
- Discuss specific issues before submitting the final review.
- Request additional materials or information from the editor.
Participants
The Participants section provides a list of all individuals involved in the workflow.
Summary of Key Actions in Each Section
| Section | Description | Actions |
|---|---|---|
| Submission Files | Access and review all manuscript files. | Download individual files or all files together, examine content carefully, follow review guidelines. |
| Pre-Review Discussion | Communicate with the editorial team or author before completing your review. | Ask for clarifications, discuss issues, but do not submit decisions here. |
| Submission Participants | View all individuals involved in the submission process. | Identify authors, editors, assigned to the manuscript. |
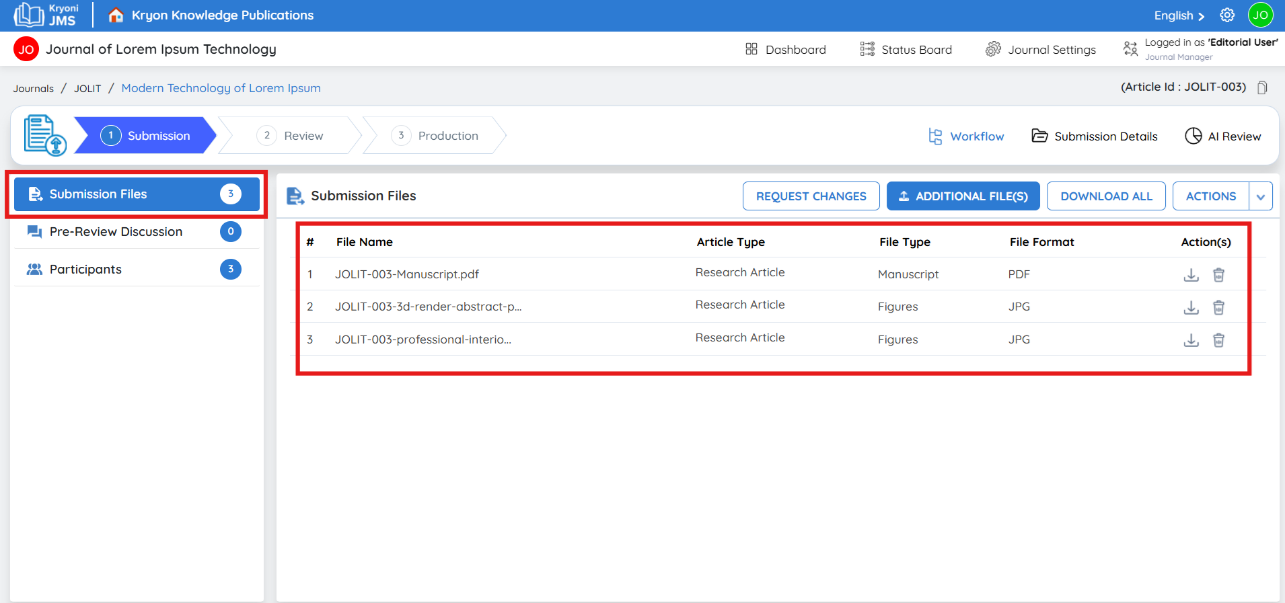
1. Access Submission Files
a. The list of uploaded files will be displayed, including the manuscript, supplementary materials, and any other supporting documents.
Download Individual Files

- Click the "Download" button next to each file to download them separately.
- Open and review the content to ensure completeness and correctness.
Download All Files
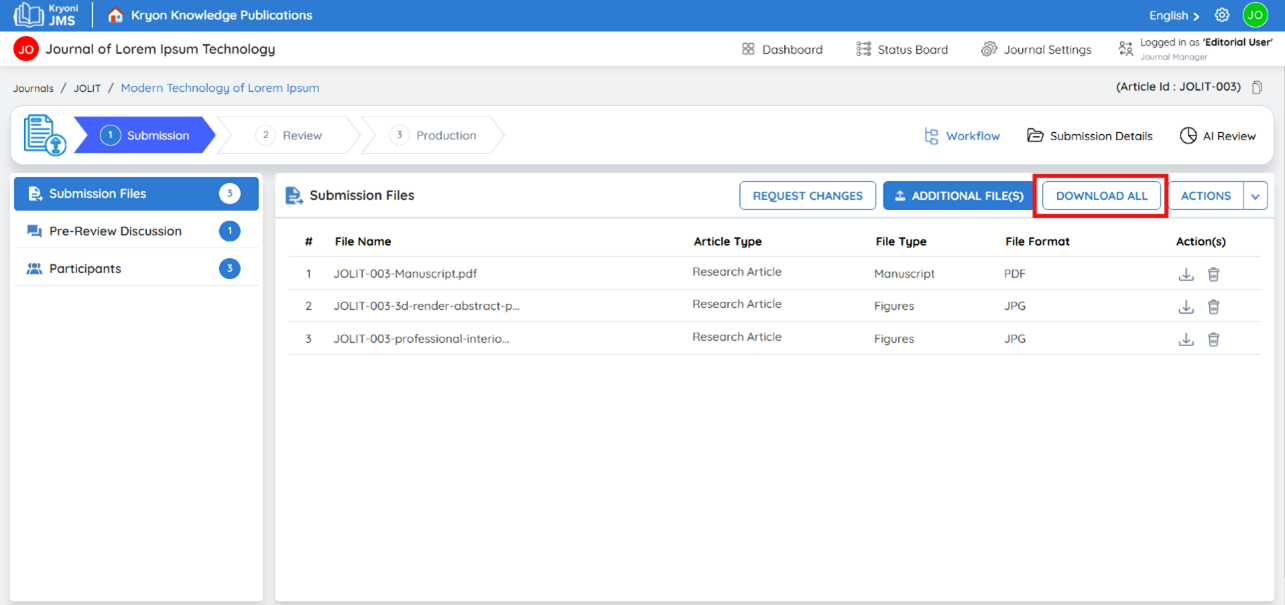
- Click "Download All" to download all submitted files as a ZIP archive.
- This allows for quick access to all necessary materials in one step.
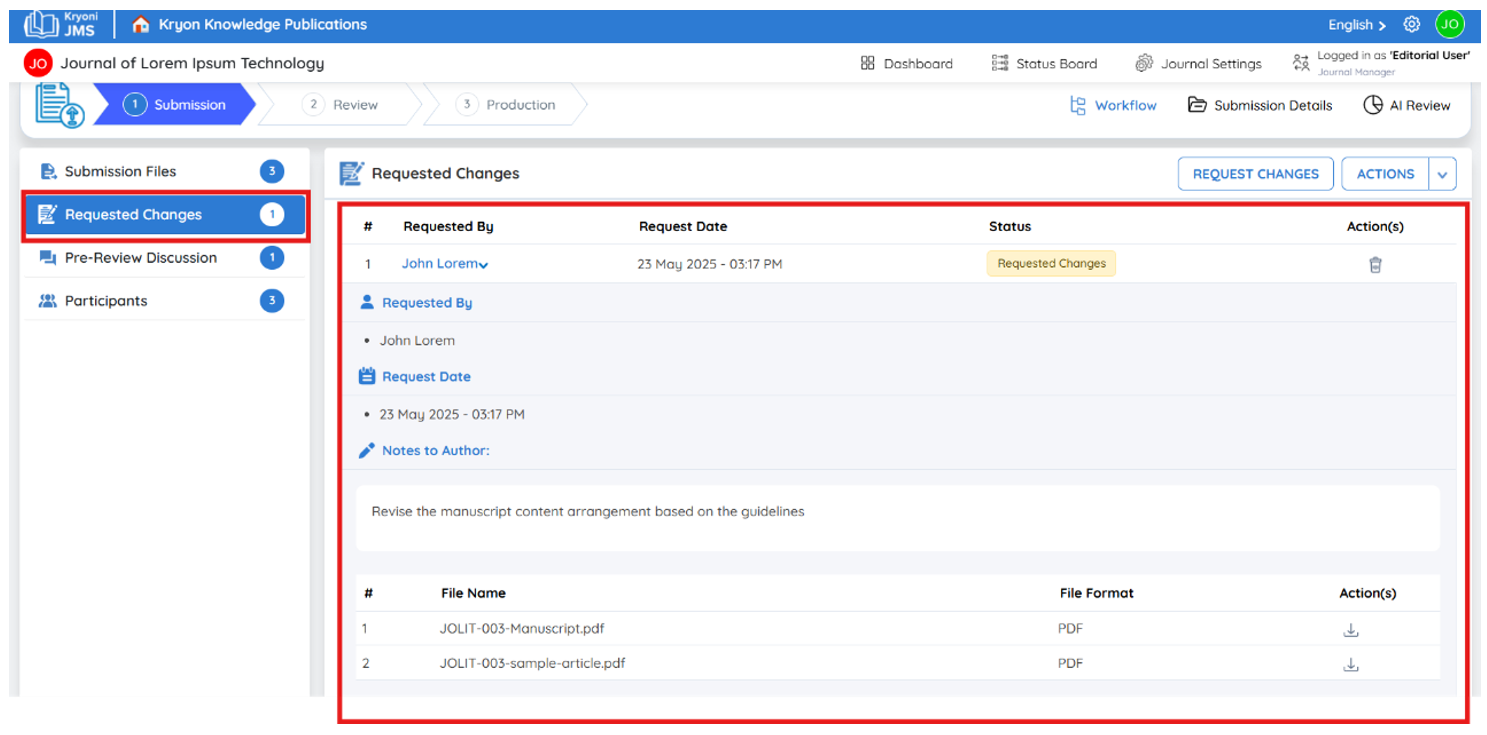
Use Case 1: Requesting Changes from the Author
If a manuscript is missing essential files or requires corrections, editors or journal managers can request revisions directly from the author during the workflow.
How to Request Changes
Step 1: Click “Request Changes”
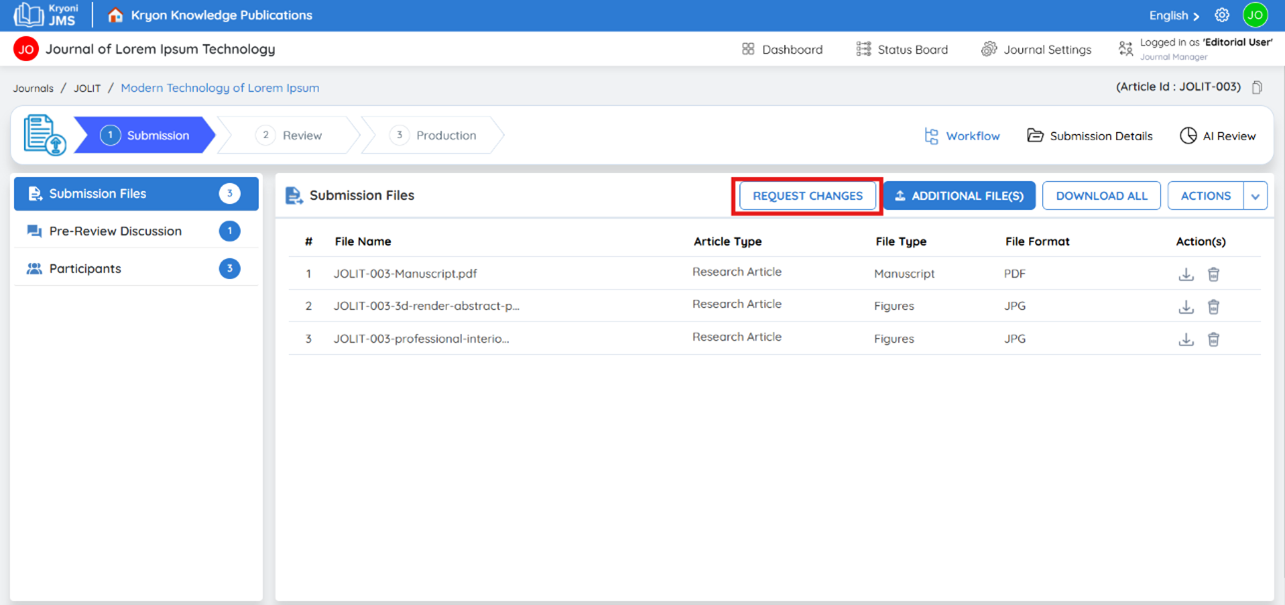
- Navigate to the manuscript’s submission page.
- Click the “Request Changes” button to initiate the request.
Step 2: Add Notes to the Author
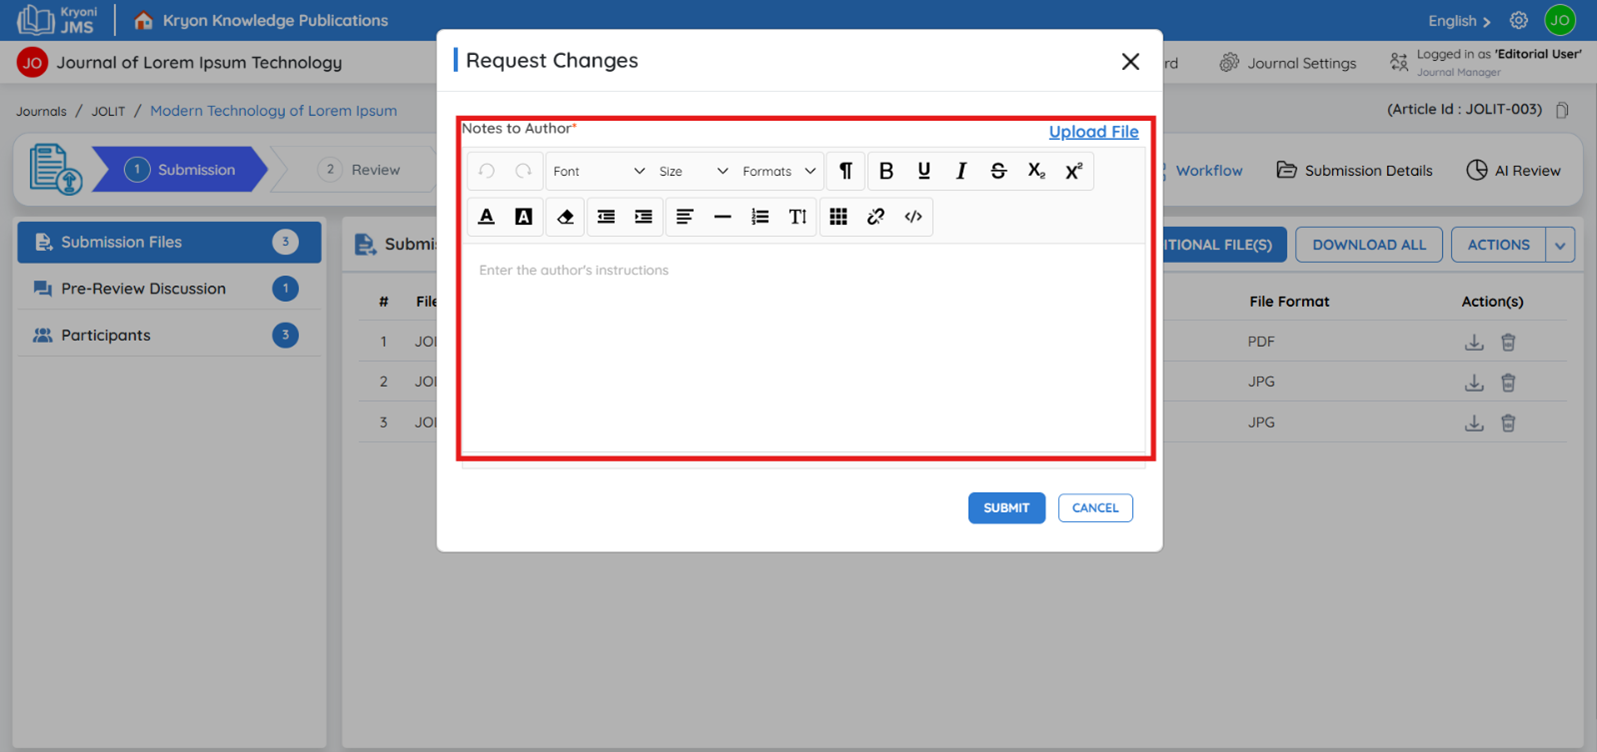
- Provide clear and specific instructions on the changes required.

- Mention any missing files or supporting materials that need to be added.
- Highlight formatting issues or content that must be corrected.
Step 3: Attach Reference Files (if applicable)
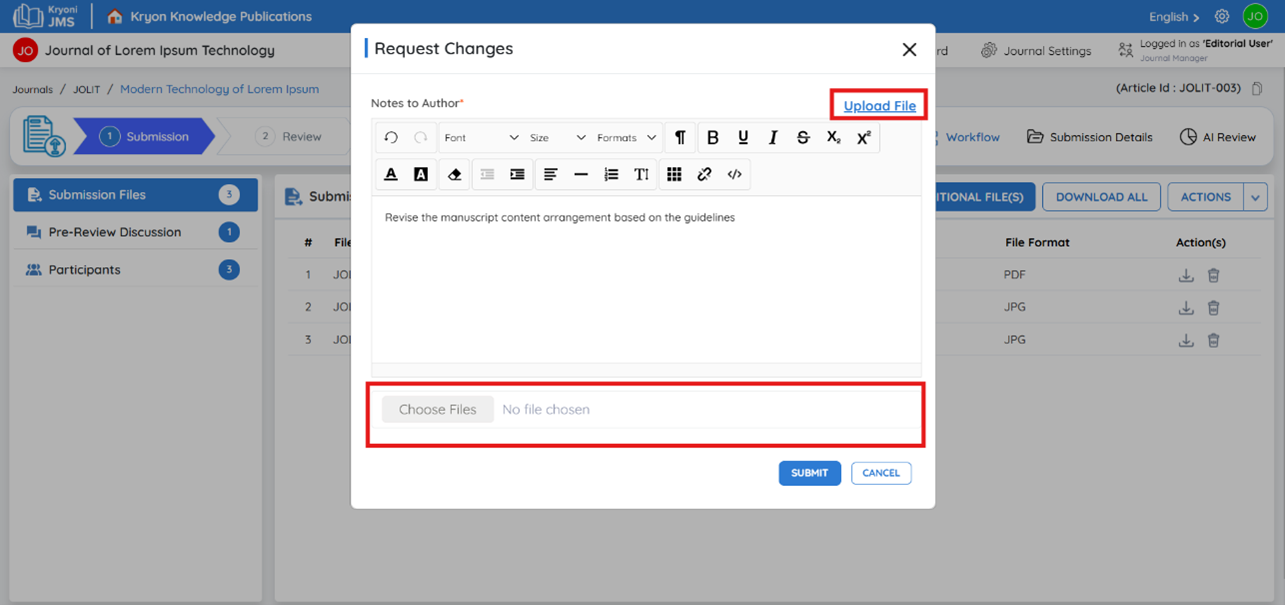
- If needed, upload relevant documents that will help the author understand the requested changes (e.g., marked-up files, examples, or templates).
Step 4: Submit the Request
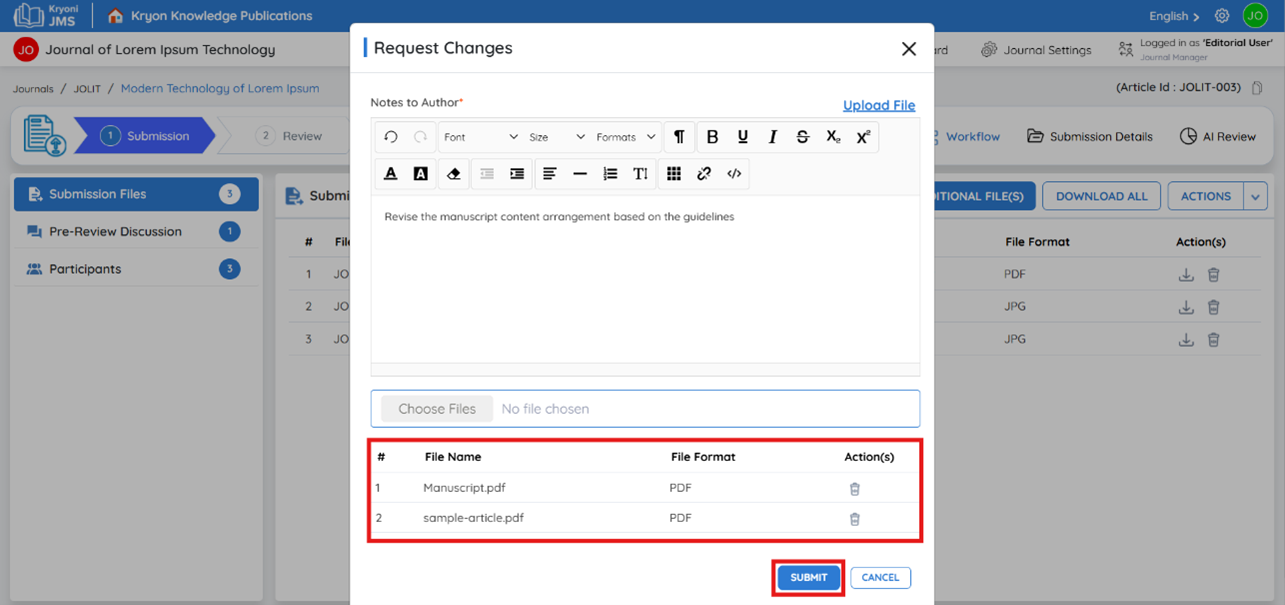
- Once all required details and files are added, click “Submit” to send the request to the author.
What Happens Next
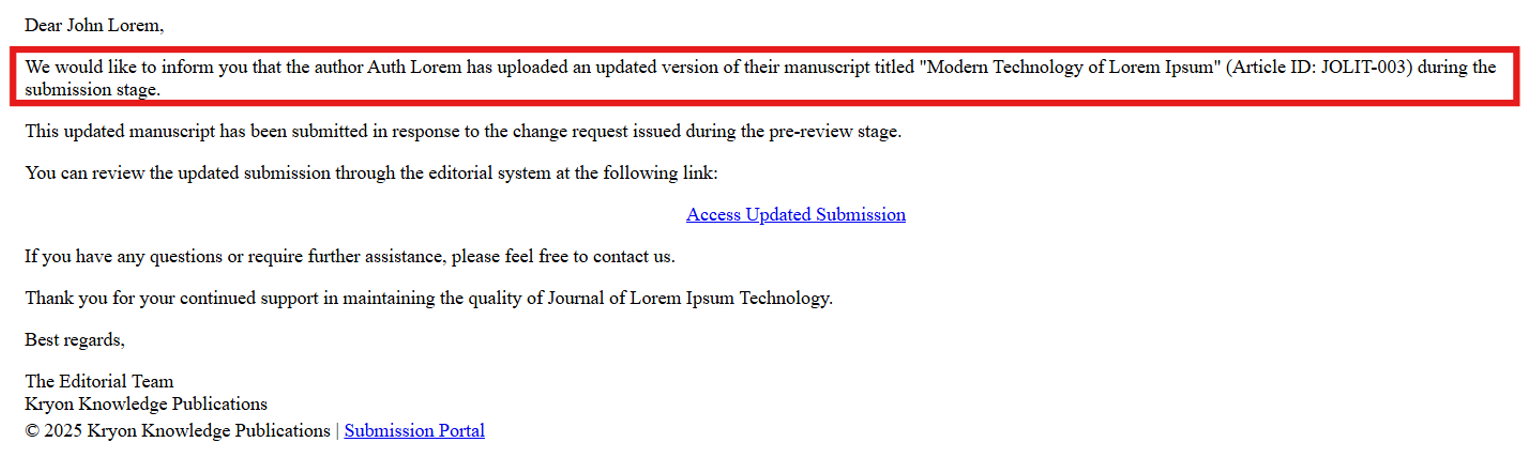
Author Receives a Notification
- An automated email is sent to the author, notifying them about the requested changes.
- The author can log in to the Journal Management System (JMS) to view the comments and instructions.
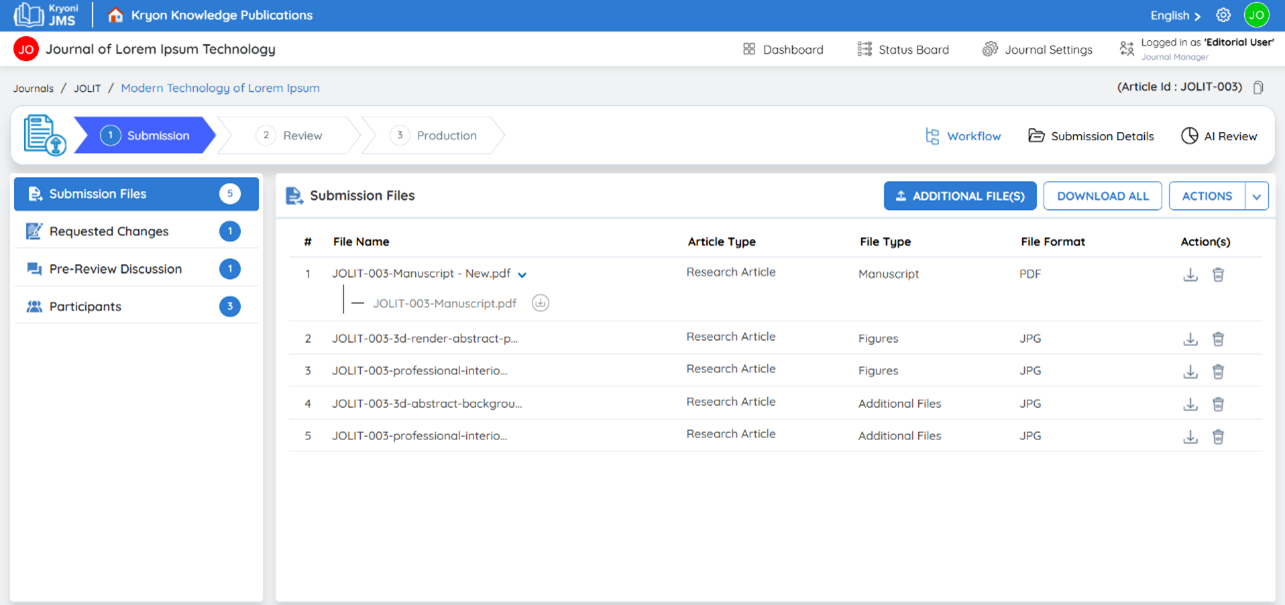
Author Submits the Updated Manuscript
- The author makes the necessary changes and uploads the updated file.
- The revised submission will be available in the system for further processing.

The workflow will not proceed after the author accepts the change request until the updated files are submitted.
Additional Files Tab
In some cases, editors or administrators may need to attach supplementary materials to a submission, such as review reports, editorial comments, or additional supporting documents. The Additional Files tab allows users to upload and manage these files efficiently.
Steps to Add Additional Files
1. Navigate to the Additional Files Tab
a. Click on the "Additional Files" tab within the submission workflow.
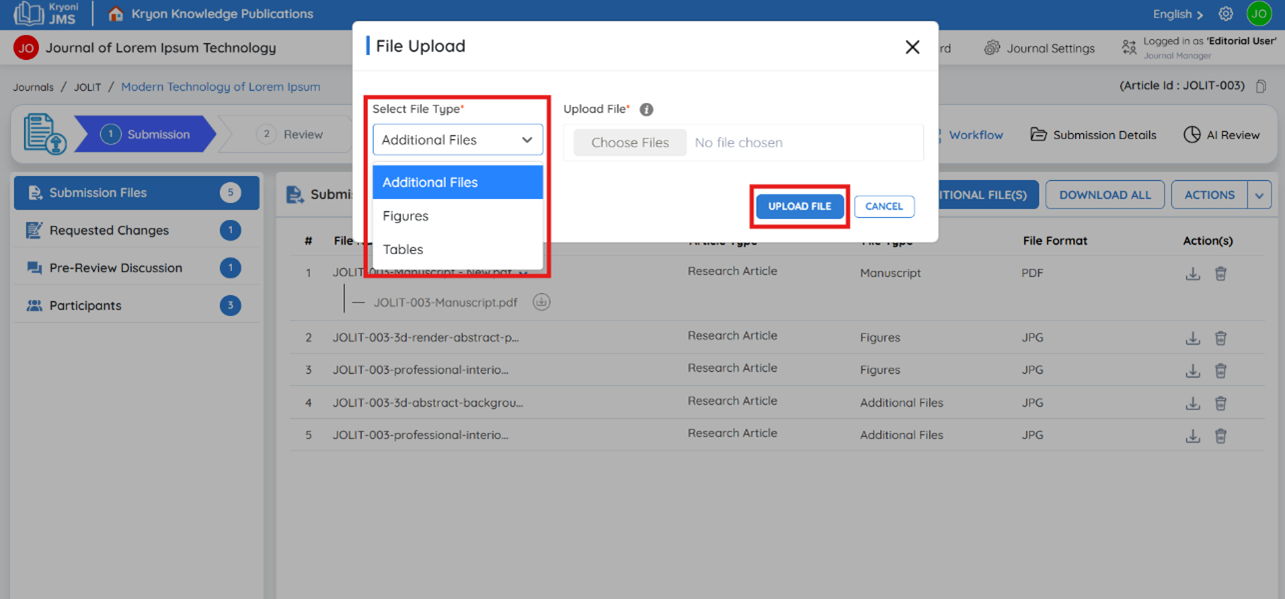
2. Select File Type
a. Choose the appropriate file type from the dropdown menu.
b. Example file types: Editorial Notes, Review Reports, Supplementary Data, or Supporting Documents.
3. Upload the File
a. Click on the upload button and select the corresponding file from your system.
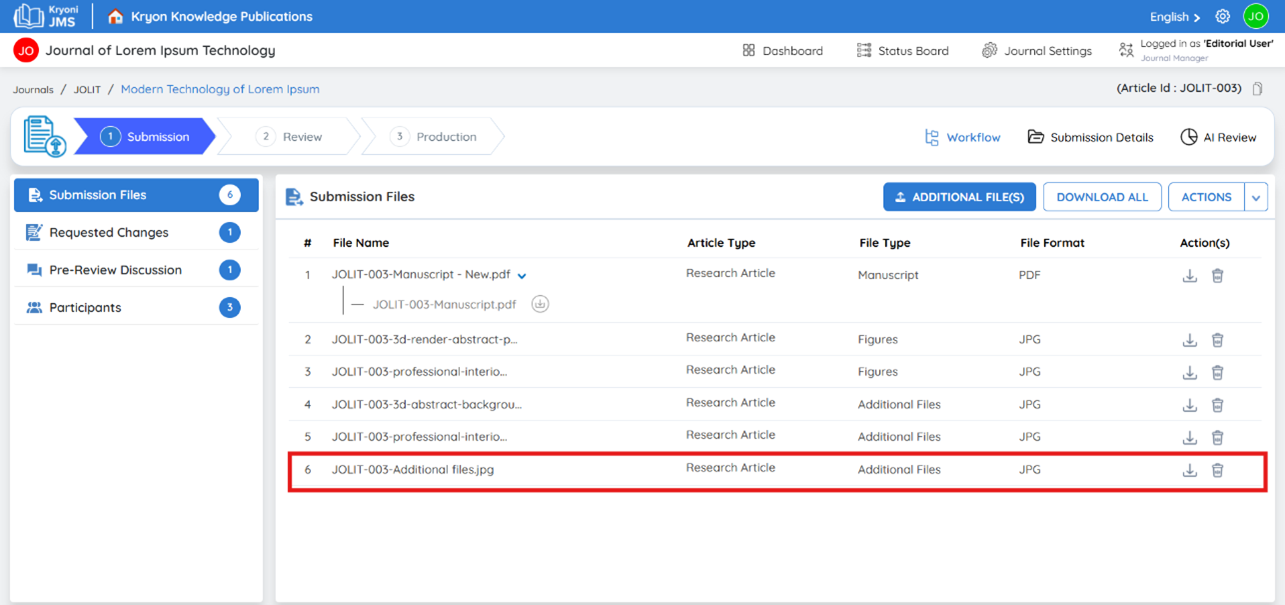
4. Save and Confirm
a. Once uploaded, verify that the file appears in the list. b. Click "Save" to confirm the addition of the file.
Action Tab
The Action Tab is where editors make decisions about the manuscript's next steps. This tab provides different options depending on the review process and editorial guidelines.
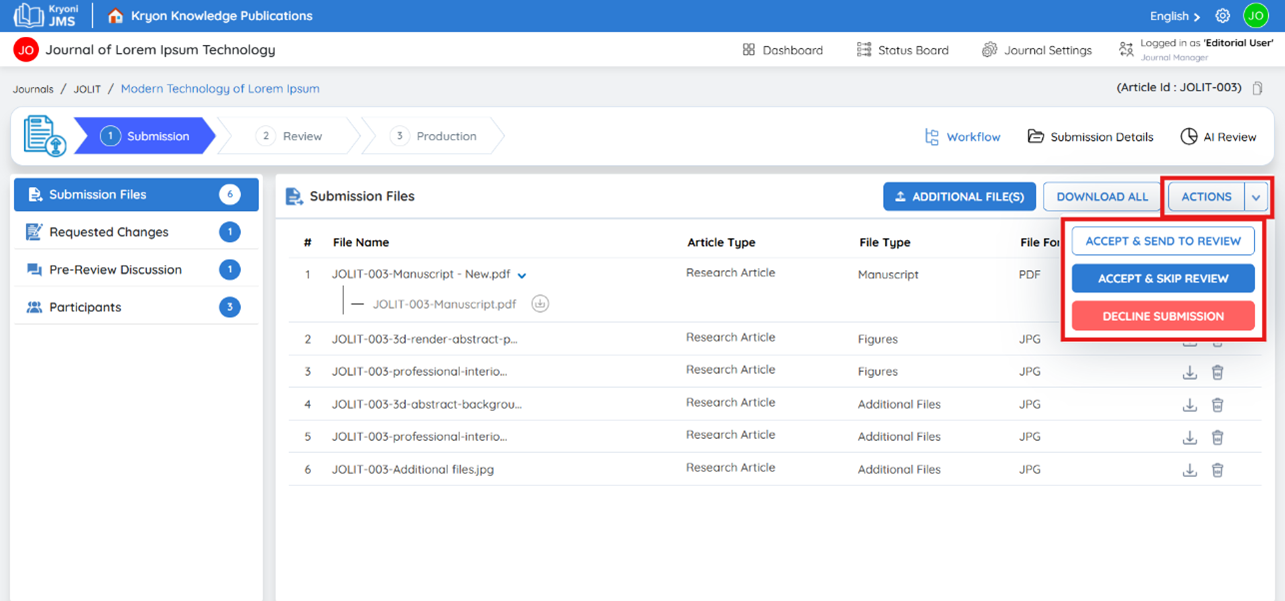
- Accept & Send to Review - Assign reviewers for peer evaluation.
- Accept & Skip Review - Directly move the manuscript to production (used for editor-approved content).
- Decline Submission - Reject the manuscript if it does not meet journal requirements.
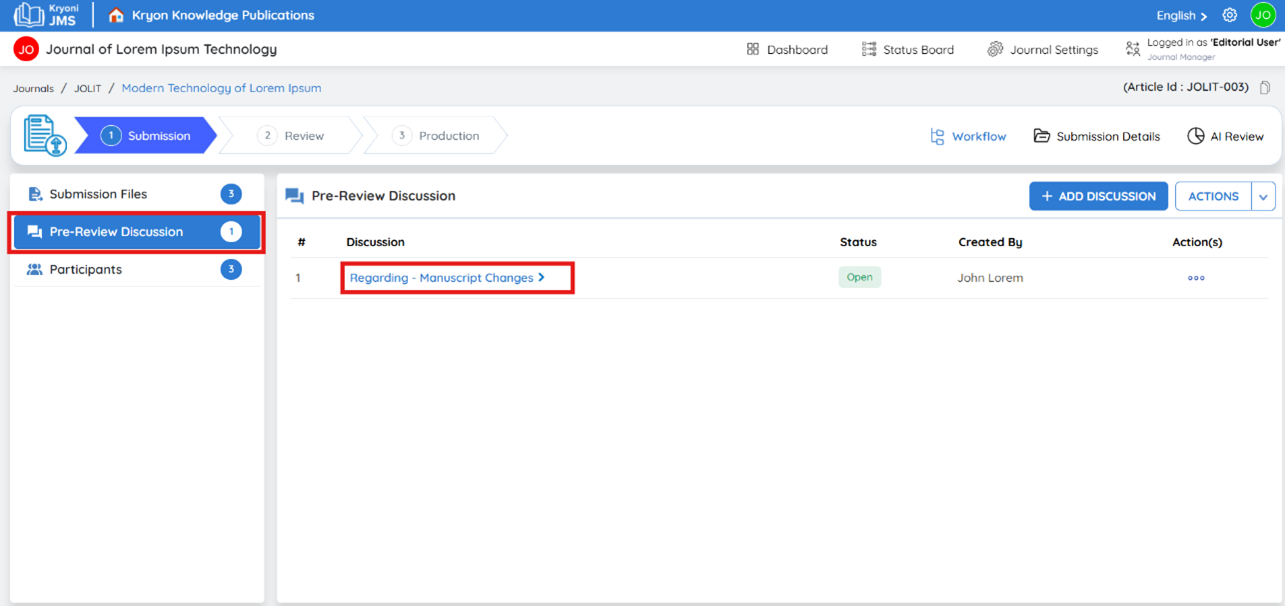
Pre-Review Discussion
The Pre-Review Discussion section in the Journal Management System (JMS) allows editors and authors to communicate directly before the formal review process begins. This feature is helpful for clarifying submission details, requesting additional information, or discussing necessary changes before deciding whether a revision is needed.
Use Case: Initiating a Pre-Review Discussion
An editor reviews a newly submitted manuscript and has a few clarifications regarding formatting and missing details. Instead of requesting a revision immediately, the editor decides to start a Pre-Review Discussion with the author.
Steps to Initiate a Pre-Review Discussion
1. Navigate to the Submission Page
a. Click on the specific manuscript submission. b. Go to the "Pre-Review Discussion" section.
2. Add Discussion
- Click on the "Add Discussion" button.
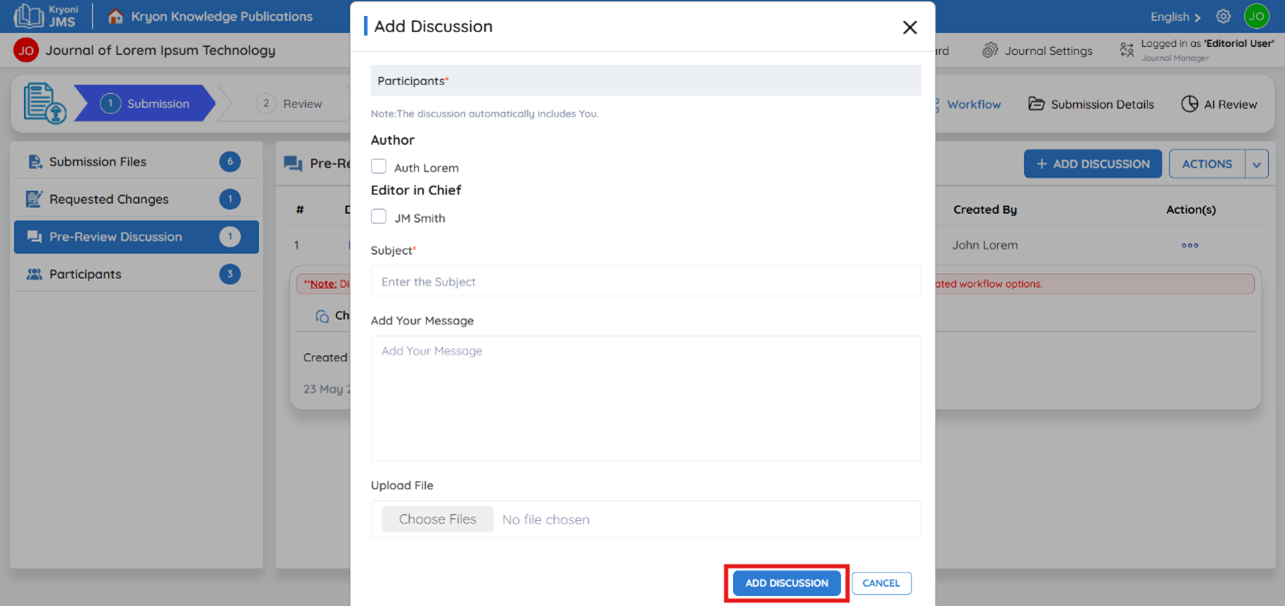
- A new discussion window will appear, allowing you to enter details.
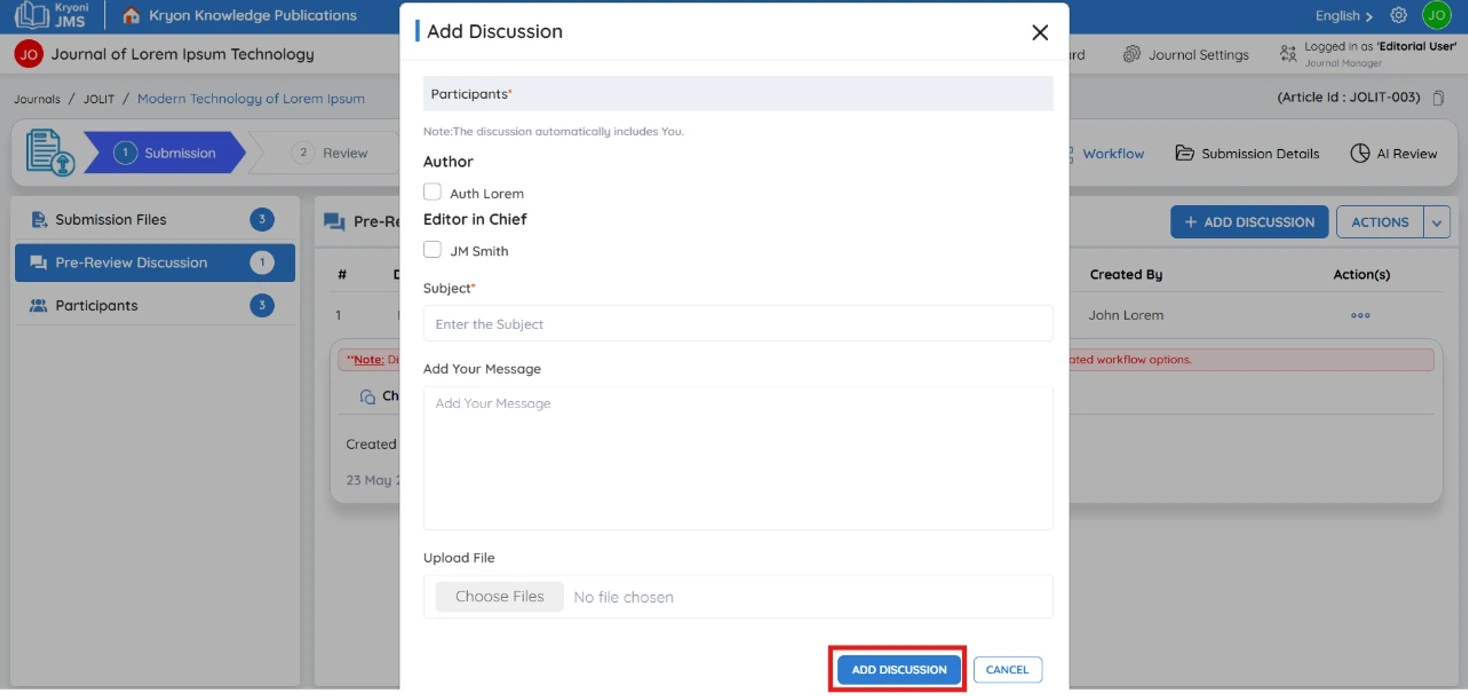
Choose Participants
Select participants for the discussion:
a. Author(s) – If you need clarifications from the submitting author.
b. Editorial Team – If internal discussion is required before reaching out to the author.
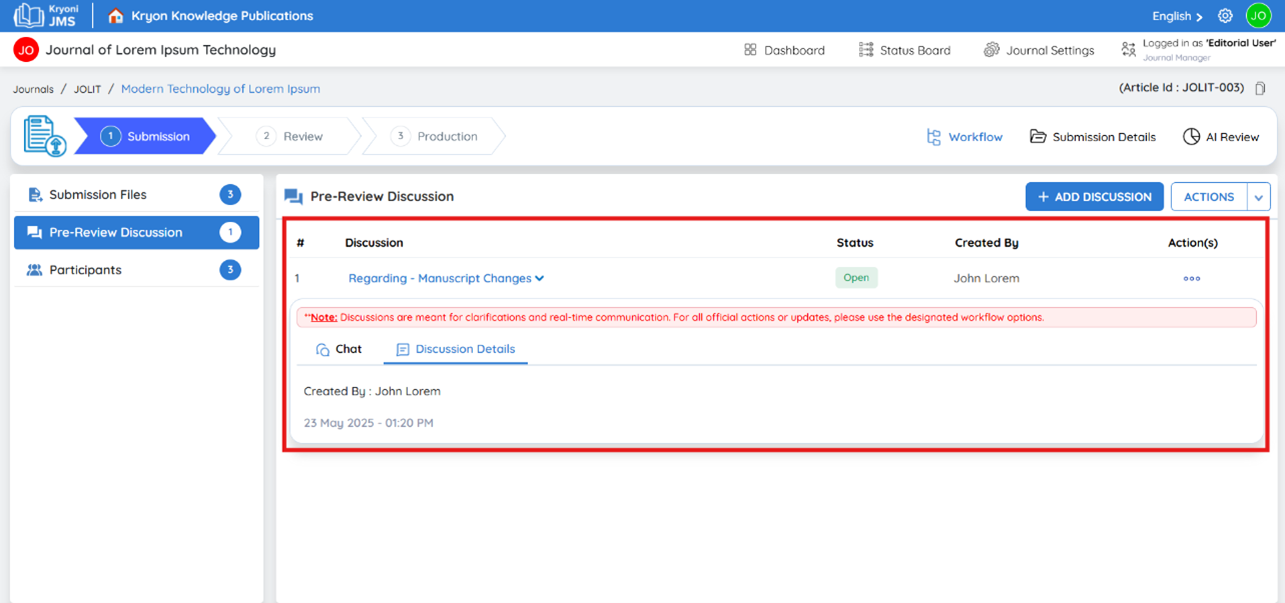
3. Enter the Discussion Details
a. Subject: Provide a clear subject line summarizing the discussion.
b. Message: Type your message or query for the author.
4. Attach Files (Optional)
a. If needed, click "Upload File" to attach relevant documents, such as editorial comments, revised guidelines, or clarification requests.
5. Submit the Discussion
a. Click "Add Discussion" to notify the author and other participants.
This feature ensures smooth communication between the editorial team and the author, facilitating a transparent and efficient review process.
Why Use Pre-Review Discussion?
- Enables direct, trackable communication within the submission platform.
- Keeps all correspondence organized in one place—no need for external emails or messaging tools.
- Encourages quick resolution of preliminary concerns before initiating formal requests or review steps.
Outcome
The author receives an email notification and can respond directly within Kryoni JMS. This ensures a smooth communication flow before the formal review process begins.
Discussions are for clarification and instant communication only. Please do not use this space for revision requests or other workflow actions. Use the appropriate options instead.
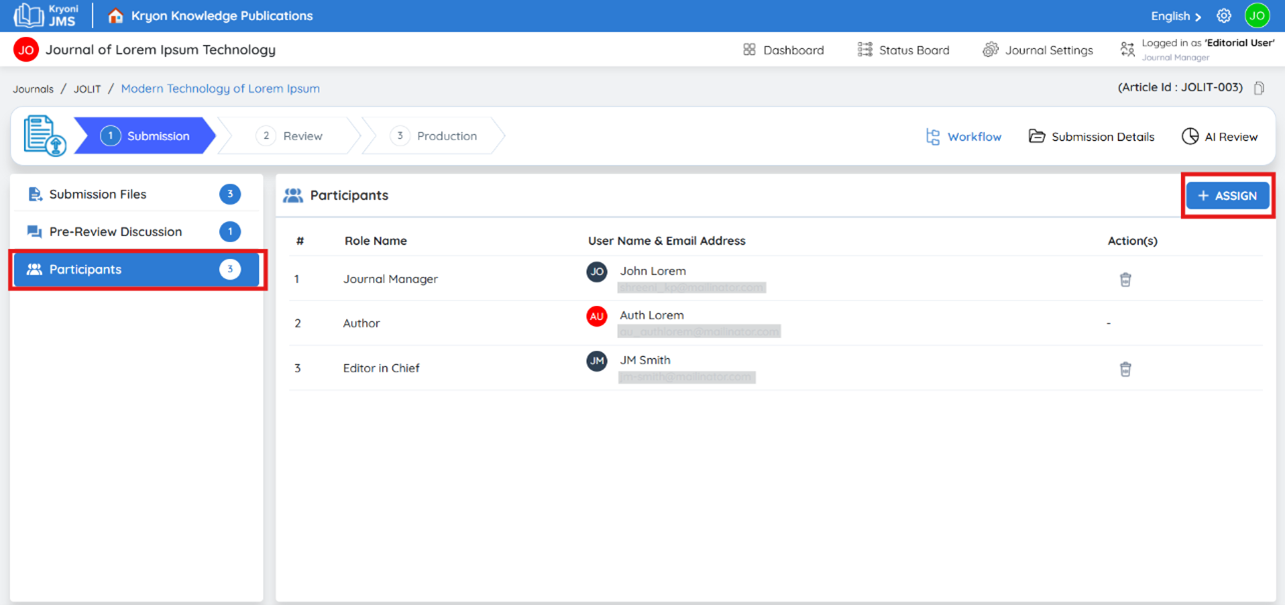
Participants Tab
The Participants Tab in the Kryoni Journal Management System (JMS) allows editors and administrators to manage the individuals involved in the manuscript submission process. This tab displays a list of participants currently assigned to a submission, along with their role name, username, and email address.
Understanding the Participants Tab
The Participants Tab provides an overview of all users associated with a submission, including their responsibilities within the editorial workflow. Common participant roles include:
- Editor-in-Chief – Oversees the entire editorial process.
- Handling Editor – Manages peer review and decision-making.
- Co-Editor – Assists the main editor in reviewing and processing the manuscript.
- Reviewer – Evaluates the manuscript based on journal standards.
- Author – Submitting author of the manuscript.
Use Case: Assigning a Co-Editor to a Submission
A common scenario in journal management is when an Editor-in-Chief or Handling Editor needs to assign a Co-Editor to assist in the editorial process.
Steps to Assign a New Participant
1. Access the Submission
a. Log in to Kryoni JMS.
b. Navigate to the journal and select the relevant manuscript submission.
2. Open the Participants Tab
a. Locate the Participants tab within the submission workflow.
b. This section displays all current participants, their roles, and contact details.
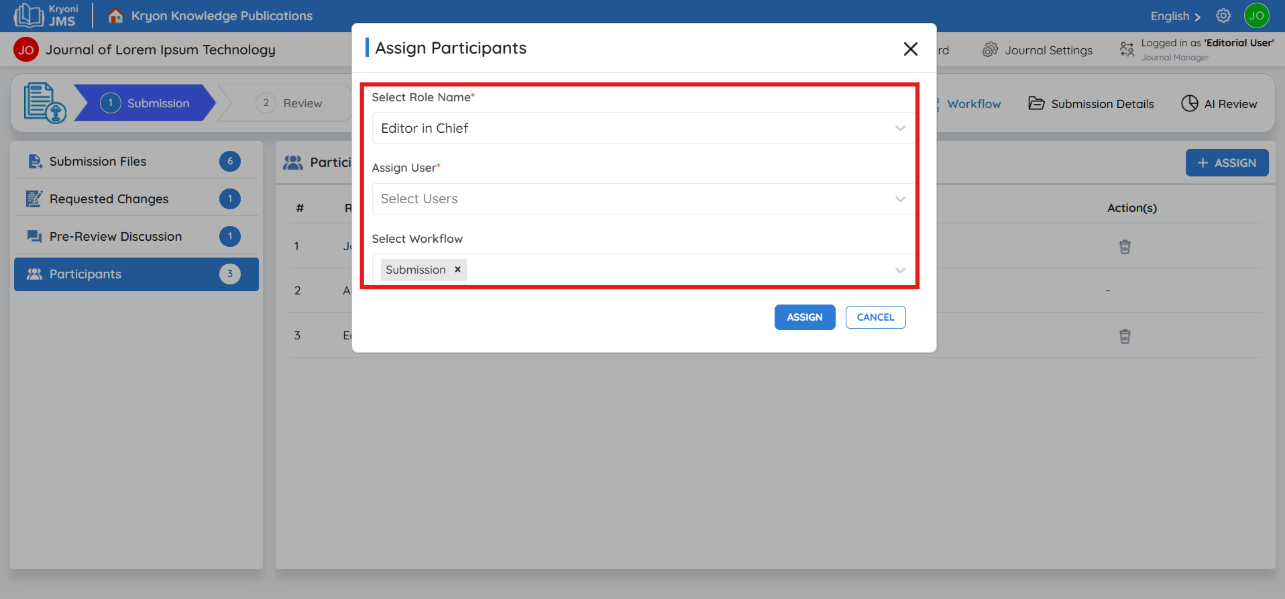
3. Click "Assign" to Add a New Participant
a. Click the "Assign" button to open the participant assignment panel.
4. Select the Role and User
a. Role Name: Choose the predefined role for the new participant (e.g., "Co-Editor").
b. Assign User: Select the appropriate user from the system’s registered participant list.

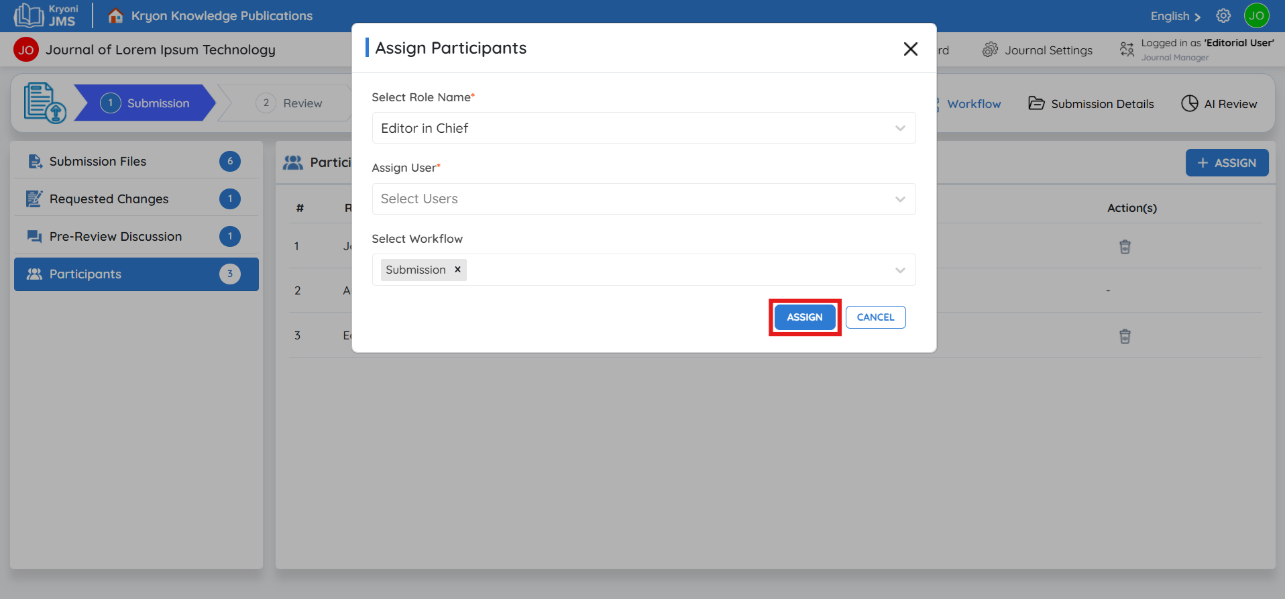
5. Confirm the Assignment
a. Click "Assign" to finalize the addition of the participant.
6. Automatic Notification
a. Once assigned, the new participant receives an email notification informing them of their role and responsibilities. b. The participant must Accept the Assignment to gain access to the manuscript.
Outcome
Once the new participant is assigned, they will:
-
Have access to the manuscript submission.
-
Collaborate with the editorial team to manage the workflow.
-
Receive notifications regarding submission updates and tasks.
By properly managing participants, Kryoni JMS ensures an organized and collaborative editorial process, enhancing efficiency and maintaining workflow transparency.