Managing Revision Requests in the Review Stage
Now, let’s see what happens from the author’s side when an editorial user requests revisions to a manuscript during the Review Stage.
Once the revision request is sent, the author receives a notification and can access the manuscript to view the reviewer comments, review the requested changes, and submit the revised manuscript for further evaluation.
Step 1: Access the Manuscript
Log in to Kryoni JMS using the Author account.
Click the relevant Journal Name to open the journal’s submission page.
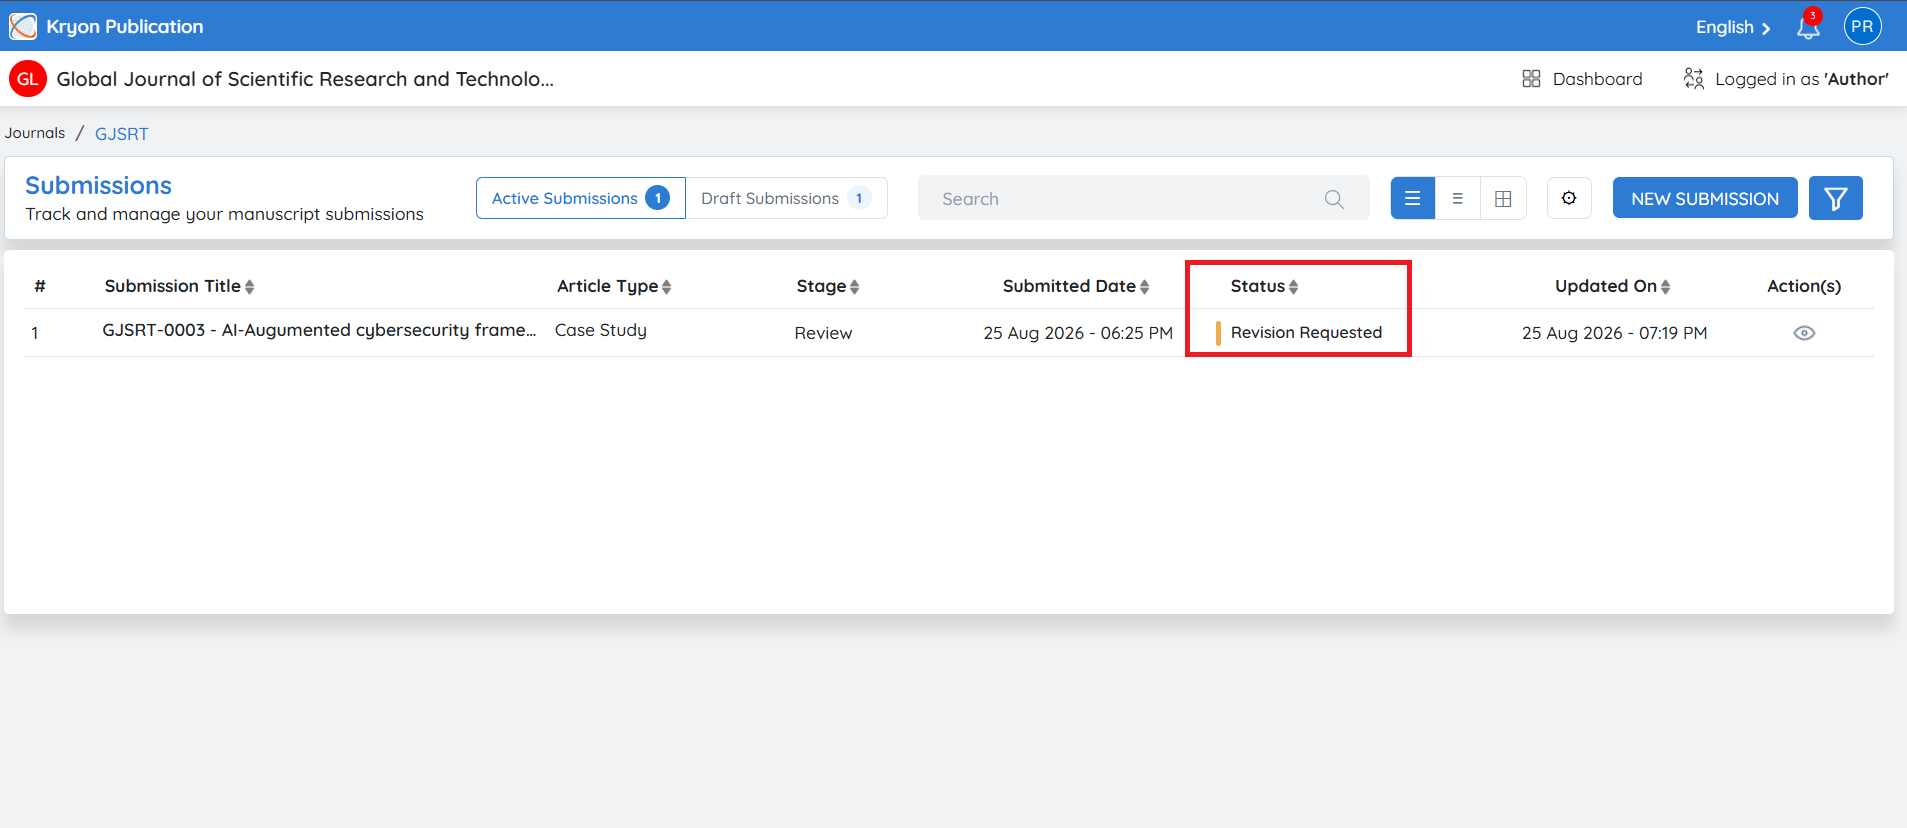
Under Active Submissions, locate the manuscript for which revisions have been requested.
The manuscript status will now display Revision Requested, indicating that the editorial user has requested changes during the Review Stage.
Step 2: View the Revision Request
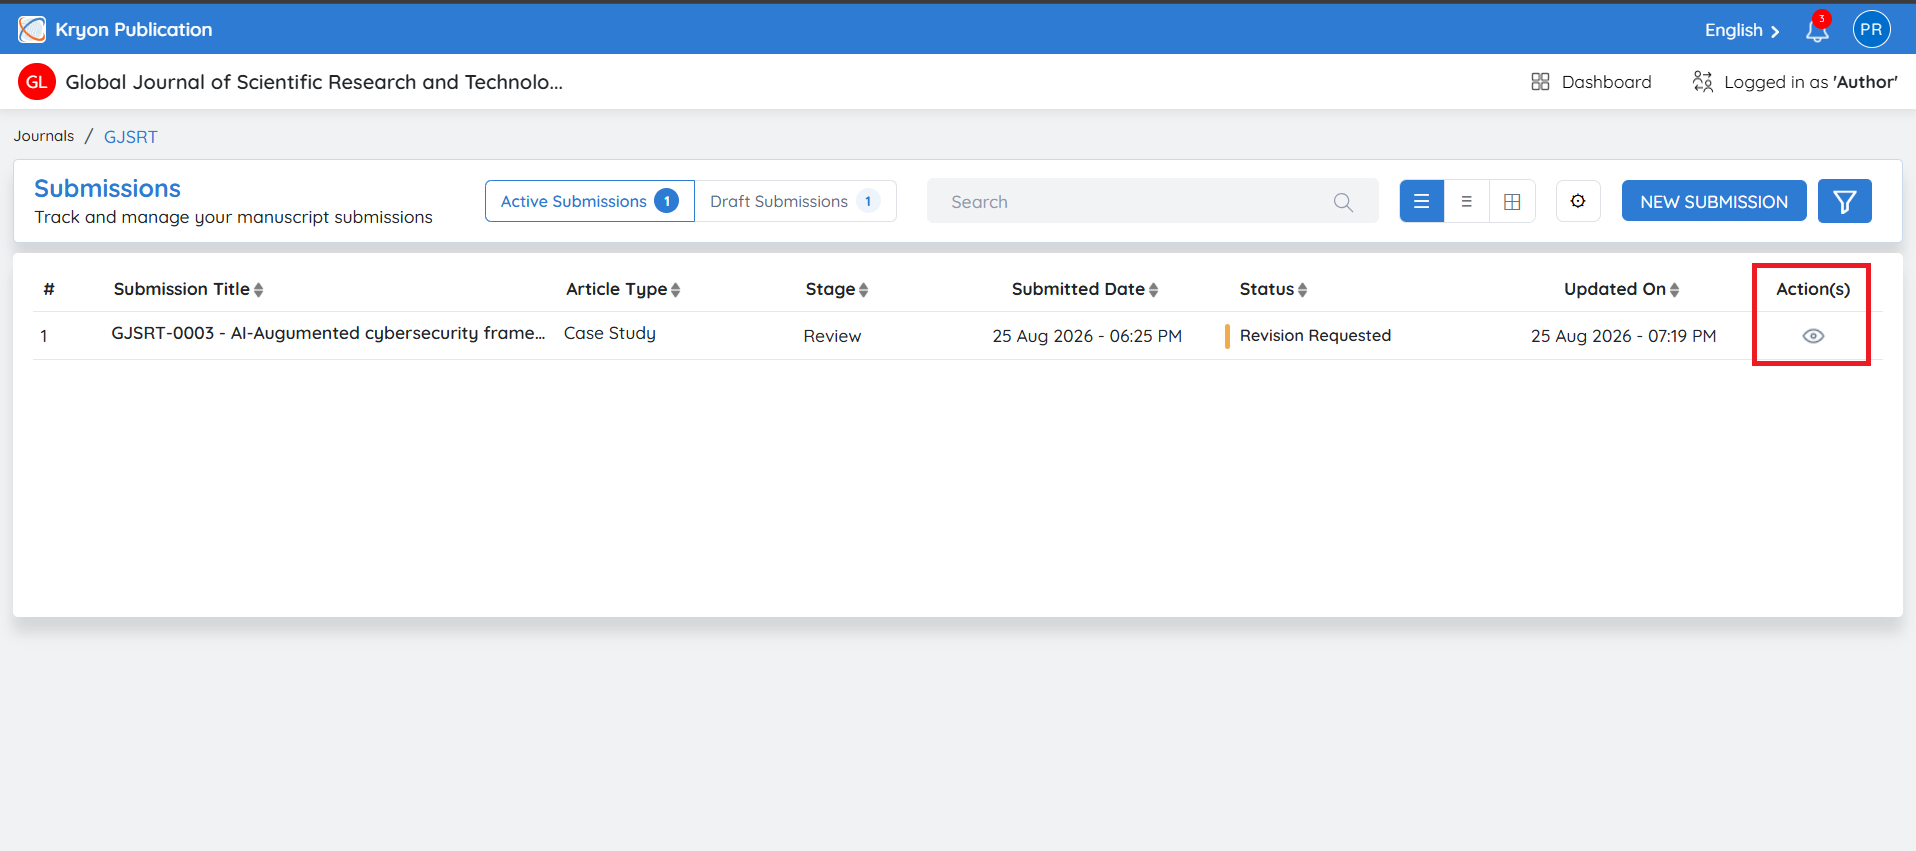
Click the View icon under Action(s) to open the manuscript.
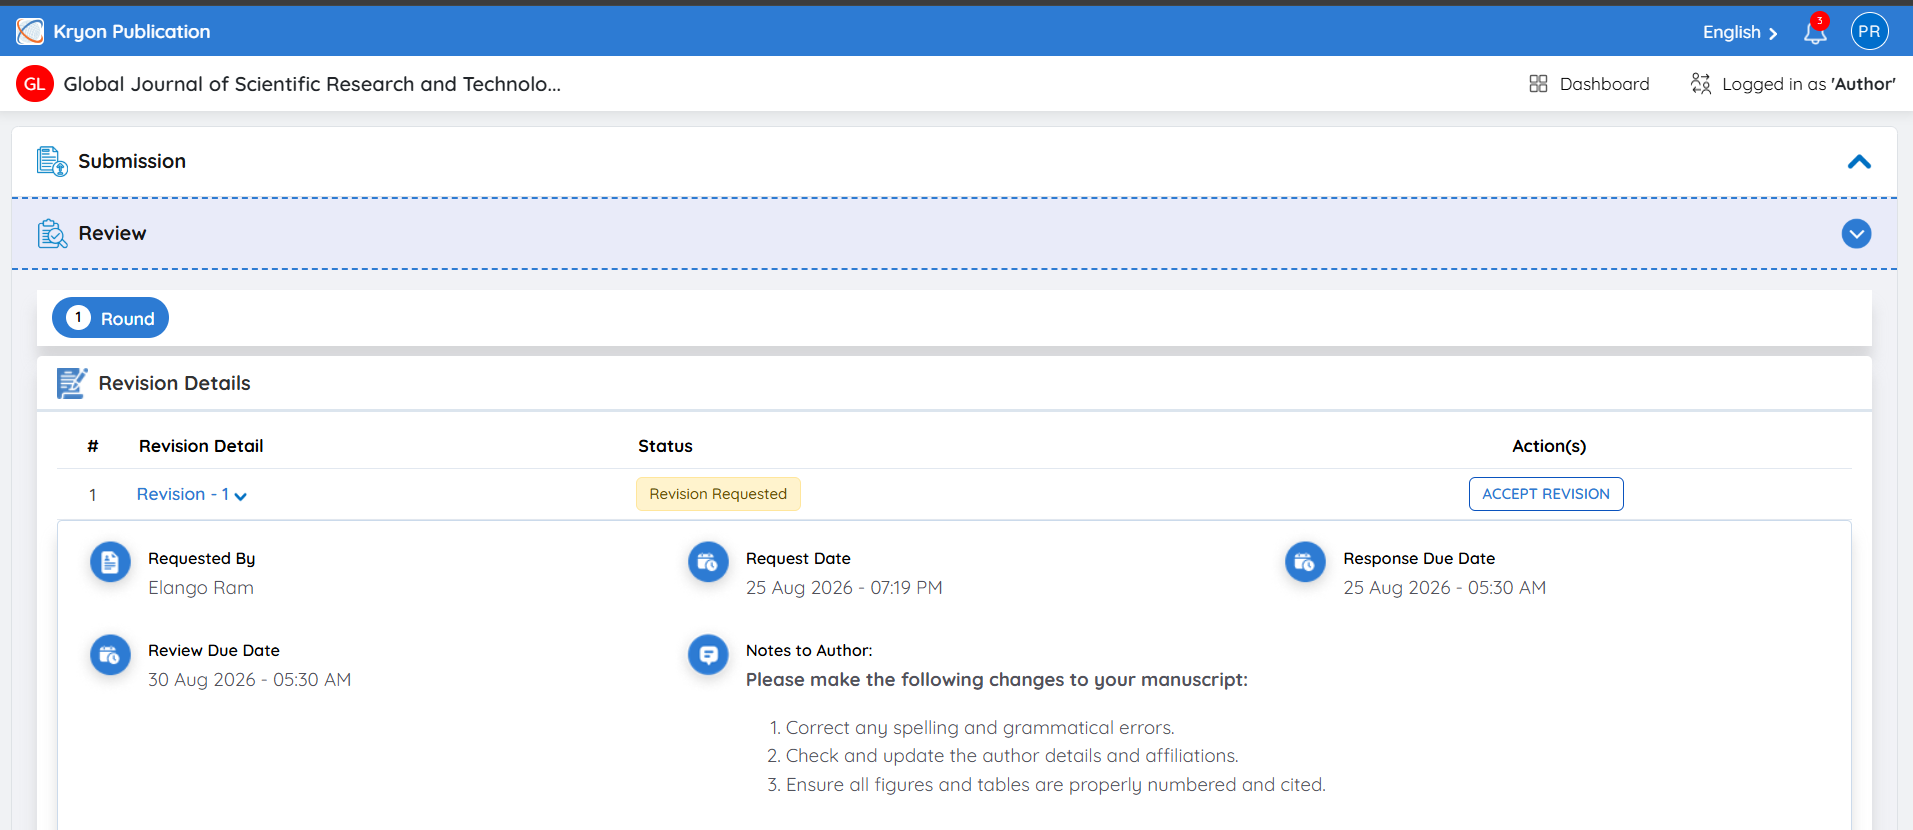
Expand the Review section. Under Revision Details, the revision request will be displayed with the status Revision Requested.
Click Revision – 1 to expand the request and view:
-
Requested By – Editorial user who requested the revision.
-
Request Date – Date and time the revision was requested.
-
Response Due Date – Deadline for the author to respond to the revision request.
-
Review Due Date – Deadline for submitting the revised manuscript.
-
Notes to Author – Reviewer comments and revision instructions shared by the editorial user.
The author can review these comments before accepting the revision request.
Step 3: Accept the Revision Request
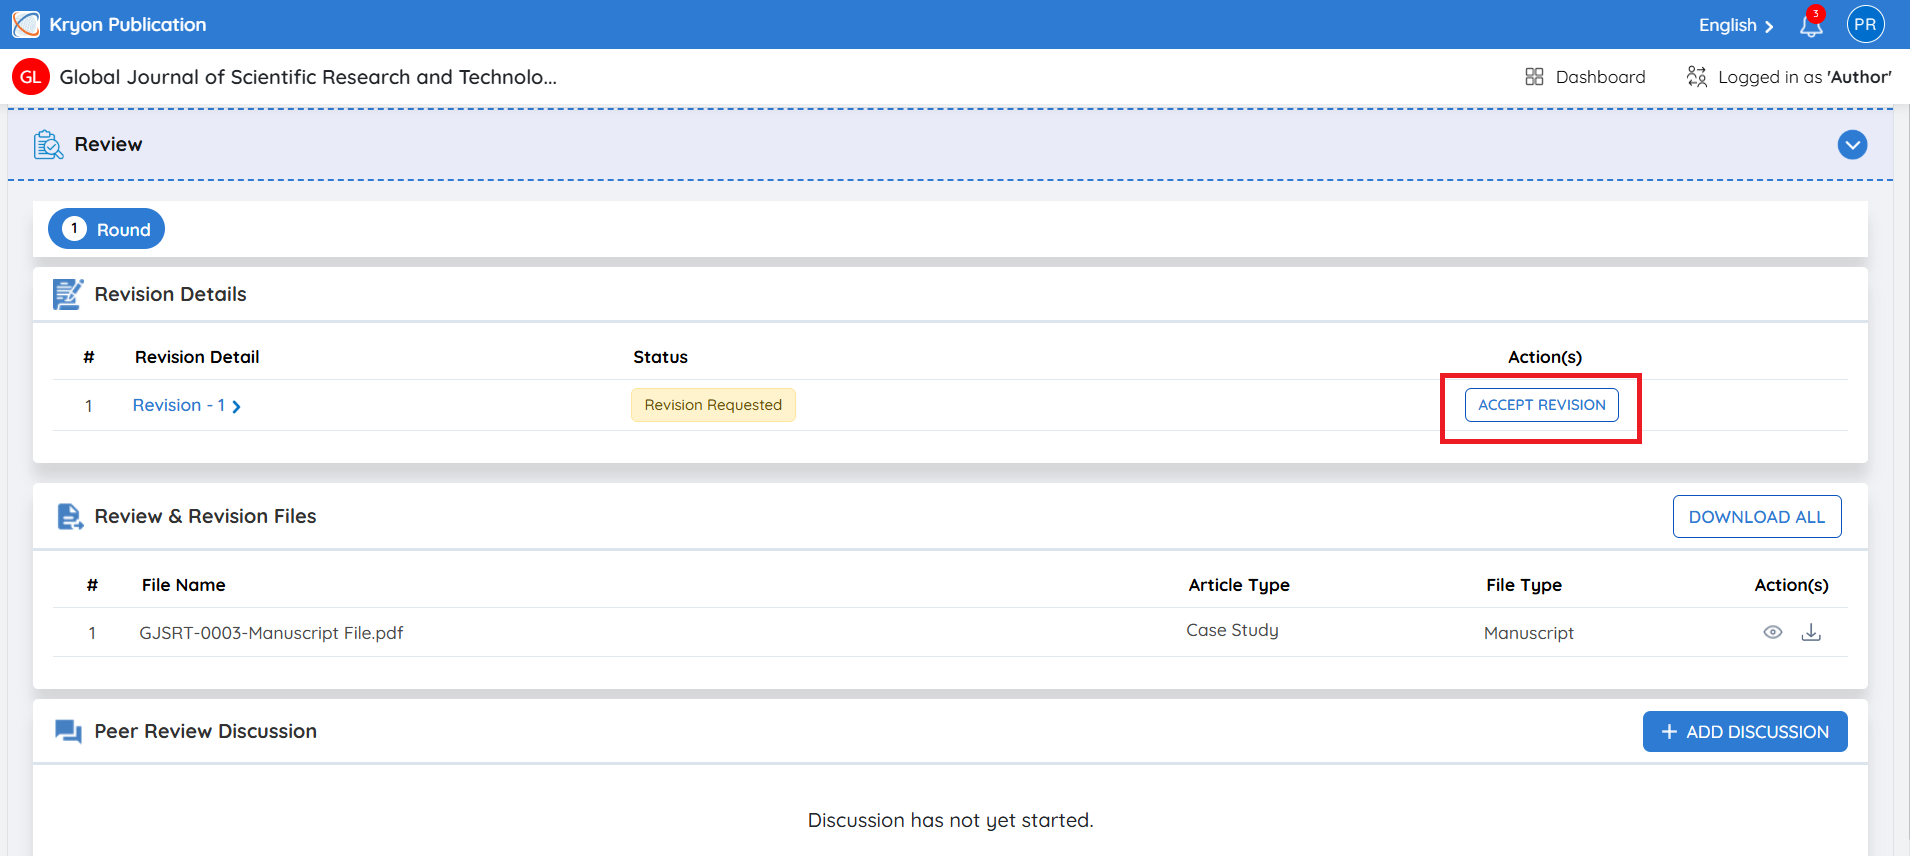
After reviewing the revision details, click Accept Revision. This action serves as the author’s acknowledgement that the revision request has been received and accepted.
A confirmation message will appear asking whether you want to accept the revision request.
Click Yes to continue.
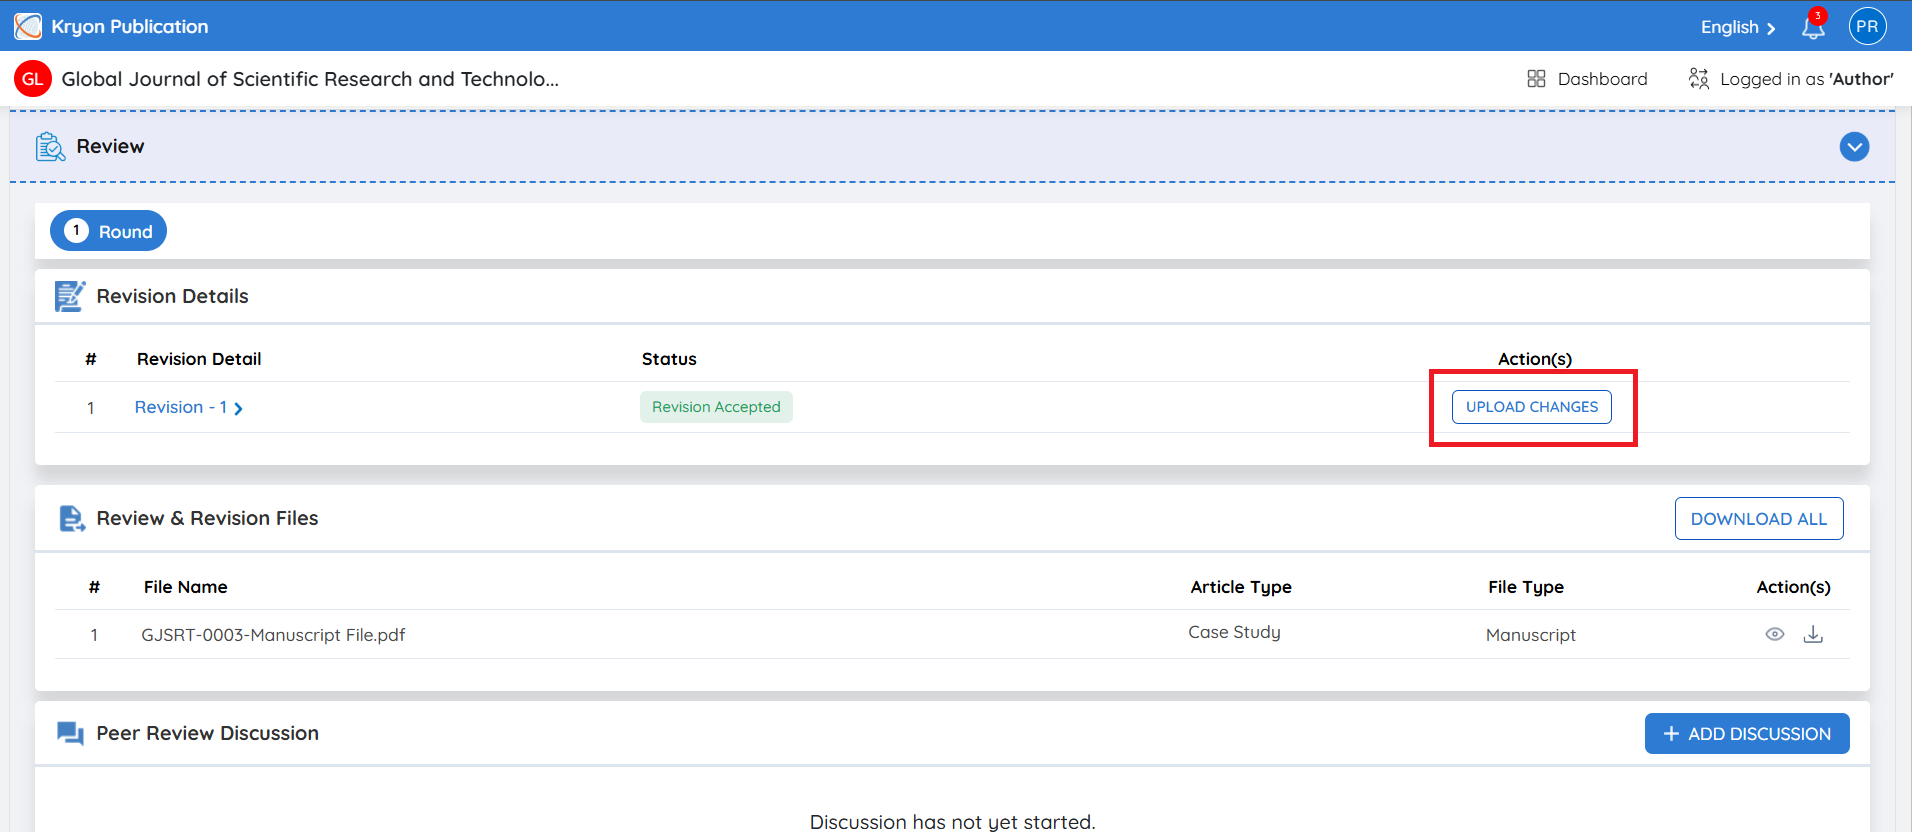
Once accepted, the revision status changes from Revision Requested to Revision Accepted, and the Upload Changes option becomes available.
Step 4: Upload the Revised Files
After making the requested changes to the manuscript, click Upload Changes.
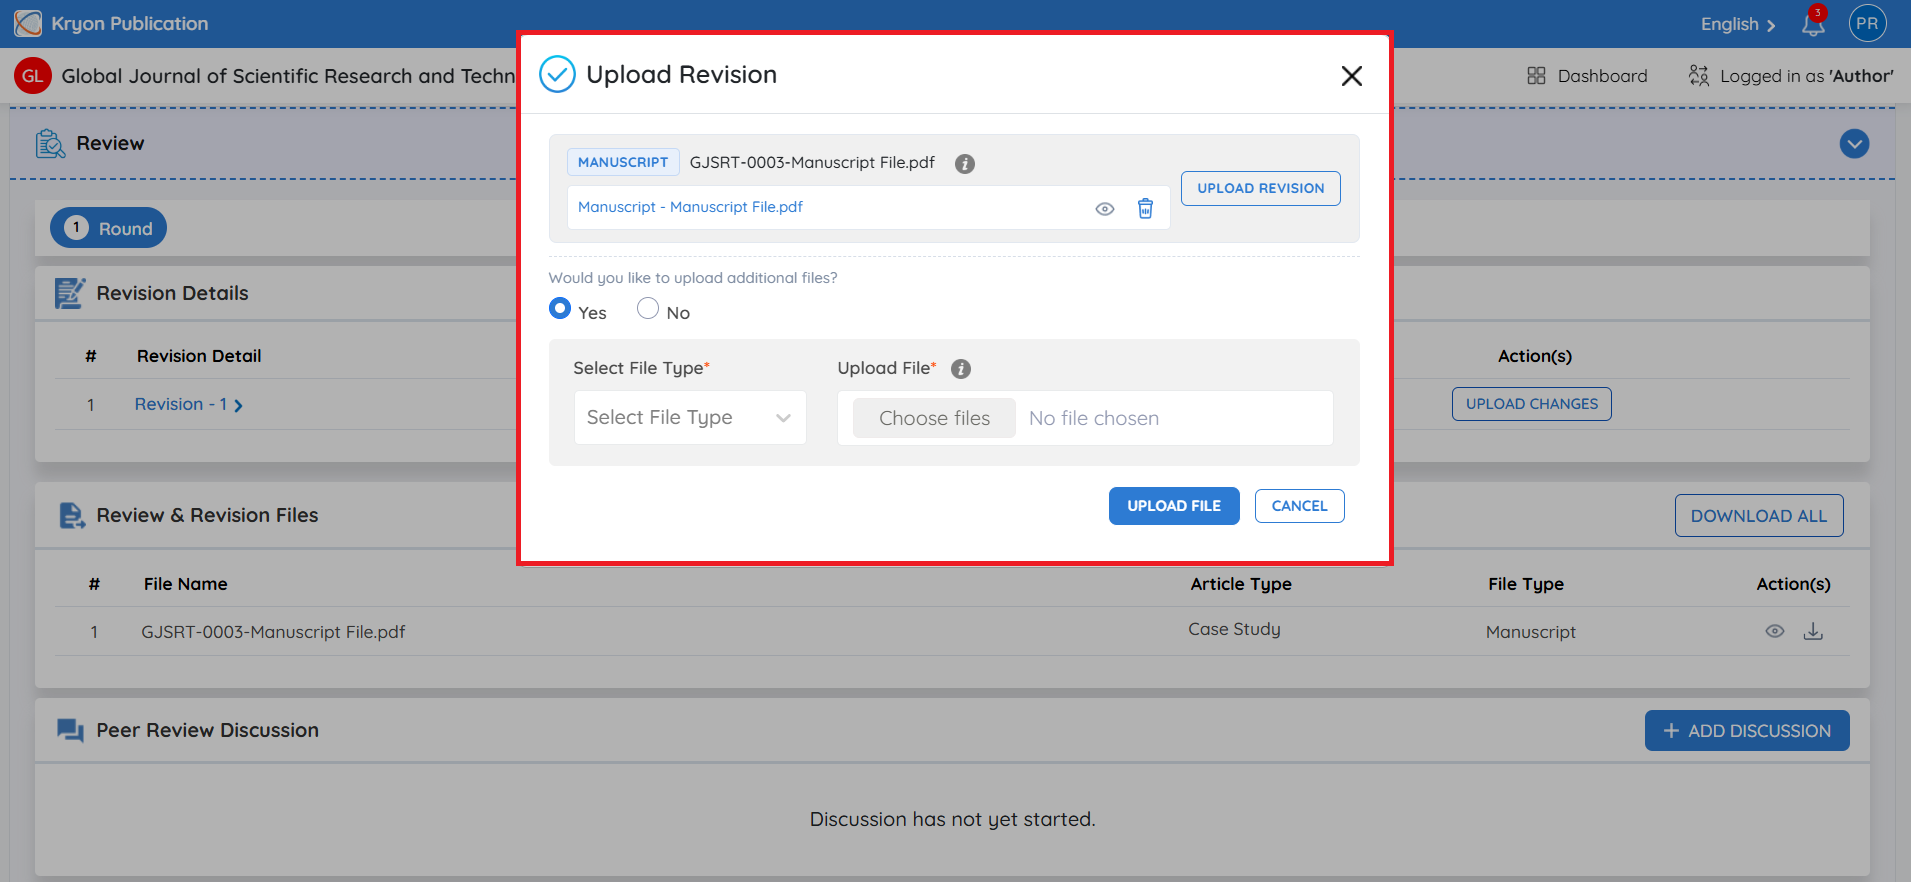
The Upload Revision window will display the files associated with the submission. Click Upload Revision against the relevant file type to upload its revised version.
If additional supporting files need to be included, select Yes under Would you like to upload additional files?
Once all revised and additional files have been added, click Upload File to proceed.
Step 5: View the Submitted Revision
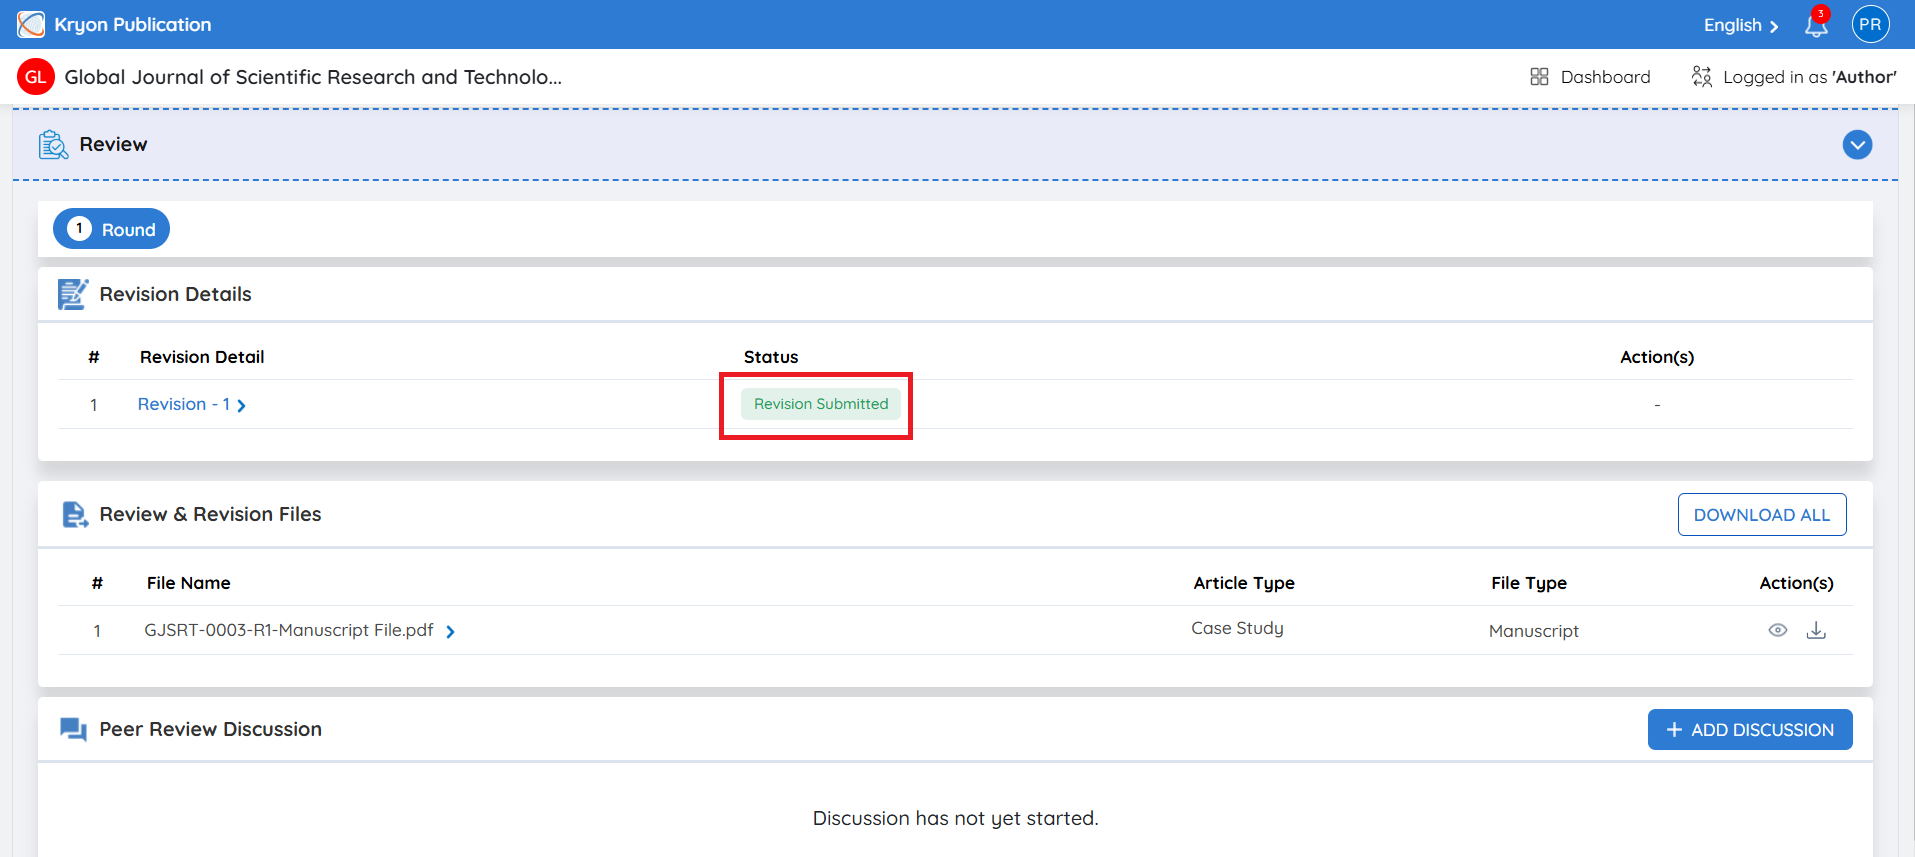
Once the revised files are successfully uploaded, the revision status changes to Revision Submitted.
Expand Revision – 1 to view the complete revision details. Under Changes Requested Files, both versions of the file are displayed:
-
Original File – Displays the original file for which the revision was requested.
-
Updated File – Displays the revised file uploaded in response to the revision request.
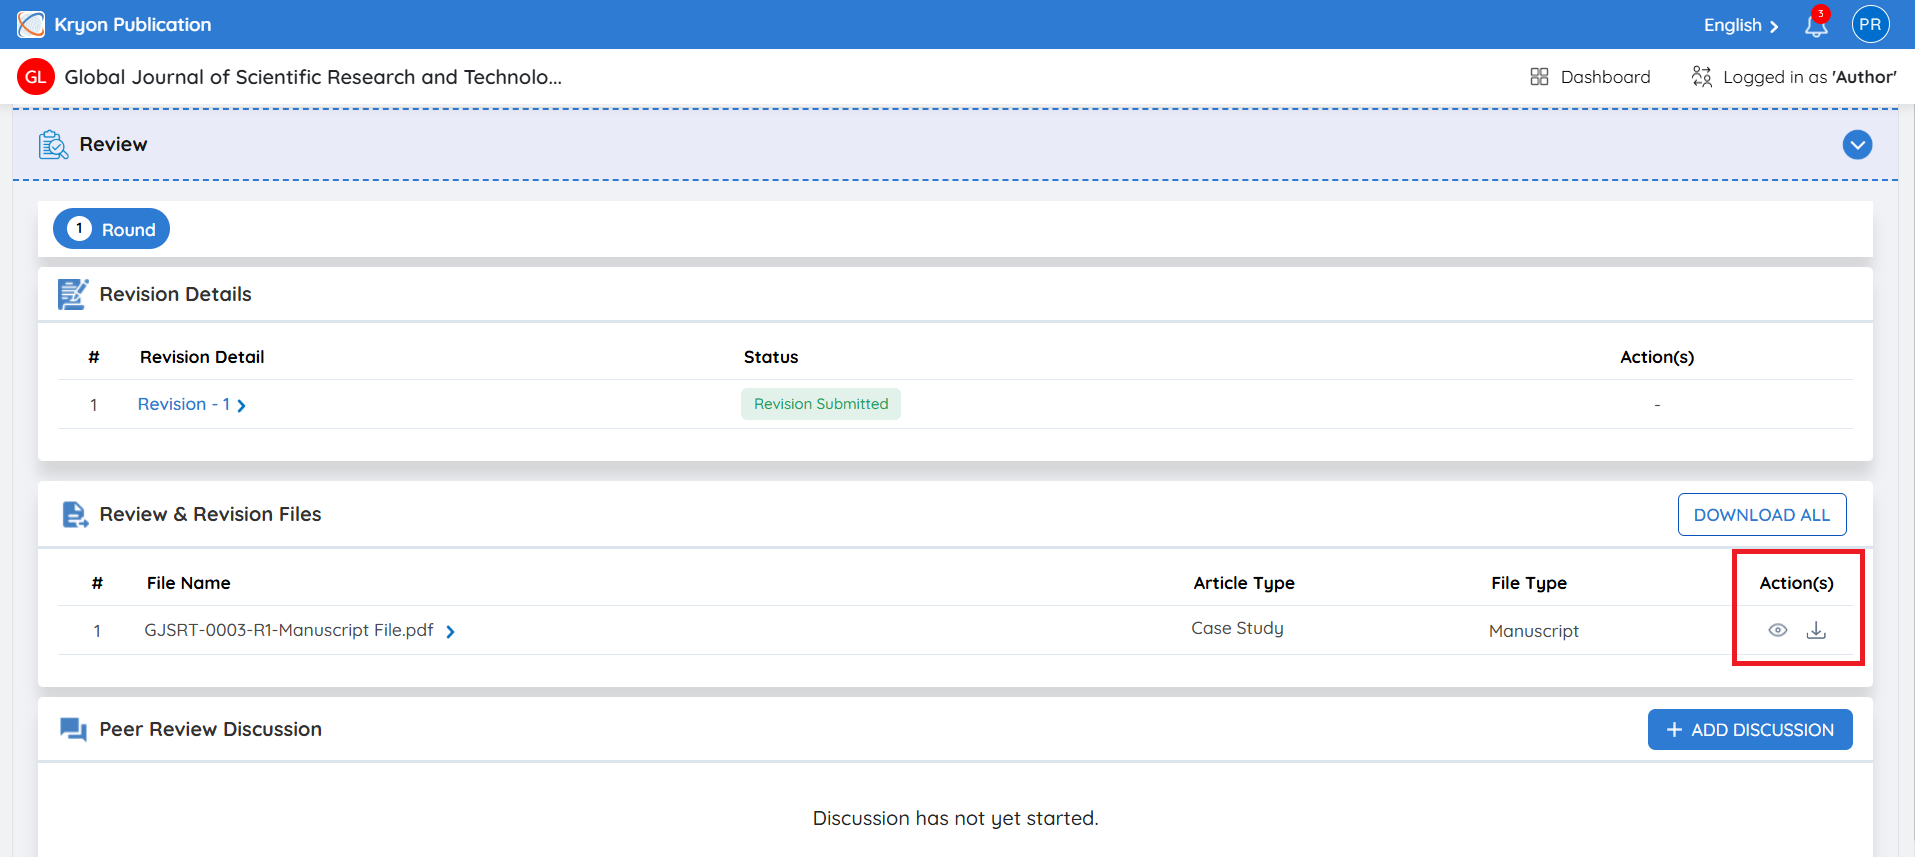
The View and Download icons can be used to review both versions of the files.
The Uploaded Date indicates when the revised file was submitted. s
FAQ
What should the author do if the wrong revised file is submitted by mistake?
If the author accidentally submits an incorrect file, the author should notify the editorial user through the Discussion section and request another revision opportunity.
The editorial user can then request a revision again, allowing the author to upload and submit the correct file.