Managing Change Requests in the Submission Stage
Now, let’s see what happens from the author’s side when an editorial user requests changes to a manuscript.
When the editorial team identifies corrections during the initial screening and submits a Request Changes action, the author will receive an email notification informing them that changes are required.
The author can then review the editor’s instructions, acknowledge the change request, revise the required files, and upload the corrected version directly through Kryoni JMS.
Step 1: Access the Manuscript
Log in to Kryoni JMS using the Author account.
Click the relevant Journal Name to open the journal’s submission page.
Under Active Submissions, locate the manuscript for which changes have been requested.
The manuscript status will now display:
Requested Changes
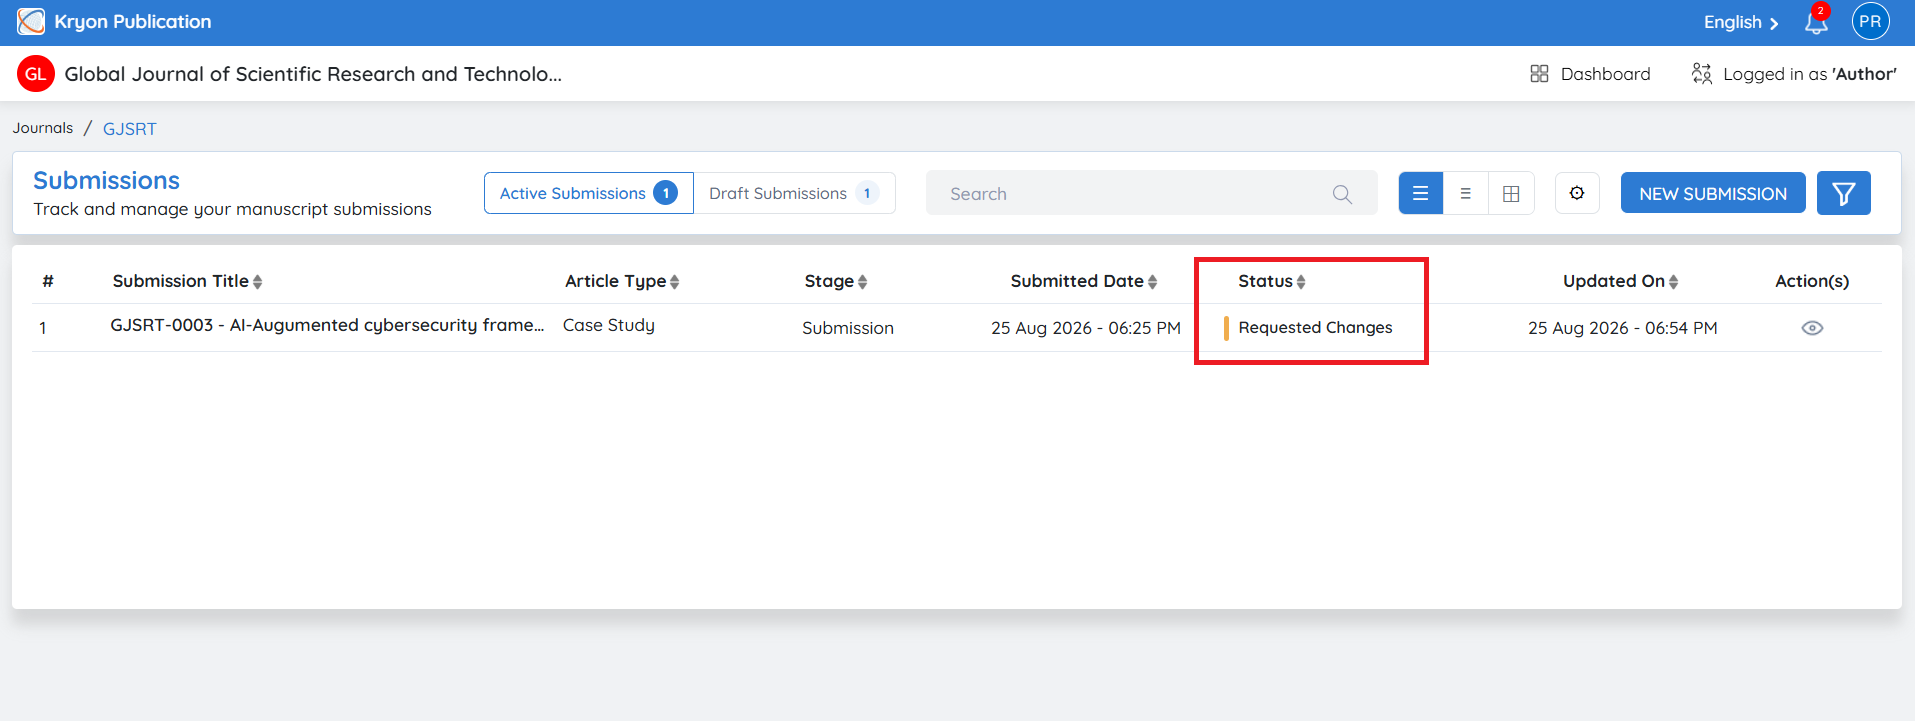
This allows the author to quickly identify submissions that require action.
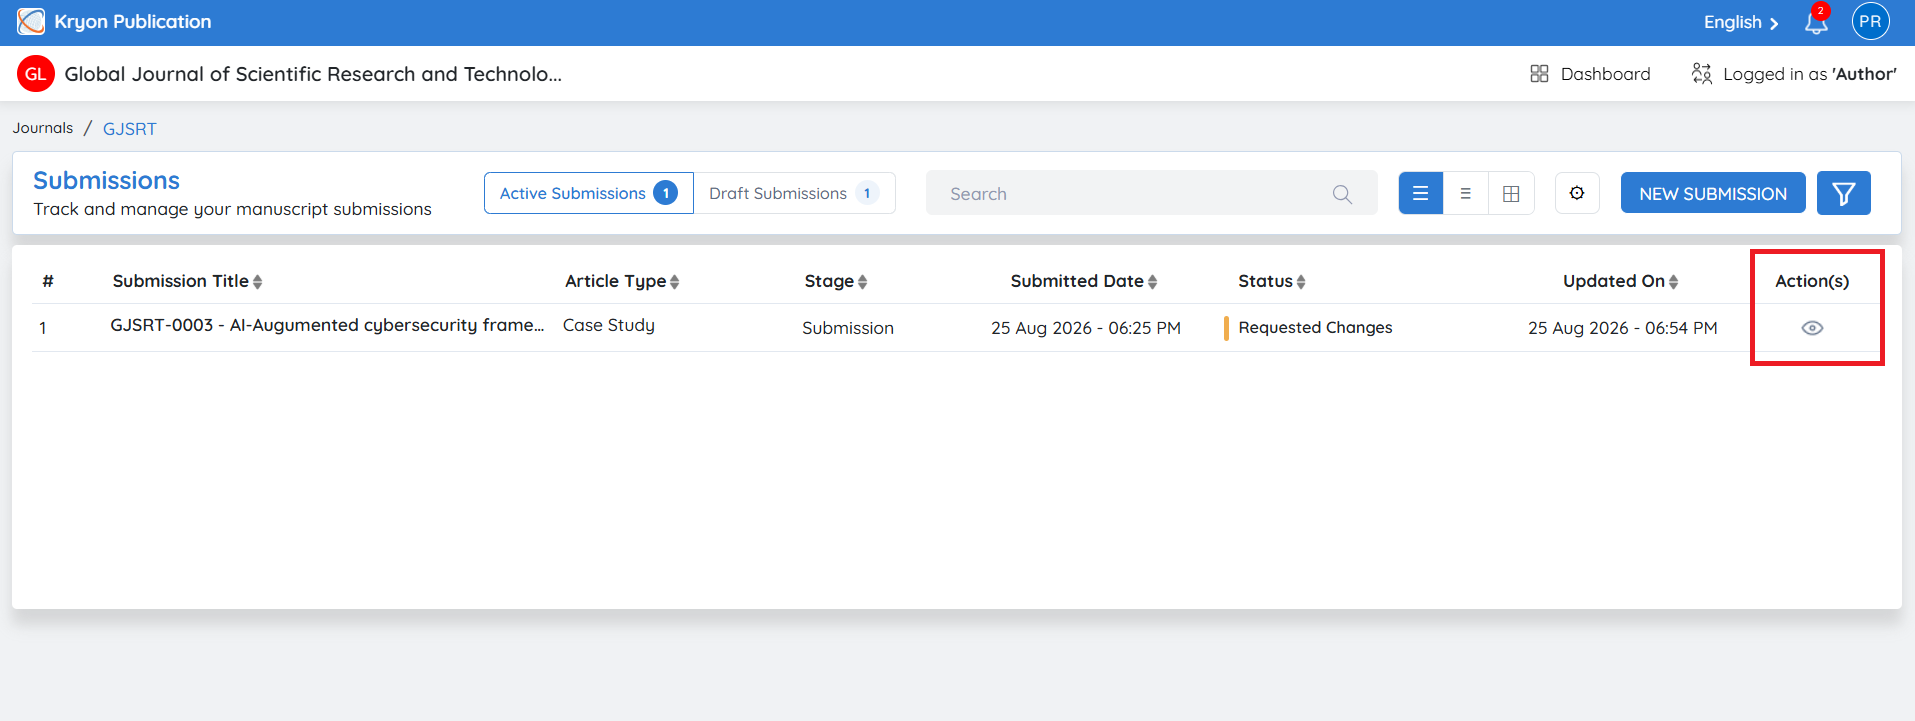
Click the View icon under Action(s) to open the manuscript.
Step 2: Review the Requested Change
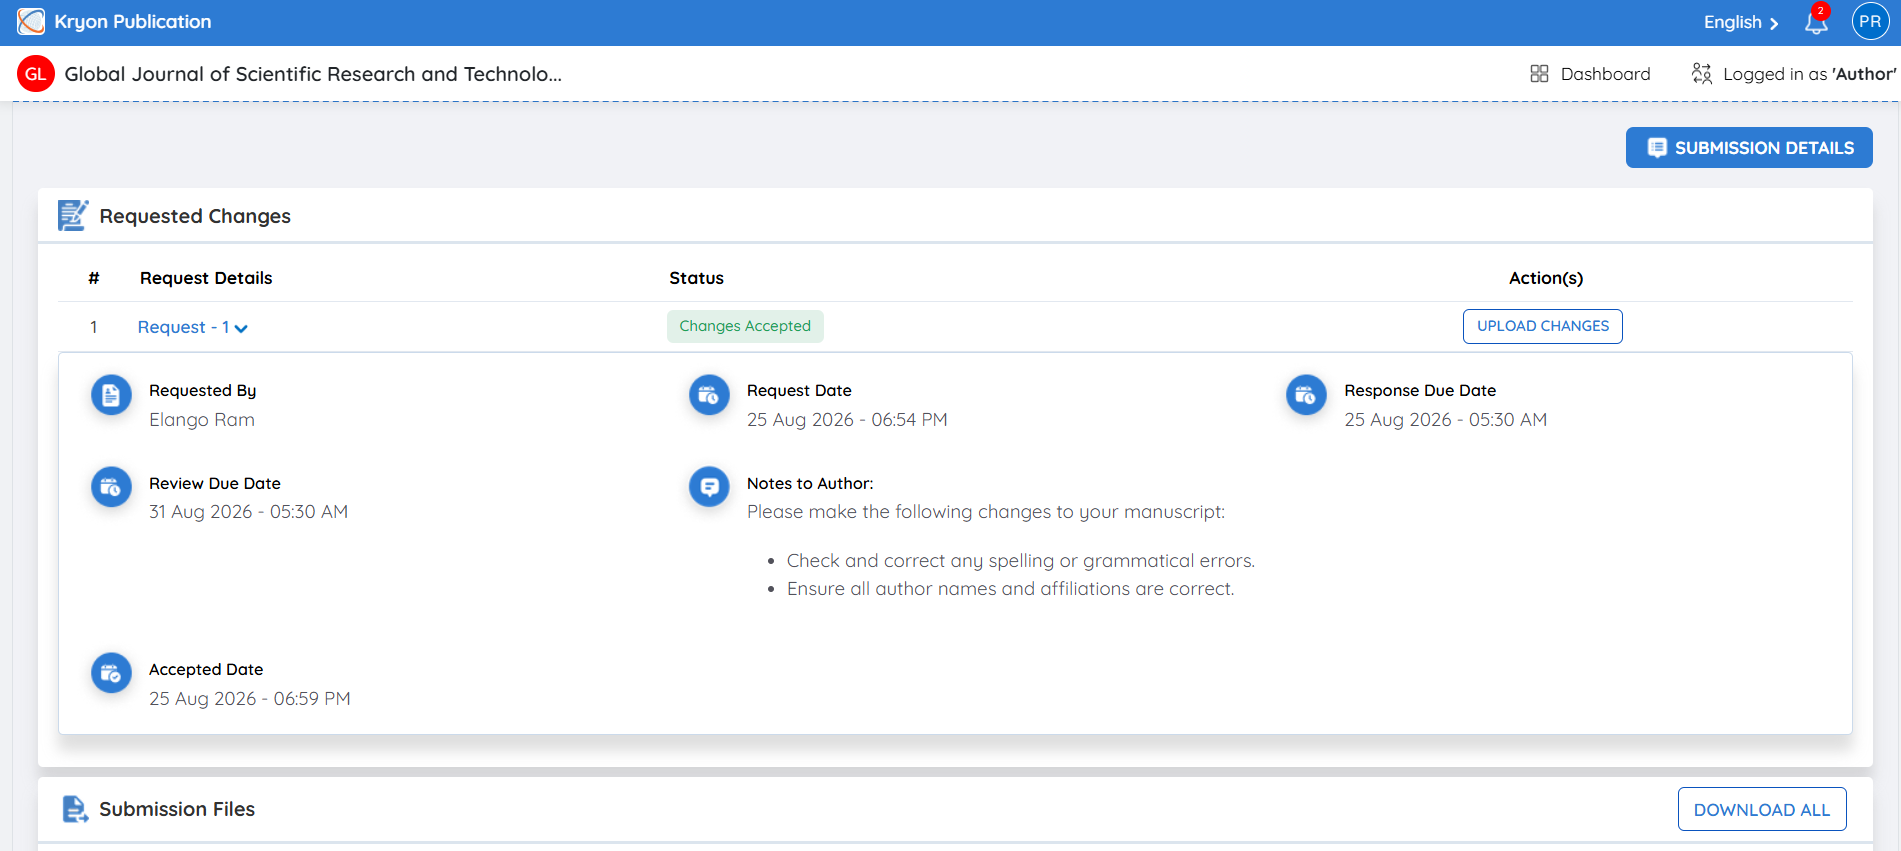
Inside the manuscript, the Requested Changes section displays all change requests received from the editorial team.
Each request is listed separately, for example:
Request – 1
Click the request to expand and view the complete instructions.
The author can review:
-
Requested By – Editorial user who initiated the request
-
Request Date – Date and time the change request was raised
-
**Response Due Date **– Deadline for acknowledging/responding to the request
-
Review Due Date – Deadline associated with completing the requested revision
-
Notes to Author – Detailed corrections or instructions provided by the editorial user
The author should carefully review all instructions before making changes to the manuscript.
Step 3: Accept the Change Request
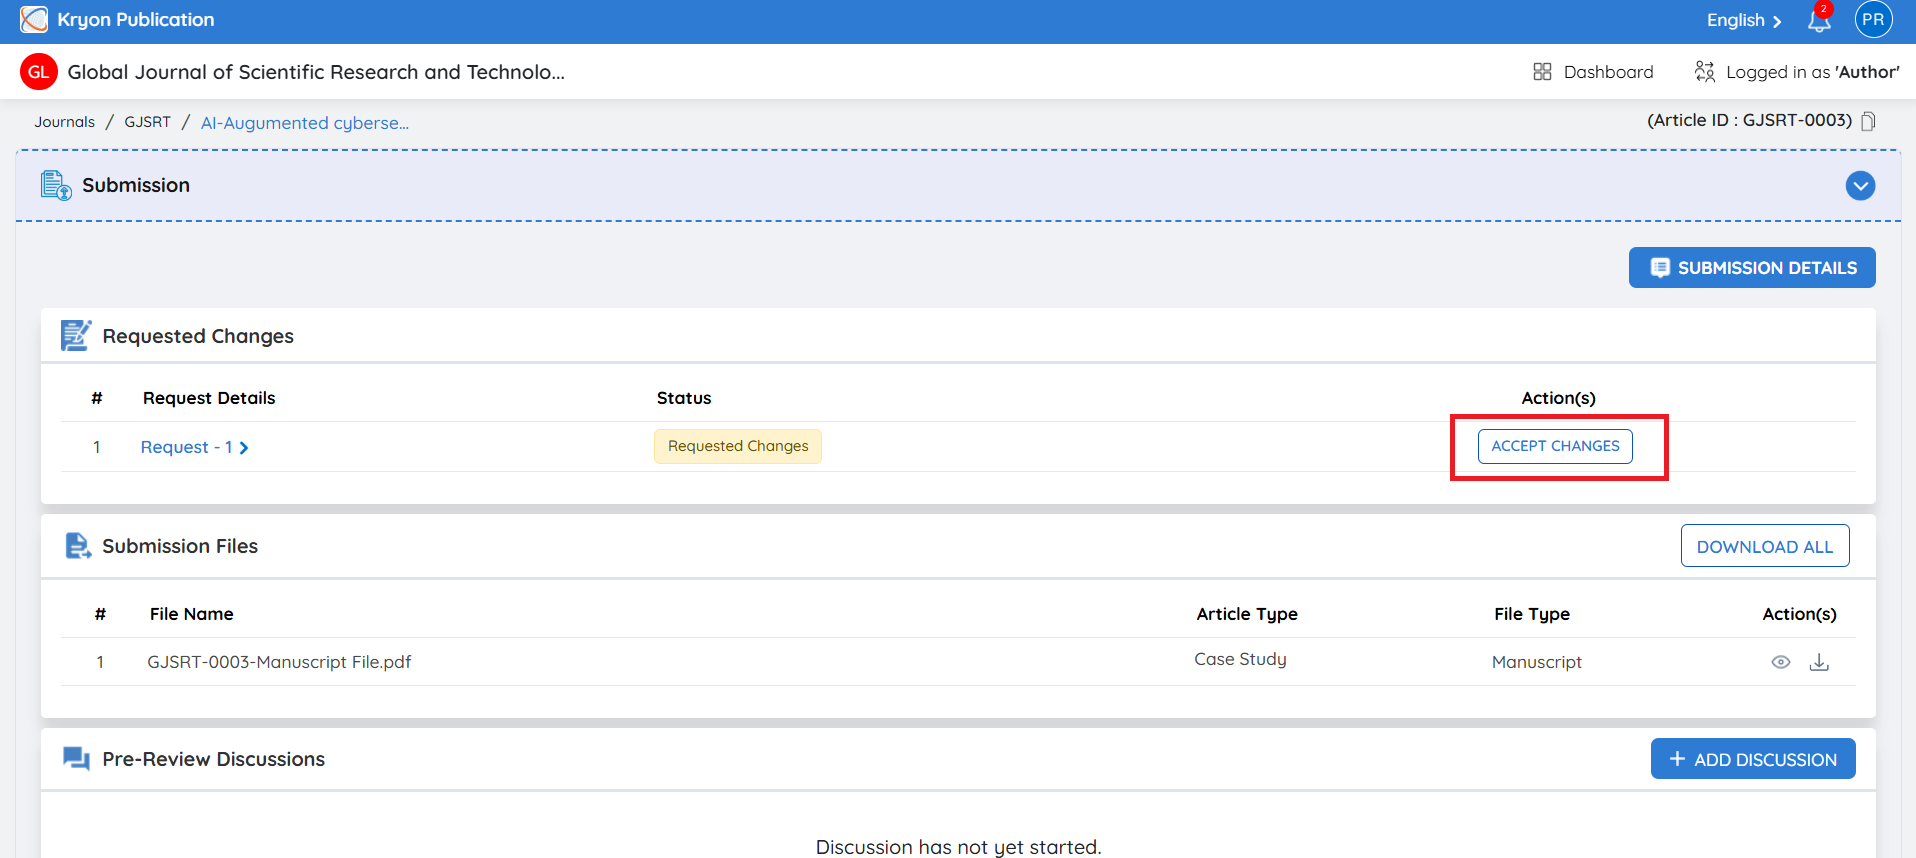
After reviewing the editor’s instructions, click Accept Changes under the Action(s) column.
This action serves as an acknowledgement that the author has received and accepted the revision request.
A confirmation message will appear:
Are you sure you want to accept the revision request?
Click Yes to continue.
Once accepted, the status of the request will change accordingly, and the author can proceed with preparing the revised files.
Important: Accepting the change request does not mean that the requested corrections have been completed. It only confirms that the author has acknowledged the editor’s request.
Step 4: Make the Requested Corrections
The author should now revise the manuscript according to the instructions provided by the editorial user.
Depending on the request, this may include:
-
Correcting the manuscript content or formatting
-
Updating author or affiliation information
-
Correcting figures or tables
-
Adding missing declarations
-
Updating the Conflict of Interest information
-
Correcting references or citations
The author should ensure that all requested corrections are completed before uploading the revised files.
Step 5: Upload the Revised Files
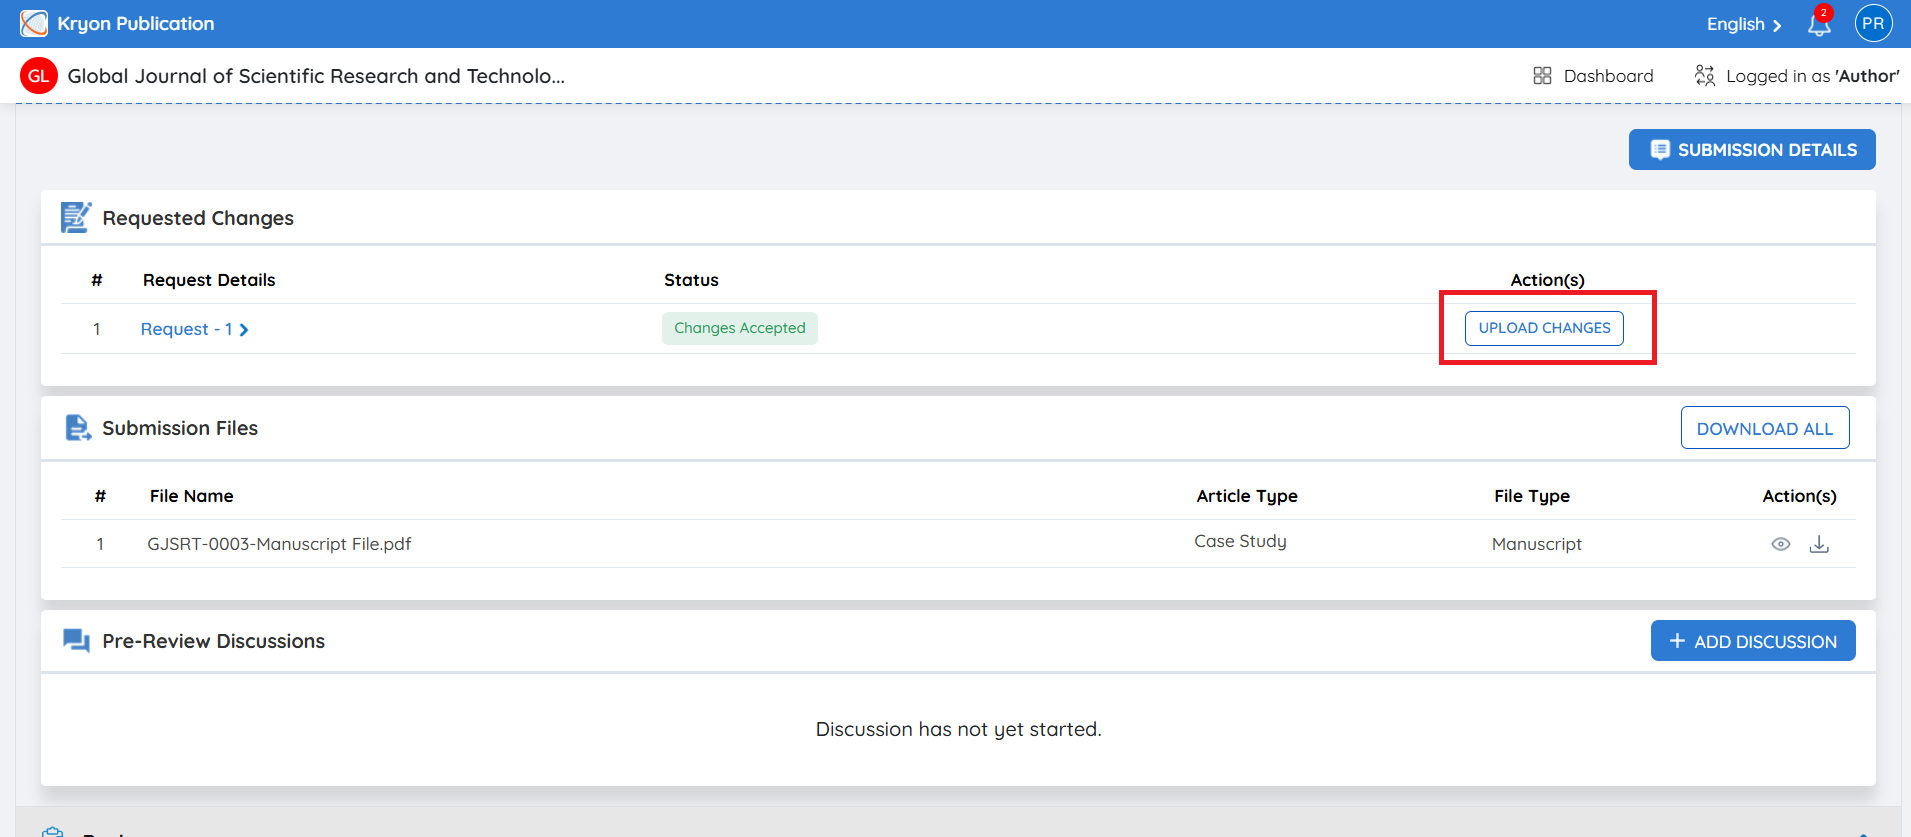
Once the required corrections are completed, return to the Requested Changes section.
Click Upload Changes.
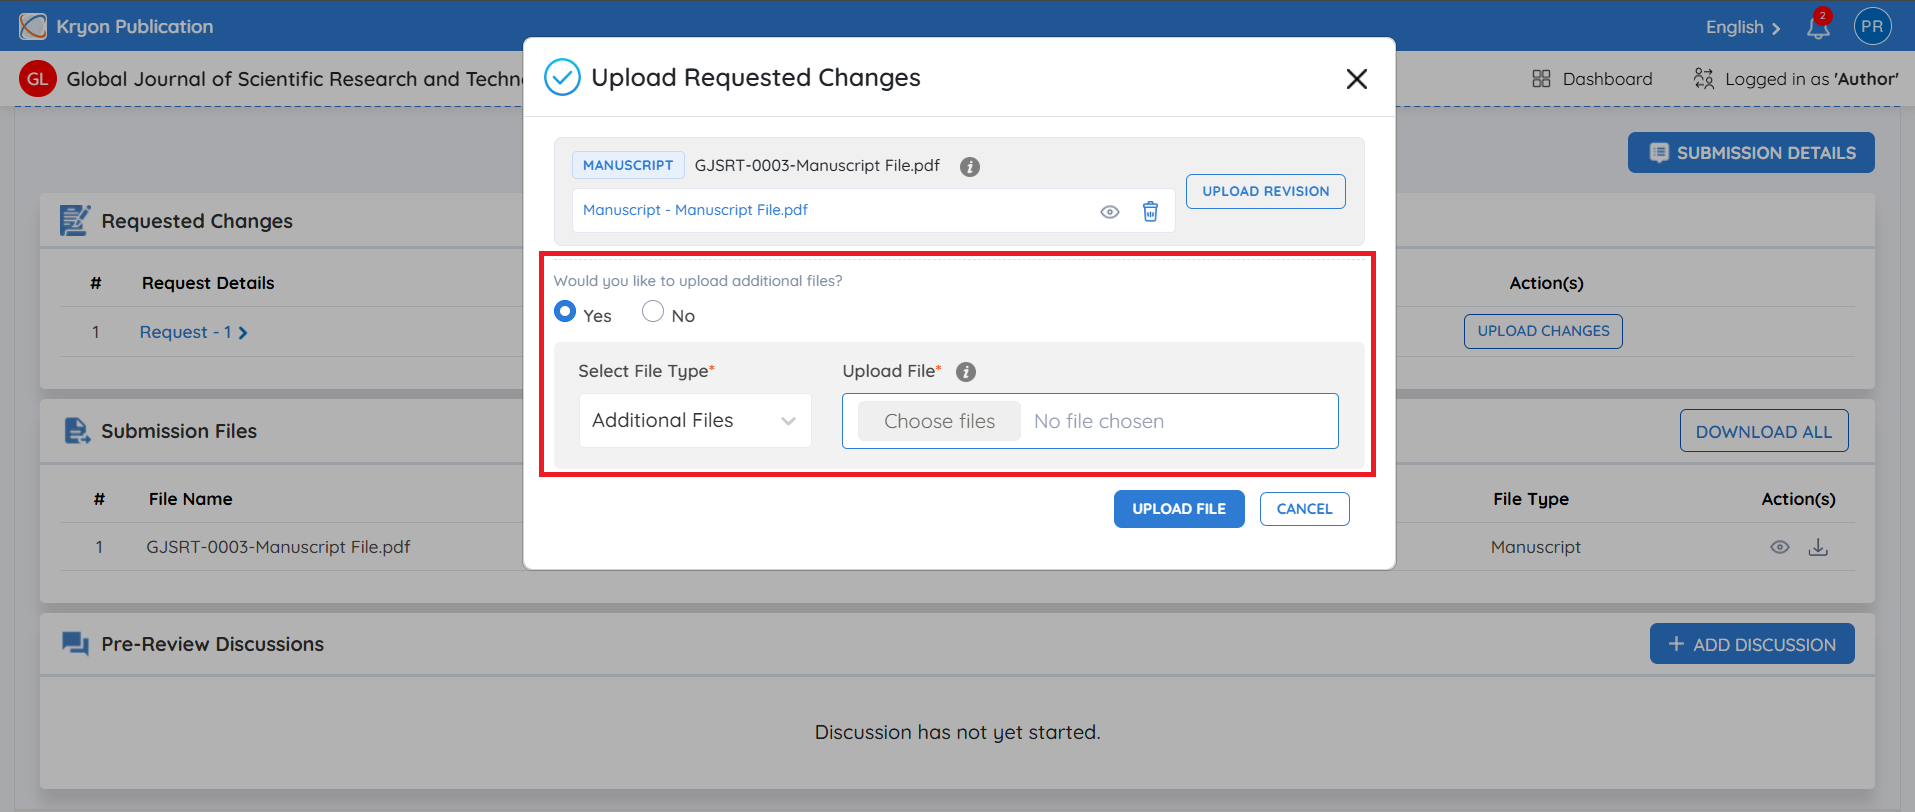
The Upload Requested Changes window will open.
The system displays the files associated with the original submission along with their respective File Types.
For example:
-
Manuscript
-
Source Files
Click Upload Revision next to the appropriate file type.
Example:
If the editorial user has requested corrections to the manuscript, locate the Manuscript file and click Upload Revision. Select and upload the corrected manuscript file.
The revised file should be uploaded against the corresponding original file type to ensure that the submission files remain correctly organized.
Repeat the process for every file that needs to be replaced.
Step 6: Upload Additional Files, If Required
The system will also display:
Would you like to upload additional files?
Select Yes if the requested changes require new files that were not part of the original submission.
Additional files may include:
-
Revised supplementary material
-
Additional figures or tables
-
Supporting documents
-
Updated declarations
If no additional files are required, select No.
Use Upload Revision when replacing or revising an existing submission file. Use the additional files option only when a new supporting file needs to be added.
Step 7: Submit the Revised Files
After uploading the corrected files and any required additional documents, verify that the correct files have been attached.
Click Upload File to complete the upload process.
The revised files will be submitted through the manuscript workflow and made available to the editorial team for further assessment.
Step 8: Changes Submitted
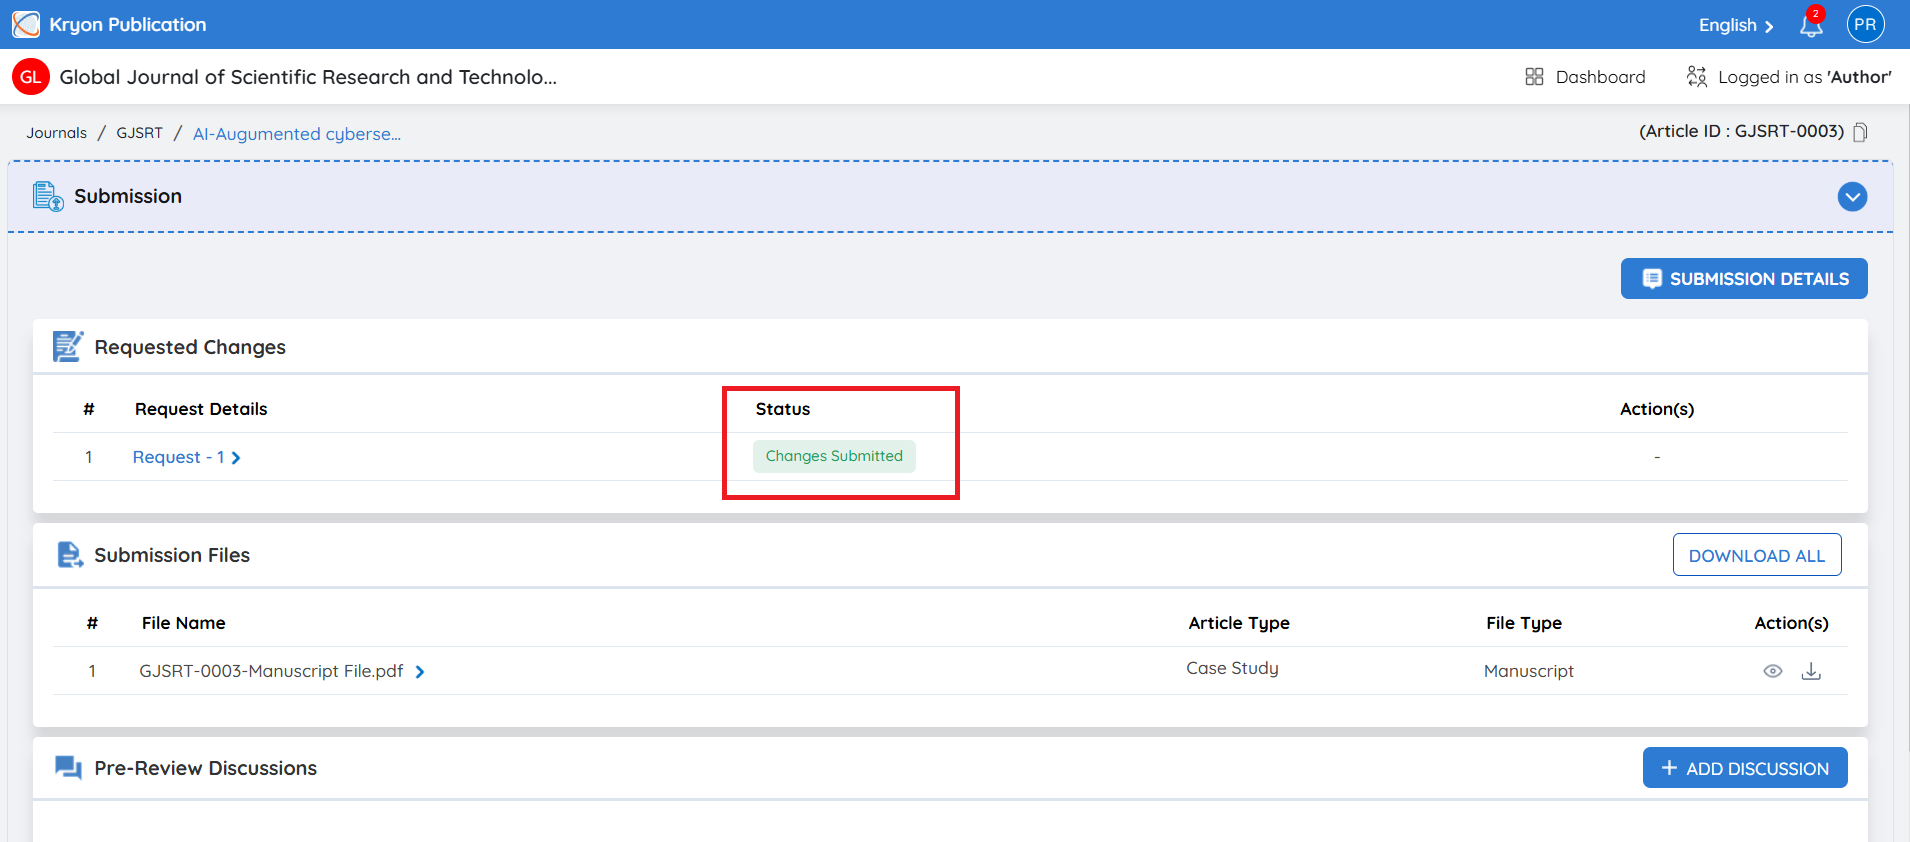
Once the revised files are successfully uploaded, the status of the change request will automatically update to Changes Submitted.
This confirms that the author has completed the requested revision process and submitted the updated files back to the editorial team.
The expanded Requested Changes section will display the complete revision record, including:
-
Requested By – Editorial user who initiated the change request
-
Request Date – Date and time the changes were requested
-
Accepted Date – Date and time the author acknowledged the request
-
Response Due Date – Deadline provided for responding to the request
-
Review Due Date – Deadline for completing the requested revisions
-
Notes to Author – Instructions provided by the editorial user
-
Uploaded Date – Date and time the revised files were submitted
-
Original File – The version available before the requested changes
-
Updated File – The revised version submitted in response to the request
The View and Download icons can be used to access the available files.
What Happens Next?
After the status changes to Changes Submitted, the revised manuscript becomes available to the editorial team for further evaluation.
The editorial user can compare the Original File with the Updated File to confirm that the requested corrections have been addressed.
If the manuscript satisfies the initial screening requirements, the editorial team can proceed with the next stage of the workflow, such as peer review.
If further corrections are required, the editorial user can initiate another change request.
The Changes Submitted status indicates that the revised files have been successfully submitted. It does not indicate editorial approval of the revisions; the editorial team must review the updated files before proceeding with the manuscript.