Users
The Users section in the JMS enables you to invite, add, and manage users within the system.
Inviting Users
The process of inviting a new user is straightforward:
1. Access the Invite User Option:
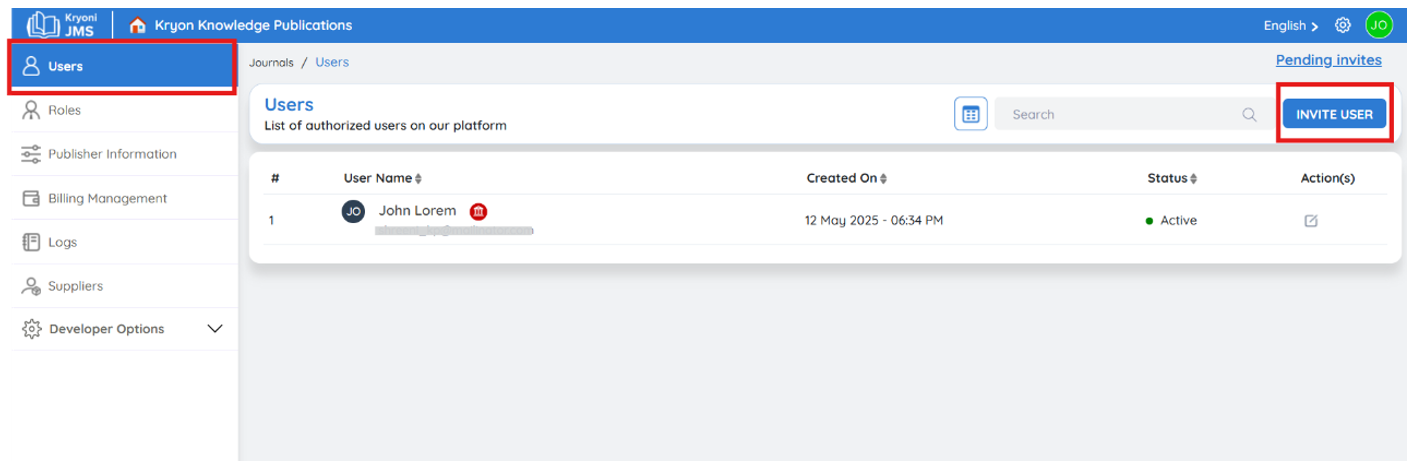
In the left-side menu, click on "Invite User" to open the invitation form.
2. Fill in the Invitation Form:
The form is divided into several sections to capture all necessary details:
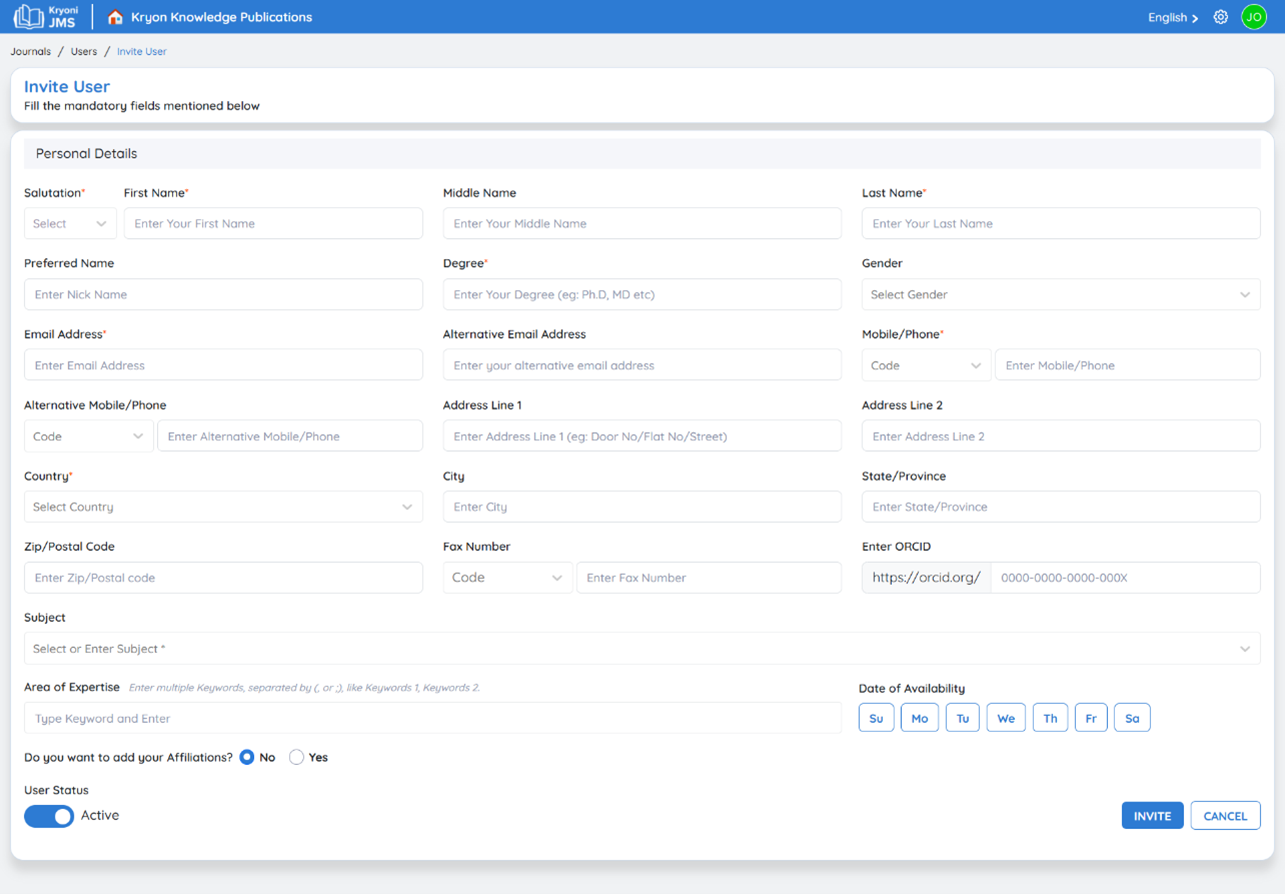
Personal Details
- Title: Choose the appropriate title from the dropdown (e.g., Mr., Ms., Dr.).
- First Name, Middle Name, Last Name: Enter the user's full name.
- Preferred Name: Optionally, enter a nickname or the name they prefer to be called.
- Degree: Provide academic or professional credentials (e.g., Ph.D, MD).
- Gender: Select the gender.
- Email Address: This is the primary email for communication.
- Alternative Email Address: (Optional) Provide a secondary email.
- Mobile Number: Include the country code along with the number.
- Alternative Mobile Number: (Optional) Add an alternate contact number.
- Address Details: Fill in Address Line 1, Address Line 2, Country, City, State/Province, and Zip/Postal Code.
- Fax Number: (Optional) Include if applicable.
- ORCID: Enter the ORCID identifier if available.
- Subject & Area Of Expertise: Select or input subjects and keywords that represent the user’s field of expertise.
- Date Of Availability: Indicate when the user is available.
User Status
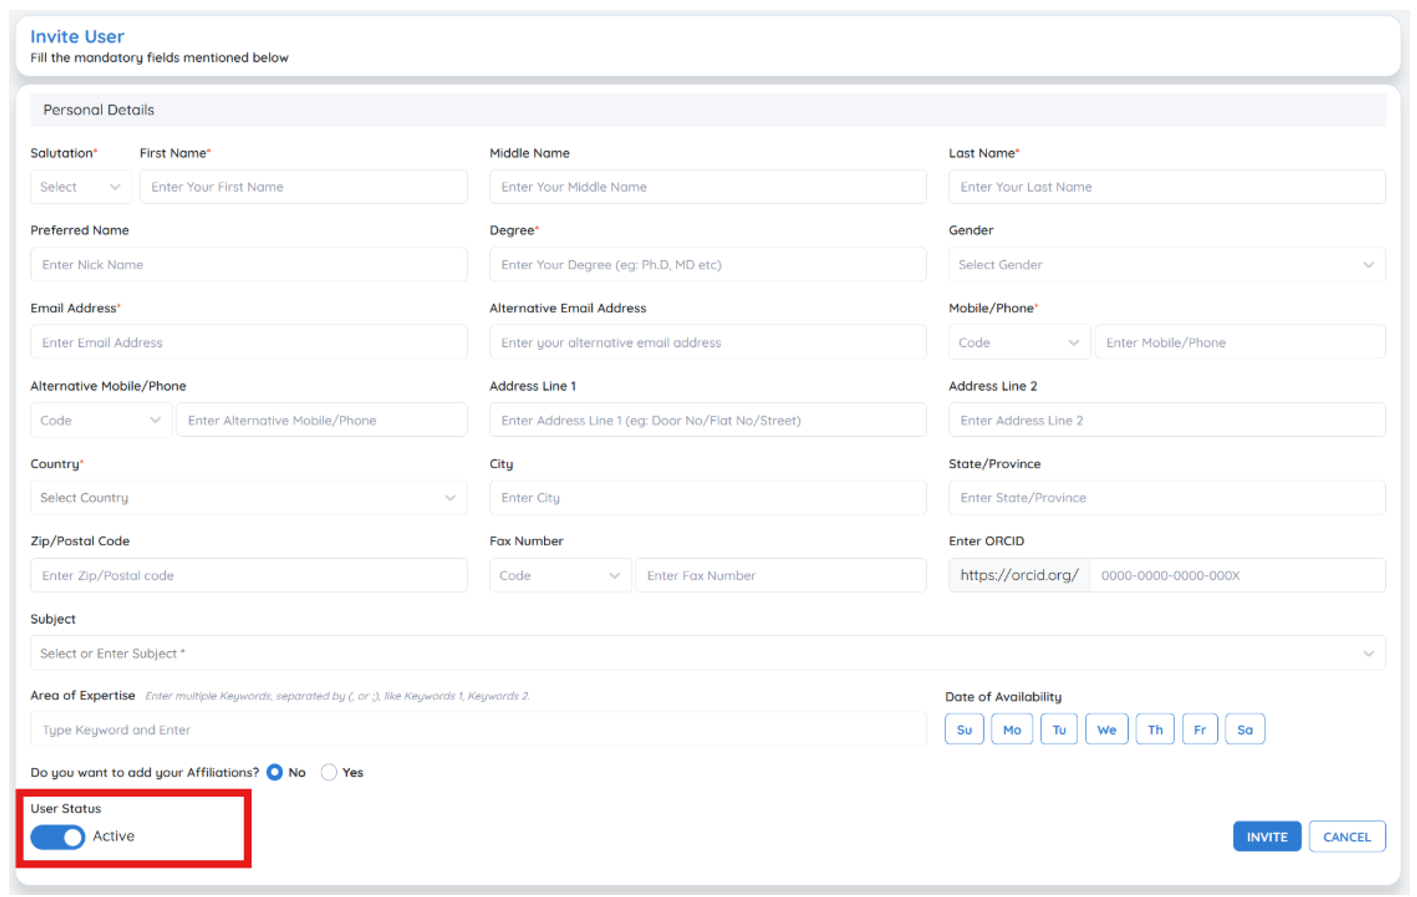
By default, the user status is set to Active, meaning the user is immediately enabled to access the JMS upon accepting the invitation. (If needed, you can adjust this setting to inactive)
Finalizing The Invitation
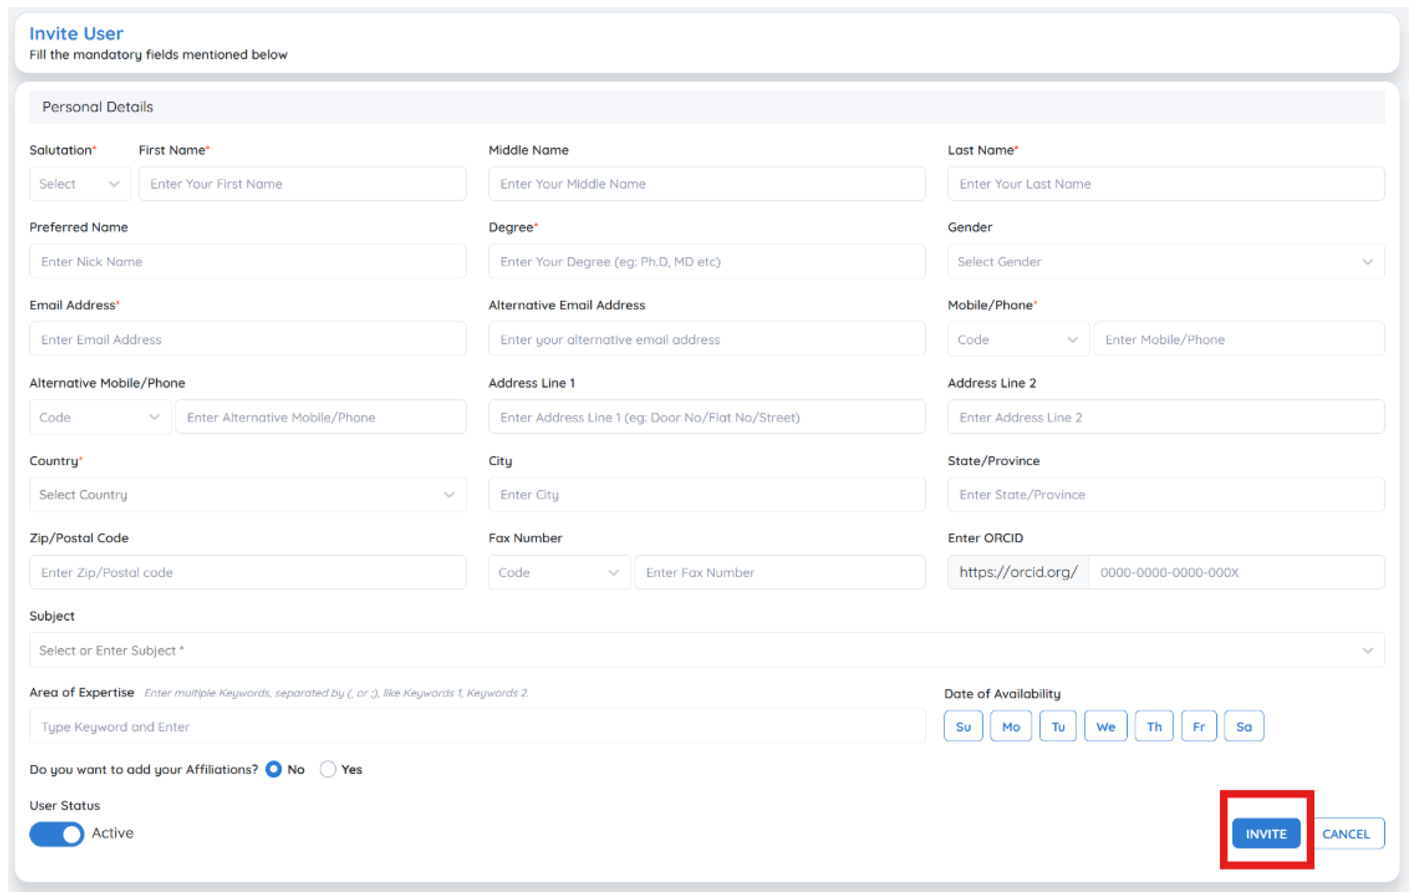
After completing all mandatory fields and verifying the information, click invite user. The new user will receive instructions on how to access the system and manage their tasks based on their assigned role.
This comprehensive approach to user management helps ensure a secure and efficient workflow within the JMS, providing every user with the appropriate level of access for their role in the publication process.
User Invited
Once a user is invited, their invitation appears in the pending invites section.
-
Pending Invites:
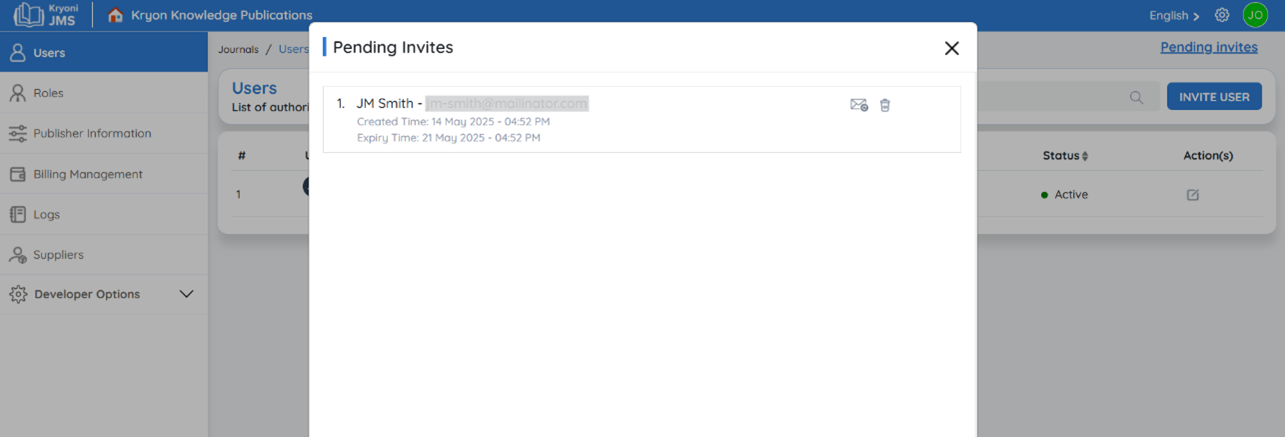
Any user who has been invited but has not yet accepted the invitation will be listed here. A notification email is sent to them, and their status remains "pending" until they complete the registration process.
-
Resend Invite:
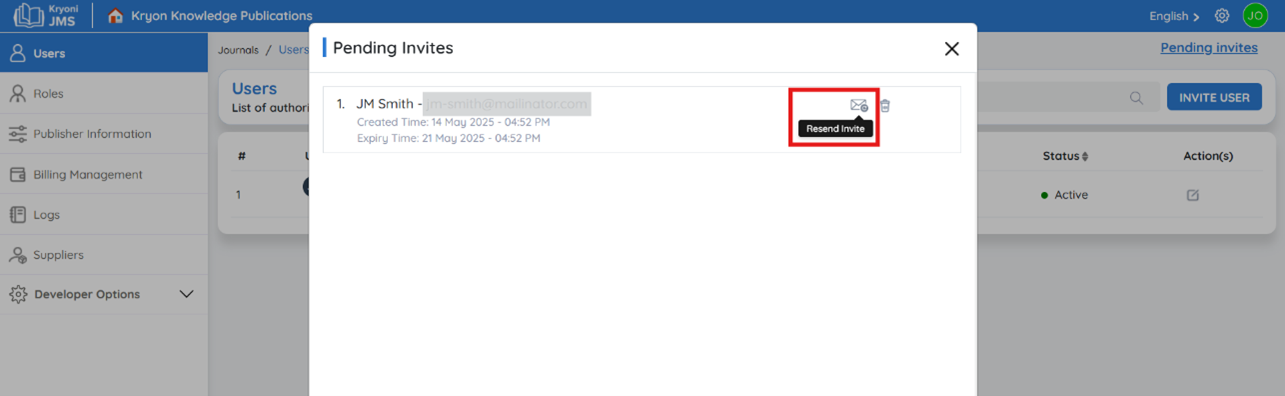
If needed, you can resend the invitation to ensure that the user receives the necessary information to join the system.
-
Pending Due Date:
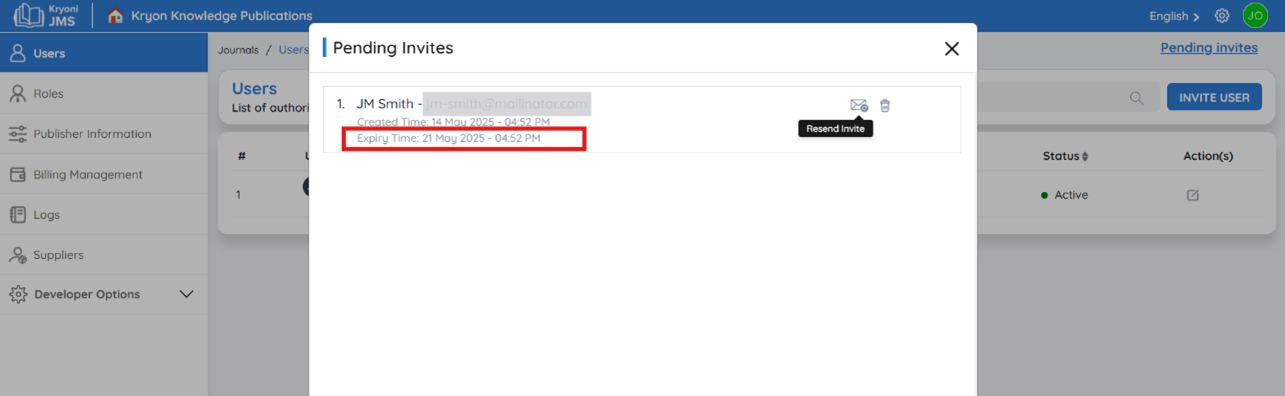
The due date for pending actions is clearly displayed, providing a timeline for the user to accept their invite and complete registration.
Bulk Import Users
If you have a list of users that need to be added to the system, you can use the Bulk Import feature to quickly upload multiple users at once.
Click on the Import Icon

- Locate and click on the Import icon to begin the bulk import process.
Upload the User List
- Prepare a user list in the required format (CSV, Excel, or as specified by the system).
- Click Upload File and select the document from your device.
Verify & Import
- Review the uploaded data to ensure all user details are correct.
- Click Import to add all users to the system in one action.
Invited User Login
Log In
- Sign in using your credentials.
- Once logged in, your dashboard will display a pending invite notification.
View the Invitation

- Click "View" to see the invitation details.
- You will see options to ACCEPT or DECLINE the invitation.
Accept the Invitation
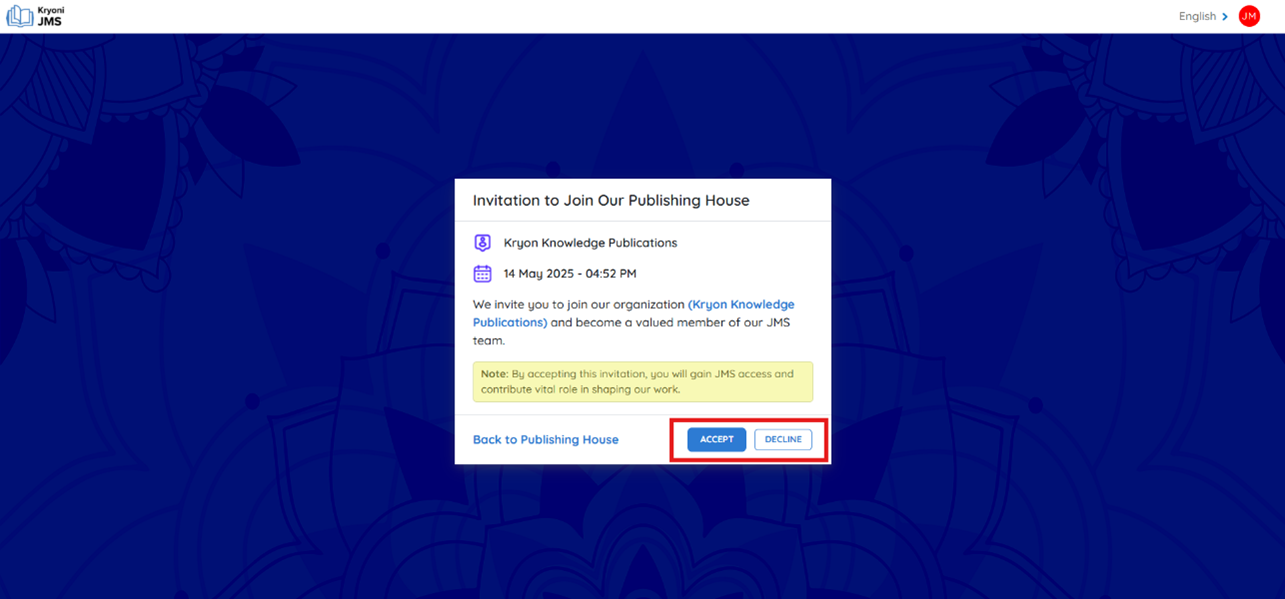
- Click "Accept Invite" to join the JMS.
- After acceptance, your account is added to the system.
Once accepted, the next step is to assign roles to your account by the administrator—please refer to the relevant guide for role assignment instructions.
