Plugins
Overview
The Plugins section allows journal administrators to enable and configure additional features that extend the functionality of the journal.
Plugins can be enabled or configured based on the journal's publishing requirements.
To access this section:
-
Navigate to Journal Settings.
-
Click Plugins.
The following plugins are available for configuration.
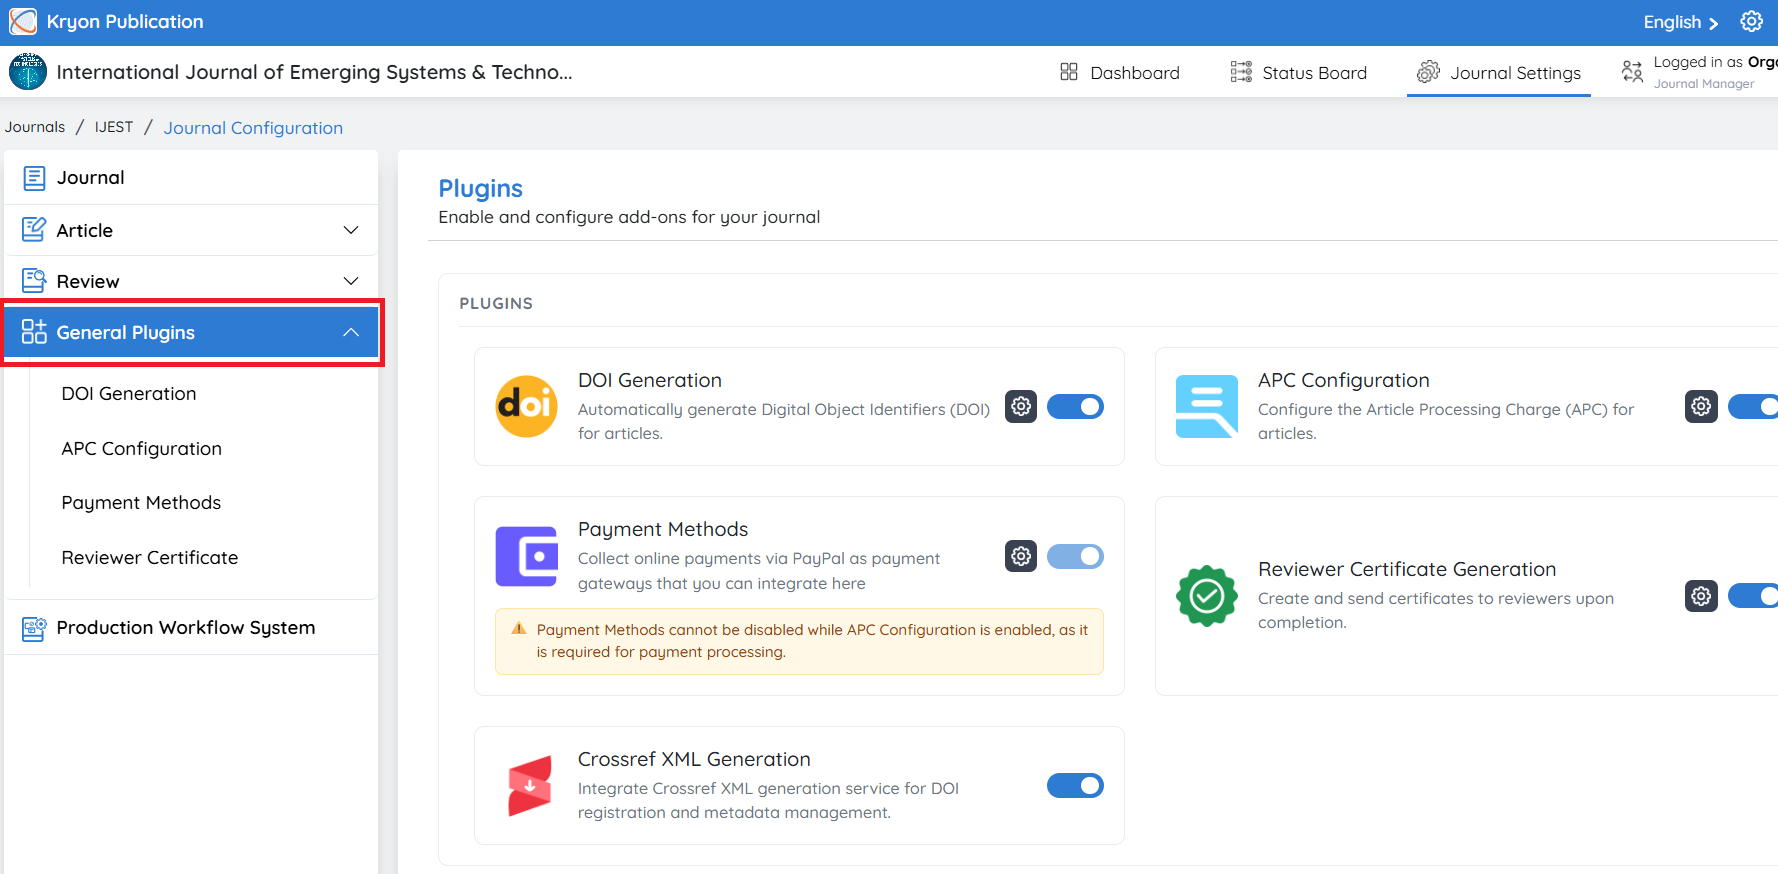
DOI Generation
The DOI Generation plugin automatically assigns Digital Object Identifiers (DOIs) to articles, providing each article with a unique and permanent identifier.
Benefits
-
Generates DOIs for published articles.
-
Ensures persistent article identification.
-
Simplifies DOI management.
A valid DOI prefix must be configured in Publisher Information before enabling this plugin.
APC Configuration
The Article Processing Charge (APC) Configuration plugin allows journals to configure publication charges for authors based on their publishing model.
Administrators can define APC amounts, manage payment workflows, and configure waiver policies for individual journals.
Benefits
-
Configure Article Processing Charges (APC).
-
Supports Open Access and Hybrid publishing models.
-
Manage APC waiver requests.
-
Manage APC payment requests and approvals.
-
Automate APC-related communications with authors.
-
Streamline APC processing throughout the publication workflow.
Payment Methods
The Payment Methods plugin allows journals to configure online and offline payment methods for collecting Article Processing Charges (APC).
Supported payment gateways and payment methods can be configured based on the journal's requirements.
Benefits
-
Secure online payment processing.
-
Support for both online and offline payment methods.
-
Simplified APC fee collection.
-
Automatic payment confirmation.
-
Invoice generation for APC payments.
-
Improved payment experience for authors.
Payment gateways must be configured with valid merchant account credentials before accepting online payments.
Important: Kryoni JMS provides only the payment management platform. All payments made by authors are transferred directly to the bank account or payment gateway configured by the publisher. Kryoni JMS does not collect, process, or retain any publication fees.
Reviewer Certificate Generation
The Reviewer Certificate Generation plugin automatically generates and issues certificates to reviewers after they successfully complete a peer review.
Benefits
-
Automatically generates reviewer certificates.
-
Recognizes reviewer contributions.
-
Reduces manual certificate preparation.
-
Improves reviewer engagement and retention.
-
Maintains a professional record of reviewer participation.
Certificates are generated only after the reviewer has successfully completed the assigned review in accordance with the journal's configured workflow.
Crossref XML Generation
The Crossref XML Generation plugin automatically generates Crossref-compliant XML files containing article metadata required for DOI registration and metadata submission.
The generated XML can be submitted to Crossref to register DOIs and distribute standardized article metadata to indexing and discovery services.
Benefits
-
Automatically generates Crossref-compliant XML.
-
Simplifies DOI registration workflows.
-
Produces standardized metadata for Crossref submission.
-
Supports metadata indexing and discovery.
-
Helps activate DOI registrations with Crossref.
-
Reduces manual XML preparation and validation.
Now let's explore how to configure the DOI Generation and APC plugins in detail
Configuring DOI Generation
Before configuring the DOI settings, ensure that the DOI Generation plugin is enabled for the journal.
Once the plugin is enabled, the DOI Generation option will appear in the left navigation panel.
Click DOI Generation to open the DOI Configuration page and begin configuring the DOI settings for your journal.
Step 1: Verify the DOI Prefix
The DOI Prefix field is automatically populated using the DOI Prefix configured at the Publisher level during the initial organization setup.
Example: 10.4989888
This prefix remains the same for all journals belonging to the publishing organization.
The DOI Prefix is inherited from the Publisher configuration and cannot be edited from the journal level.
Editing the DOI Prefix
The DOI Prefix is configured at the Publisher level and is shared across all journals within the publishing organization. Therefore, it cannot be modified from the journal-level DOI Configuration page.
To update the DOI Prefix, you must have the appropriate administrative permissions.
Follow these steps:
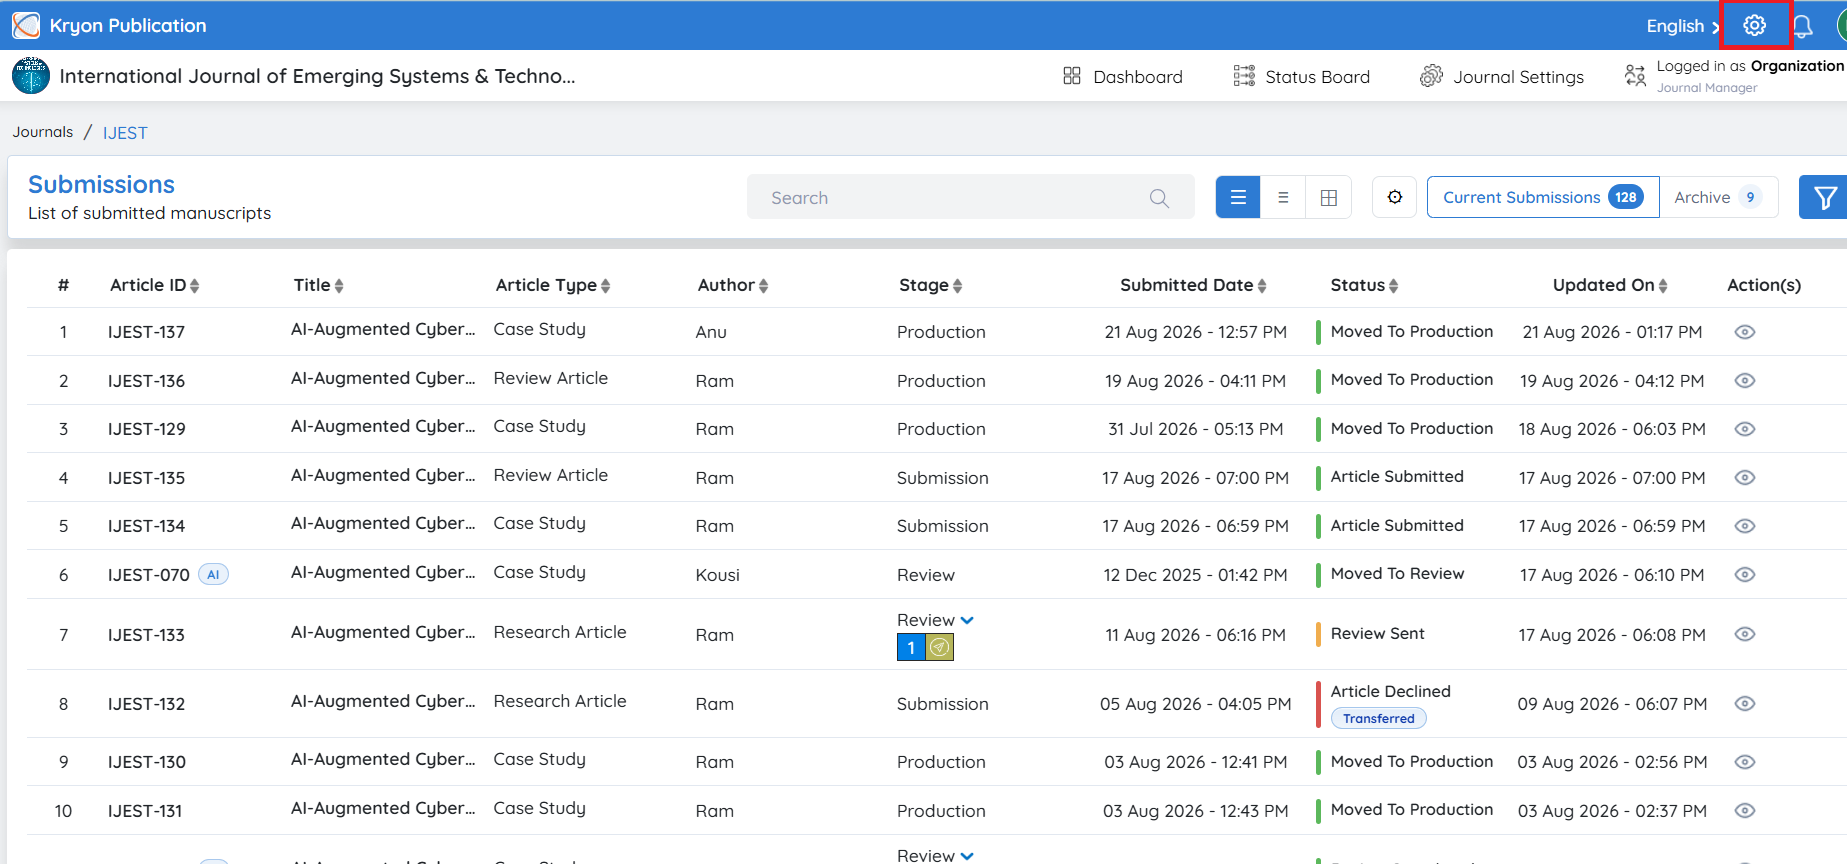
- Navigate to Global Organization Settings.
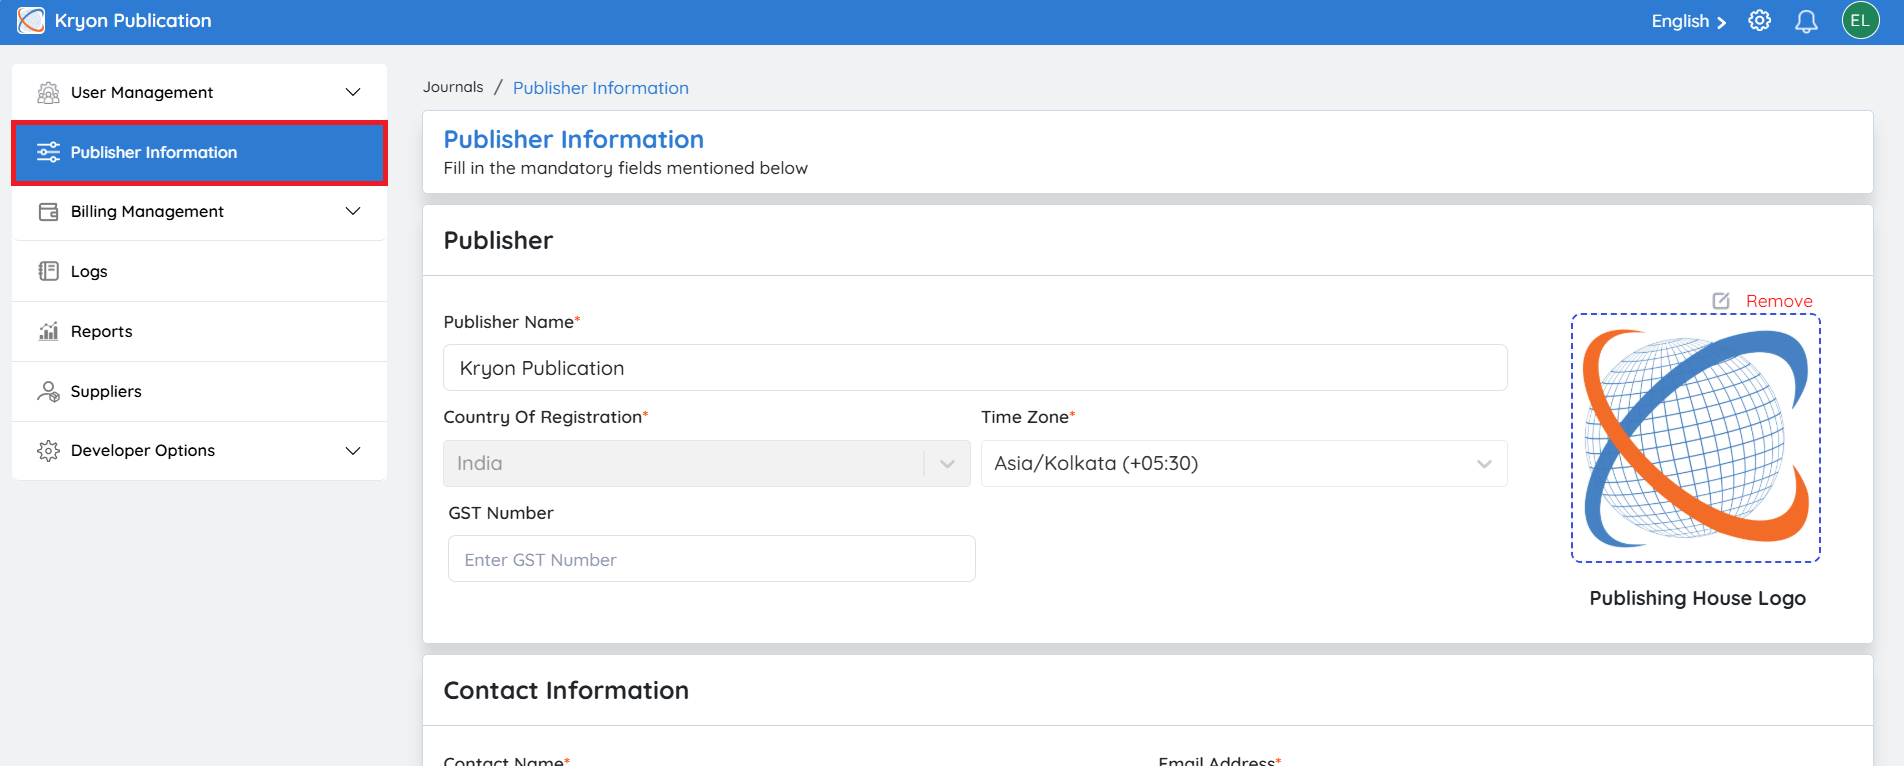
- Click Publisher Information.
-
Go to the DOI Configuration section.
-
Update the DOI Prefix as required.
-
Click Save to apply the changes.
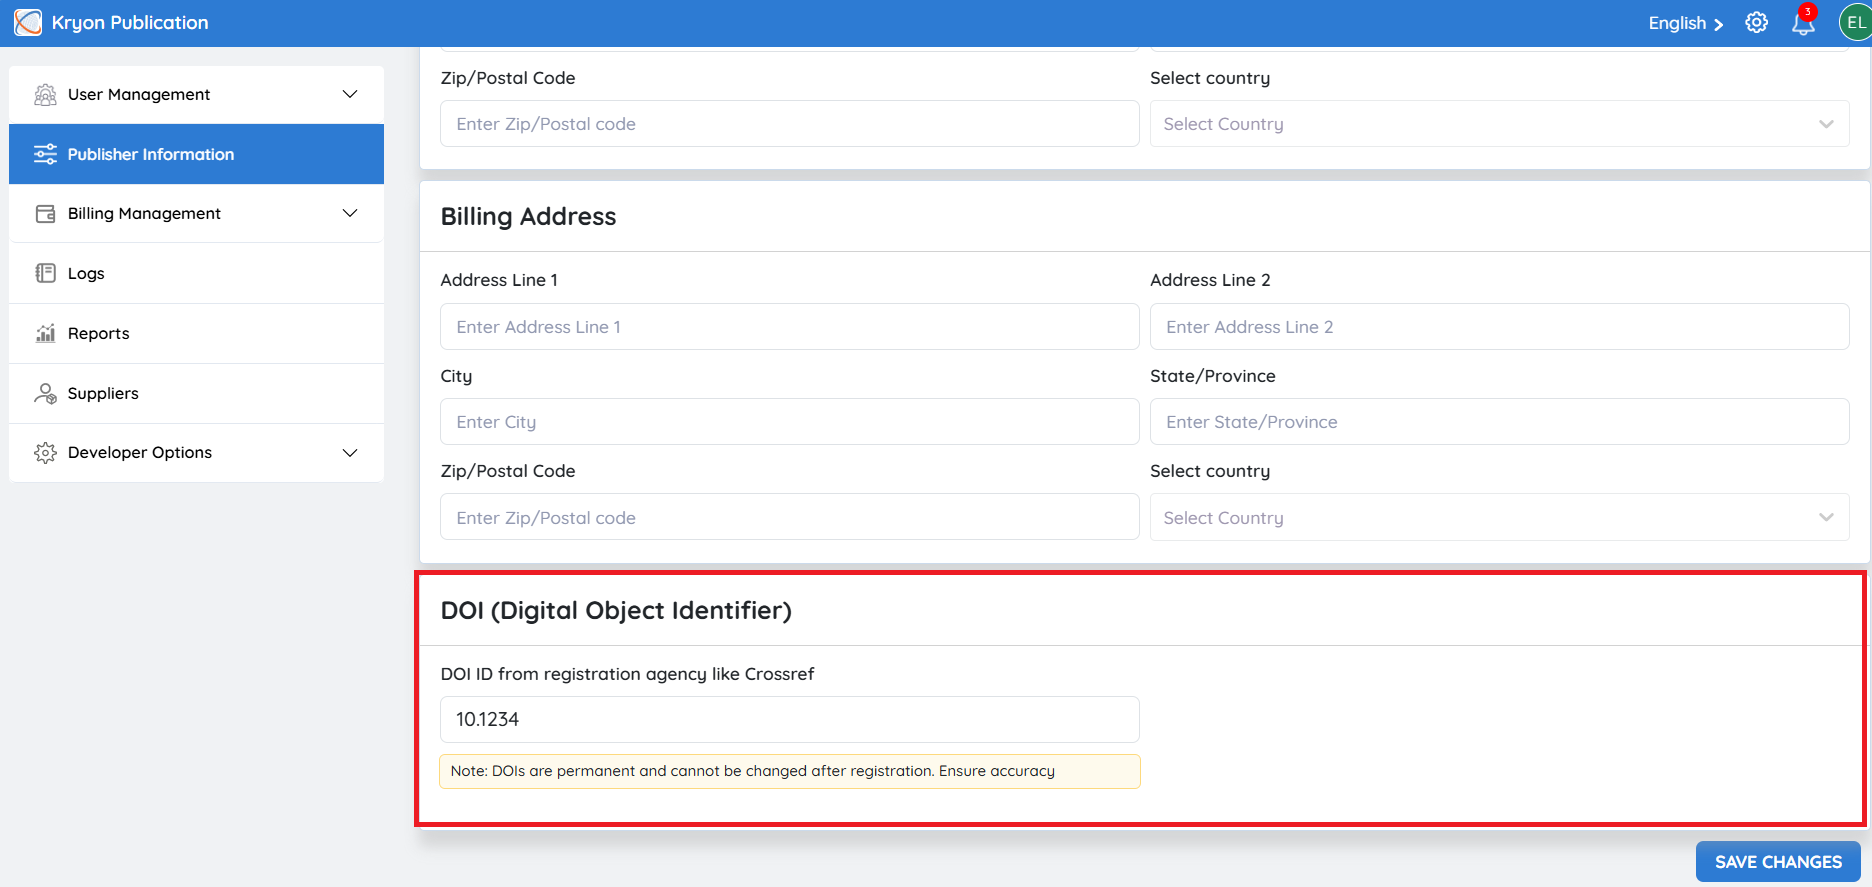
Only users with the required permissions can modify the DOI Prefix. Any changes made at the publisher level will automatically apply to all journals associated with the publishing organization. Ensure that the updated DOI Prefix is the valid, registered prefix assigned to your organization by your DOI registration agency (such as Crossref or DataCite).
Step 2: Select the DOI Assignment Stage
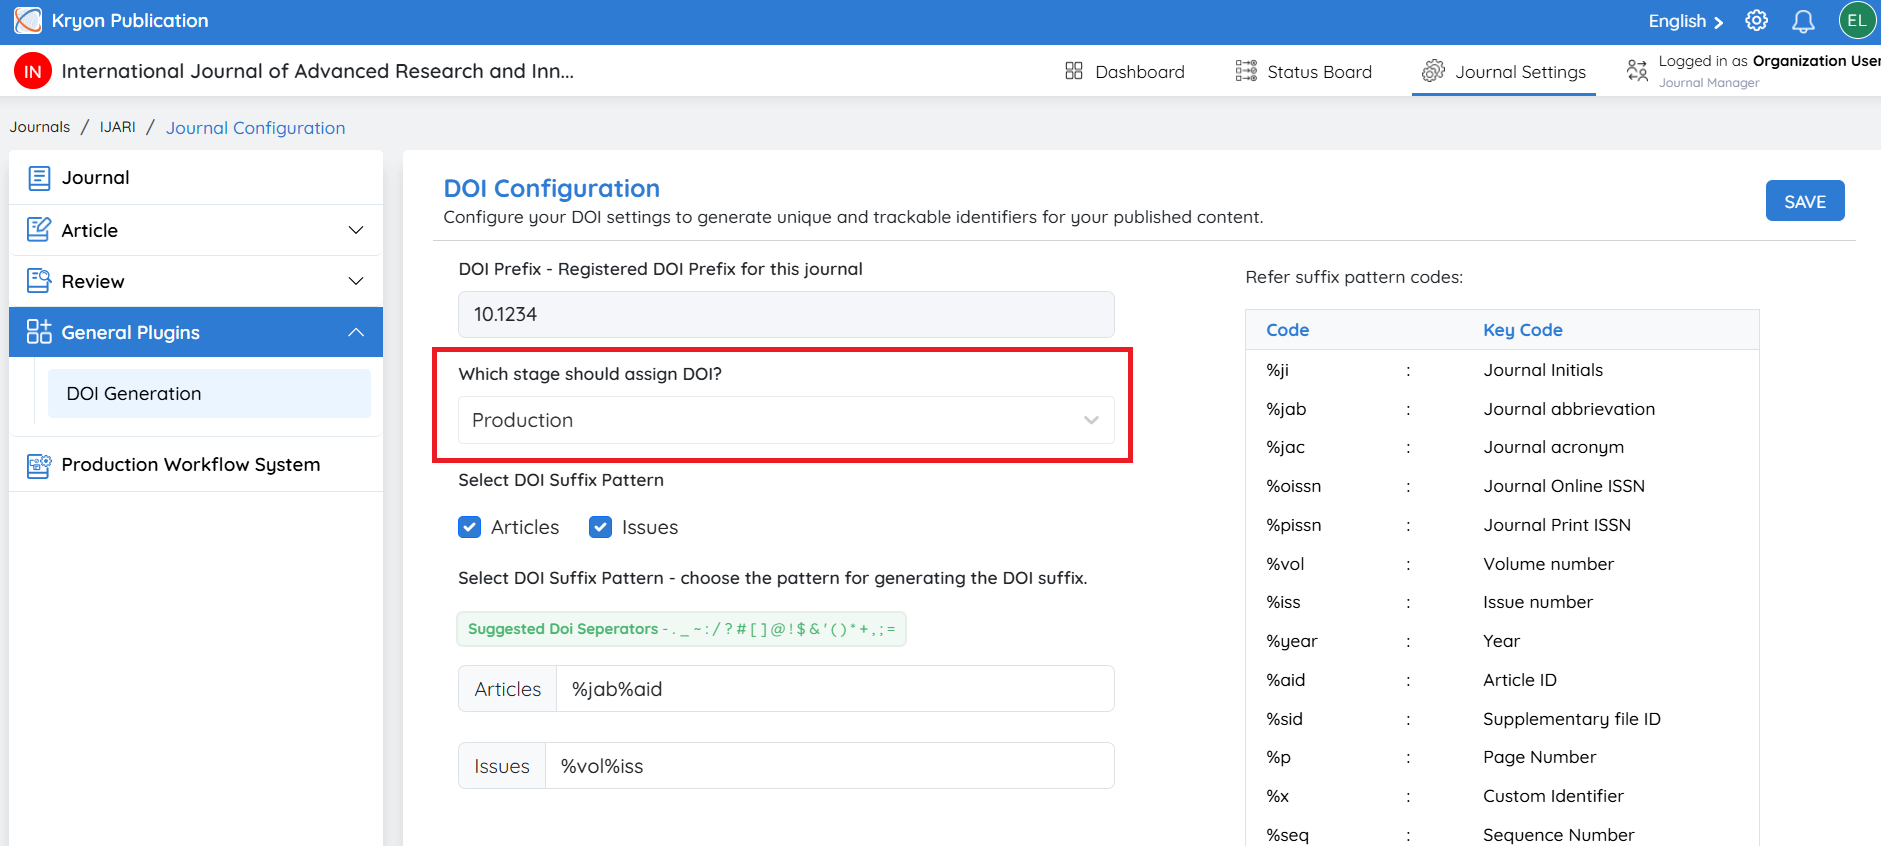
Under Which stage should assign DOI?, select the workflow stage at which Kryoni JMS should generate the DOI.
Recommended: Production
Assigning the DOI during the Production stage ensures that the identifier is generated only after the manuscript has reached its final publication-ready version.
Step 3: Configure the DOI Suffix Pattern
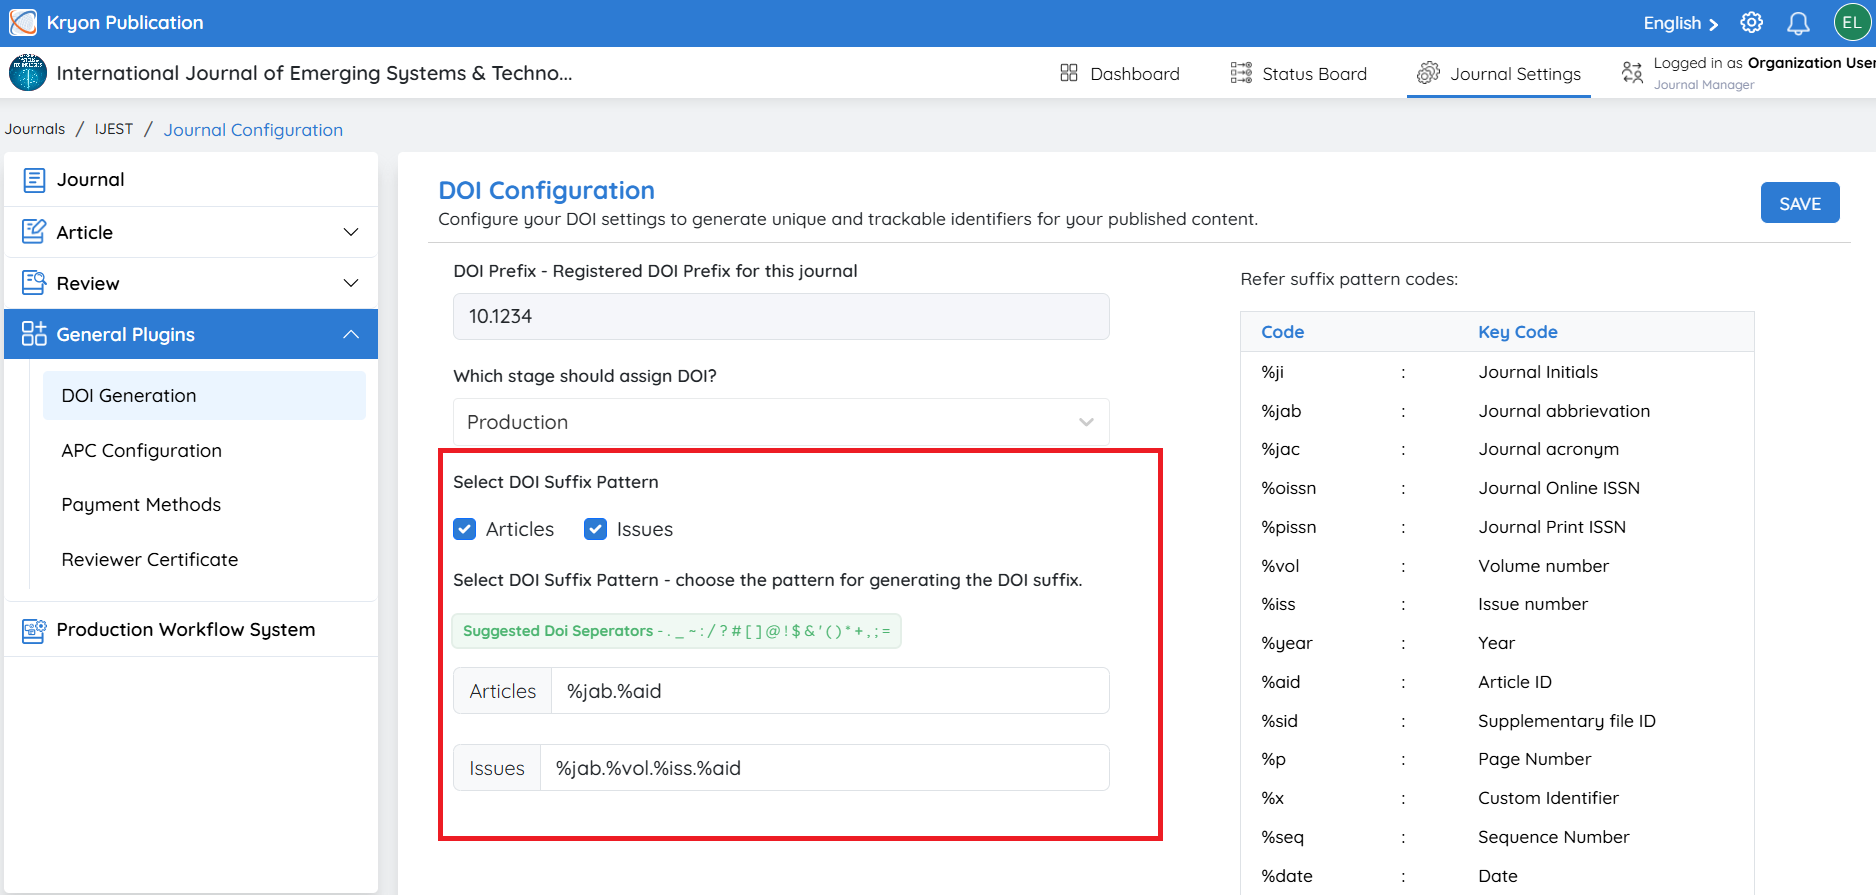
The DOI Suffix uniquely identifies each article or issue within your DOI prefix.
Choose whether DOIs should be generated for:
-
Articles
-
Issues
-
Both Articles and Issues
Then enter a suffix pattern for each content type.
Kryoni JMS supports dynamic placeholders that automatically populate metadata during DOI generation.
Available DOI Suffix Codes
The following placeholders can be used to build custom DOI suffix patterns
| Code | Description | Example Output |
|---|---|---|
%ji | Journal Initials | IJCMR |
%jab | Journal Abbreviation | Int J Cranio Maxillofac Rehabil |
%jac | Journal Acronym | IJCSR |
%oissn | Online ISSN | 2589-XXXX |
%pissn | Print ISSN | 0975-XXXX |
%vol | Volume Number | 12 |
%iss | Issue Number | 3 |
%year | Publication Year | 2026 |
%aid | Article ID | 00125 |
%sid | Supplementary File ID | S01 |
%p | Page Number | 45 |
%x | Custom Identifier | YOURCODE |
%seq | Sequence Number | 0001, 0002... |
%date | Date (YYYYMMDD) | 20250922 |
Step 4: Configure DOI Patterns
Create meaningful DOI suffix patterns using the available placeholders.
Example – Article DOI
-
Pattern %aid.%year.%date
-
Generated DOI 10.4989888/IJEST-123.2025.20250922
Example – Issue DOI
-
Pattern %ji.%vol-%iss.%seq
-
Generated DOI 10.4989888/IJCMR.12-3.0001
Tip: Use separators such as ., -, or _ to improve DOI readability.
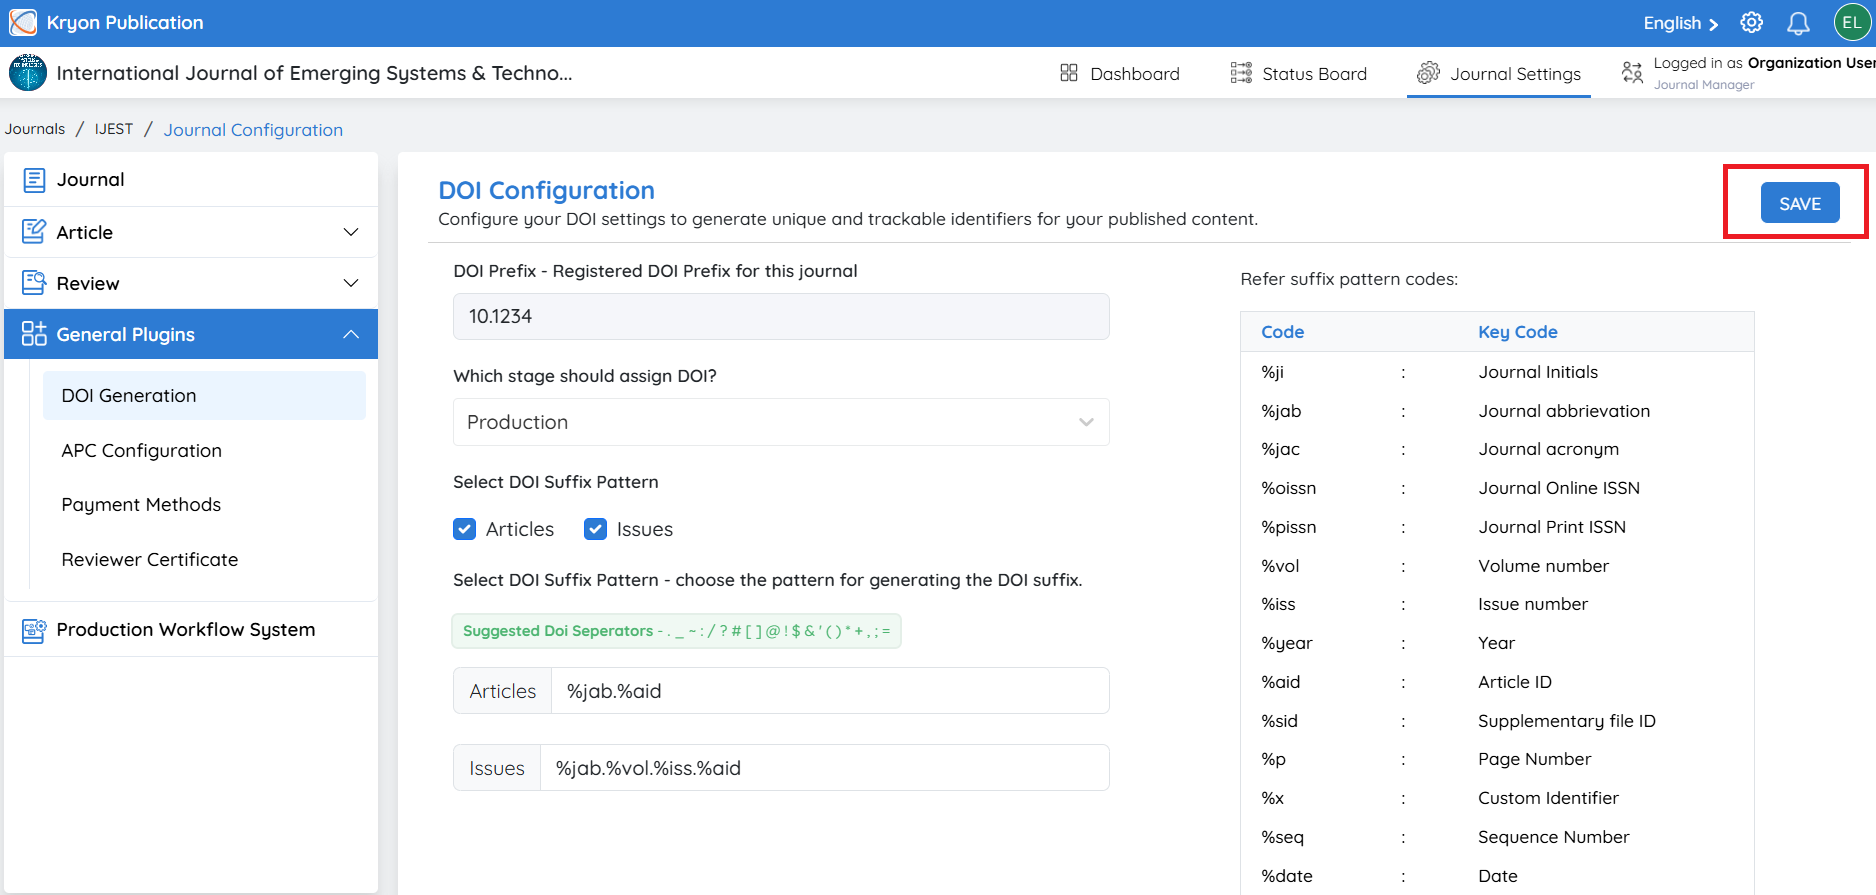
Step 5: Save the Configuration
After completing the DOI configuration:
-
Review the DOI Prefix.
-
Verify the Assignment Stage.
-
Configure the required DOI Suffix Patterns.
-
Click Save.
Kryoni JMS will generate DOIs according to the configured rules whenever an article or issue reaches the selected workflow stage.
Best Practices
To ensure consistent and reliable DOI generation:
-
Ensure every DOI suffix is unique.
-
Include identifiers such as Year, Volume, Issue, or Article ID to minimize the possibility of duplication.
-
Avoid spaces and unsupported special characters in DOI patterns.
-
Test your DOI suffix pattern using sample articles before applying it to live journals.
-
Do not modify assigned DOIs after publication, as DOIs are permanent identifiers intended to provide persistent access to scholarly content.
Custom DOI Assignment
If you want to assign a custom DOI instead of using the automatically generated DOI pattern, Kryoni JMS allows you to do so during the Production stage of the manuscript workflow.
When the manuscript reaches the Production stage, authorized editorial users can manually enter a custom DOI for the article.
Important: Once a DOI—whether **automatically generated or manually assigned—**has been saved for an article, it cannot be edited or changed within Kryoni JMS
Payment Methods
Overview
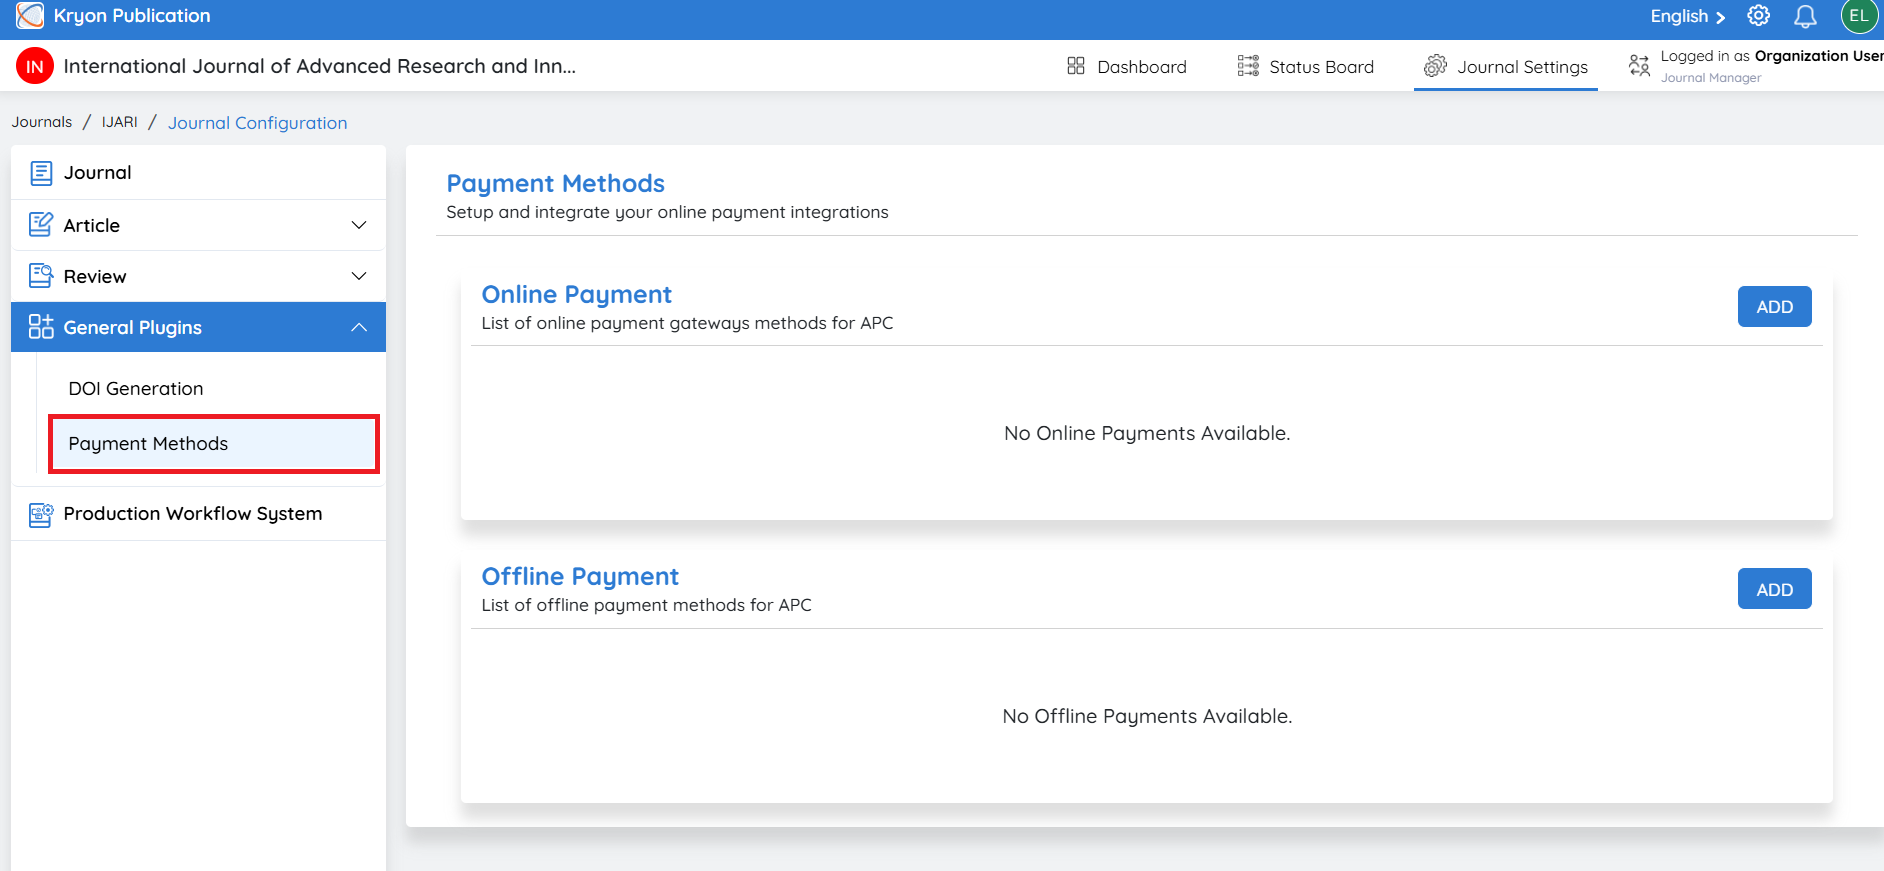
Before configuring the Article Processing Charge (APC), you must first configure at least one Payment Method. Payment methods define how authors can pay APC fees and provide the necessary payment instructions for completing the transaction.
Kryoni JMS supports both online and offline payment methods, allowing publishers to offer multiple payment options based on their business requirements.
To access this section:
-
Navigate to Journal Settings → Plugins.
-
Enable the Payment Methods plugin.
-
Click Payment Methods from the left navigation menu.
Configuring an Online Payment Method
Online payment methods allow authors to make APC payments securely through an integrated payment gateway.
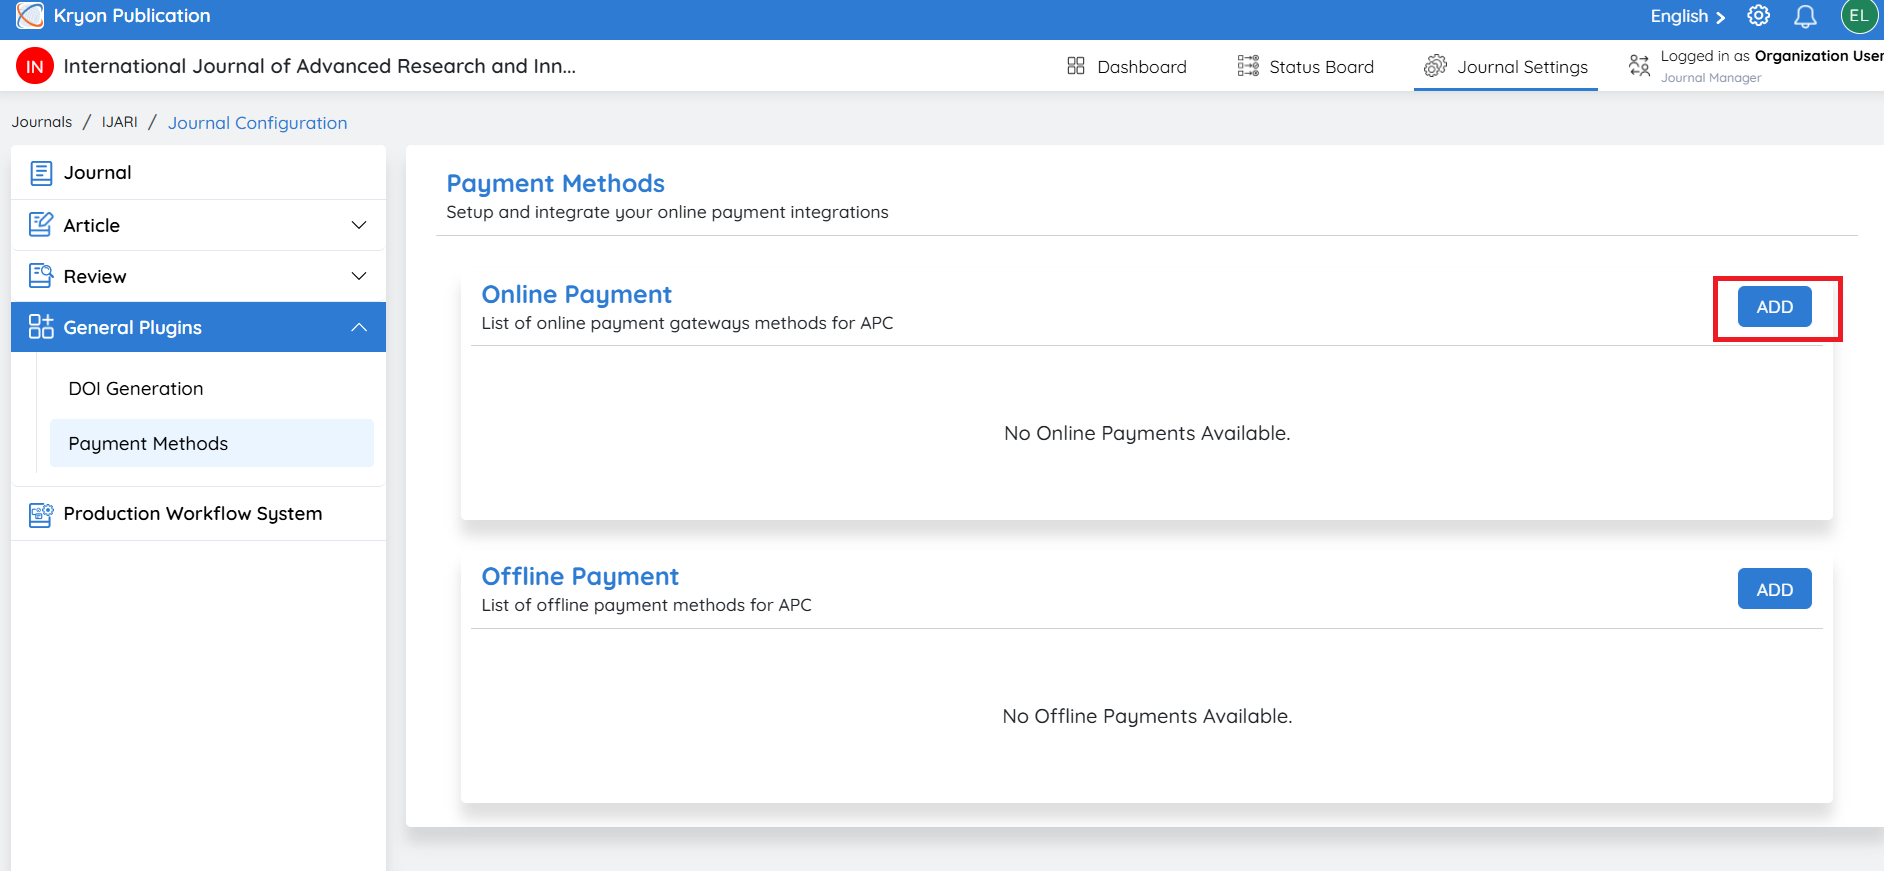
Step 1: Create an Online Payment Method
Click add and select Online Payment.
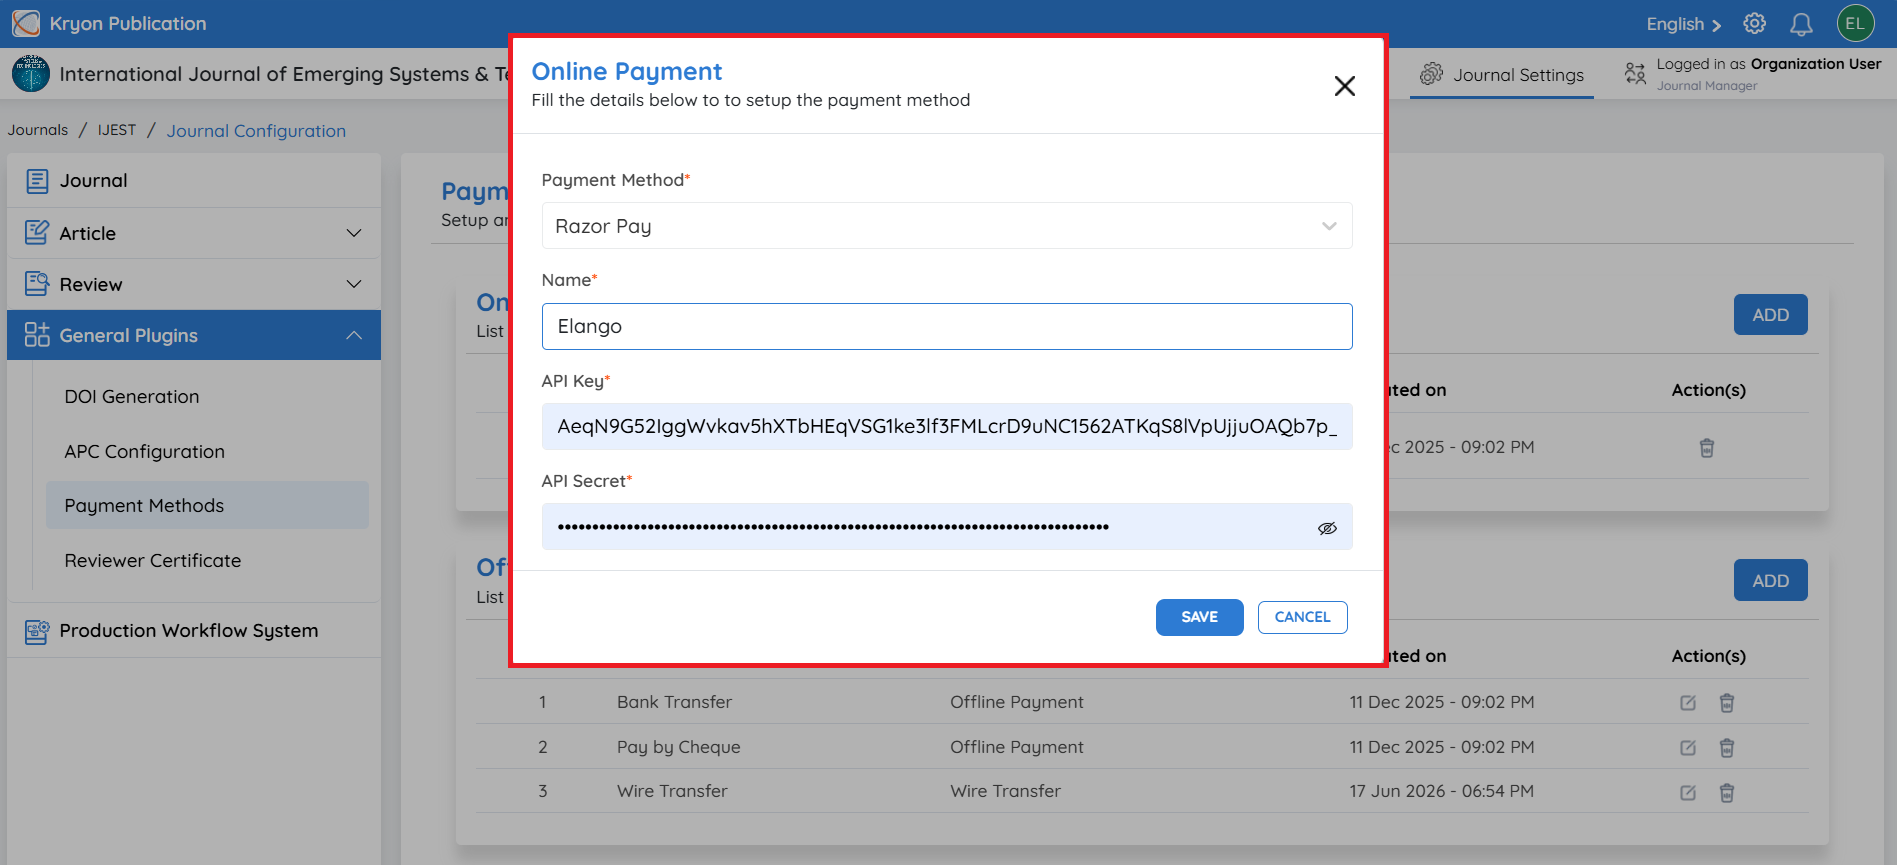
Step 2: Enter Payment Gateway Details
Complete the required information.
Payment Method Select the payment gateway to integrate.
Name Enter a display name for the payment gateway.
API Key Enter the Client ID or API Key provided by your payment gateway.
API Secret Enter the Client Secret or API Secret provided by your payment gateway.
Step 3: Save the Configuration
Click Save.
The configured payment gateway will be available for APC payments.
Ensure that the API credentials are valid. Incorrect credentials will prevent successful payment processing.
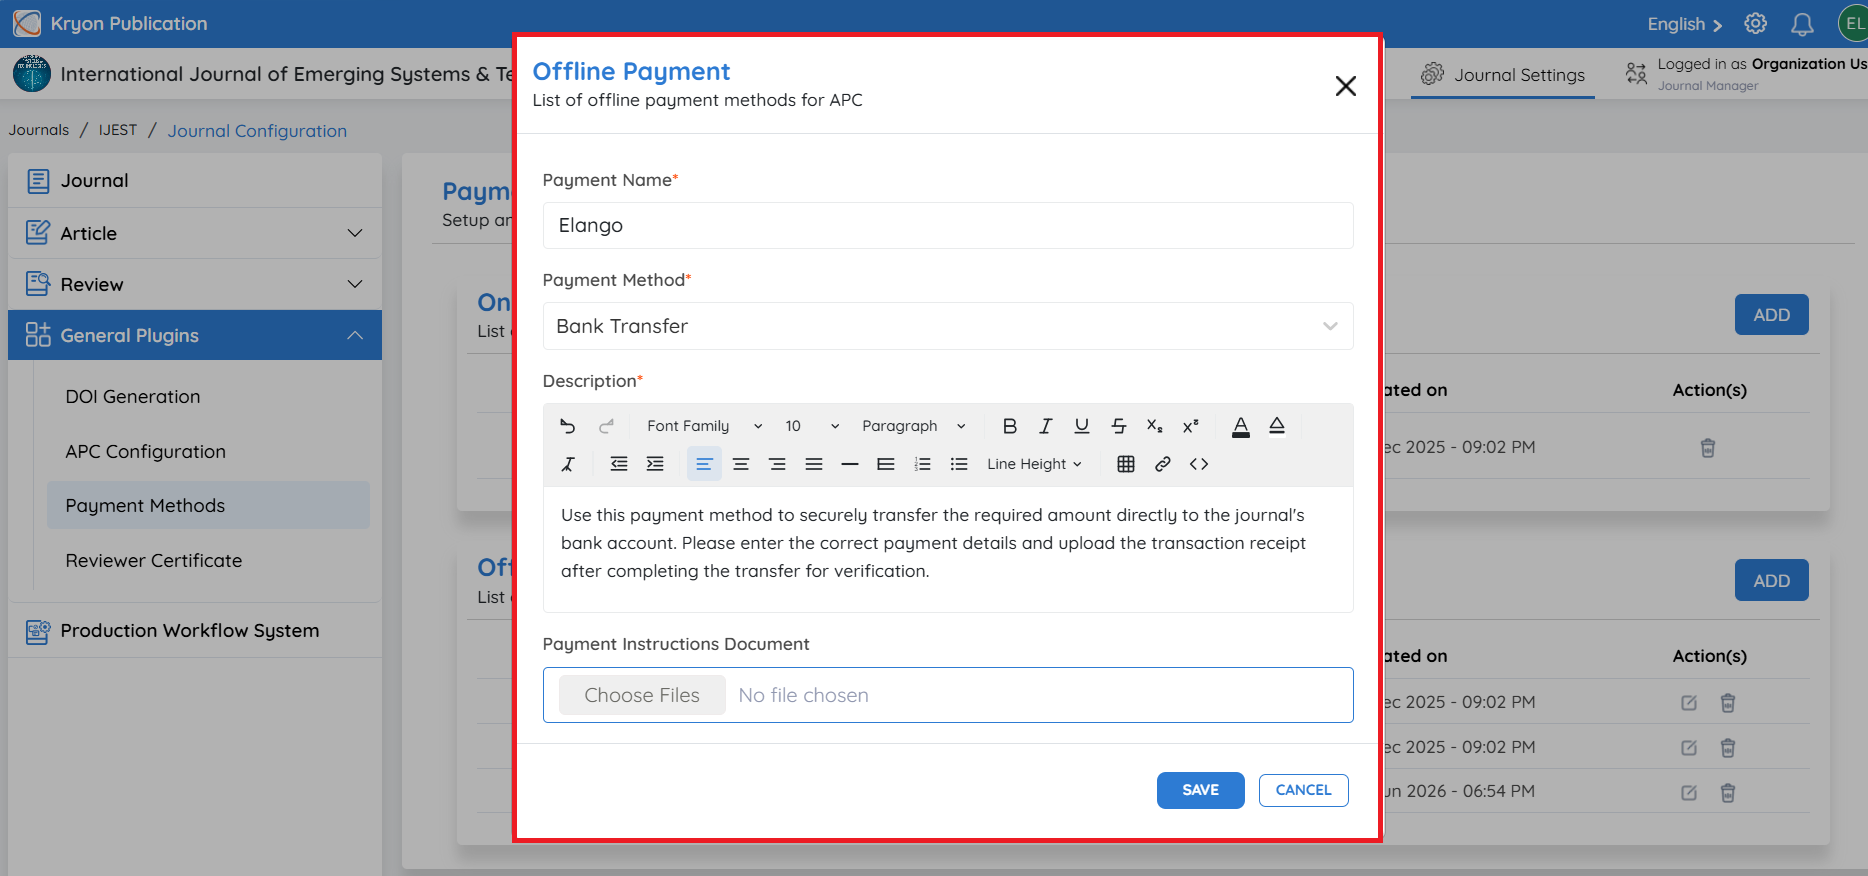
Step 4: Enter Payment Details
Complete the following information.
Payment Name Enter a name for the payment method.
Examples:
-
Bank Transfer
-
Wire Transfer
-
Pay by Cheque
-
Cash
-
Other Payment
Payment Method
Select the appropriate payment method from the drop-down list.
Available options include:
-
Pay by Cheque
-
Bank Transfer
-
Wire Transfer
-
Cash
-
Other Payment
Description
Provide payment instructions for the author.
For example:
-
Bank account details
-
Beneficiary name
Payment Instructions Document
Upload a supporting document containing detailed payment instructions, if required.
Examples include:
-
Bank account information
-
Wire transfer instructions
-
Cheque payment instructions
Step 5: Save the Configuration
After entering all the required information, click Save.
The payment method will be available for authors during the APC payment process.
Important: Kryoni JMS serves as the payment management platform only. For online payments, all payment transactions are processed directly through the configured payment gateway, and funds are deposited into the publisher's configured merchant or bank account. Kryoni JMS does not receive, process, or retain any APC payments. For offline payments, authors follow the payment instructions provided by the publisher, and payment verification is managed by the journal's editorial or finance team.