Reviewing
This guide provides step-by-step instructions for reviewers on how to access, manage, and complete their assigned reviews efficiently within the Journal Management System (JMS).
Receiving the Review Assignment
-
Once assigned, reviewers receive an email notification with the subject:
“New Review Assignment: [Manuscript ID]”
-
The email contains:
- Manuscript details (Title, ID, Abstract)
- Review deadline
- A link to log in to the JMS
Logging into JMS
-
Click on the login link in the email or go to the JMS website.
-
Enter your credentials
-
If this is your first time logging in, complete your registration by providing:
a. Full Name
b. Country
Secure Login via ORCID (Optional but Recommended) - Refer Register Using ORCID
- Link your ORCID ID for secure and easy login.
- Benefits of using ORCID:
- Quickly access your account
- Maintain a trusted and verifiable identity
- Use ORCID for future logins
Accessing Pending Review Invitations
- After logging in, navigate to “Pending Invitations” on your dashboard.
- Here, you will find invitations to join the journal as a reviewer.
Accept or Decline the Invitation
- Click “Accept” to confirm your role as a reviewer and proceed to the review process.
- Click “Decline” if you are unable to participate at this time.
Accessing Your Reviewer Dashboard
Once you accept the invitation, you will gain full access to the Reviewer Dashboard, where you can view assigned manuscripts and proceed with the review process.
Navigate to Your Assigned Journal
After logging in, go to the Reviewer Dashboard.
You will see a list of journals you are associated with, including details such as:
- Journal Name
- Abbreviation
- Acronym
- Date of Creation
- Last Updated At
- Action(s): (View Journal Details)
- Click on the journal name to open it.
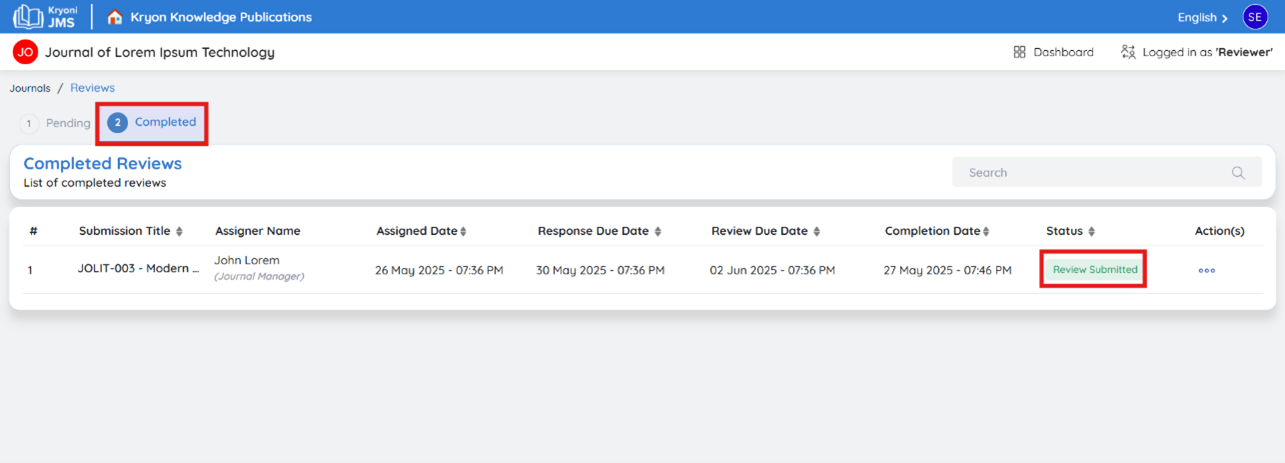
View Pending Reviews
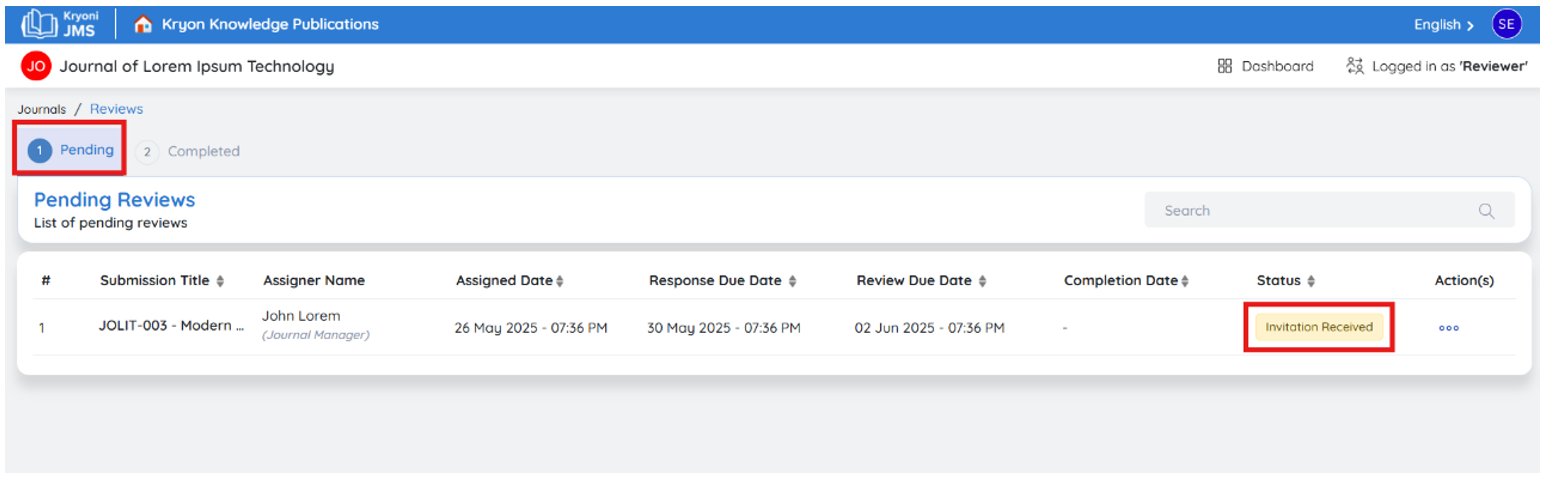
After accessing the journal dashboard, navigate to Pending Reviews, where you will see a list of manuscripts awaiting your review. The following details will be displayed:
- Submission Title – The title of the manuscript assigned for review.
- Assigner Name – The editor or journal staff member who assigned the review.
- Response Due Date – The deadline for accepting or declining the review request.
- Review Due Date – The deadline for submitting your completed review.
- Completion Date – The date on which the review was completed (if applicable).
- Action(s): (View Manuscript & Proceed to Review)
Next Step: Click "View" to open the manuscript and start the review process.
Step: 1 Request for Review
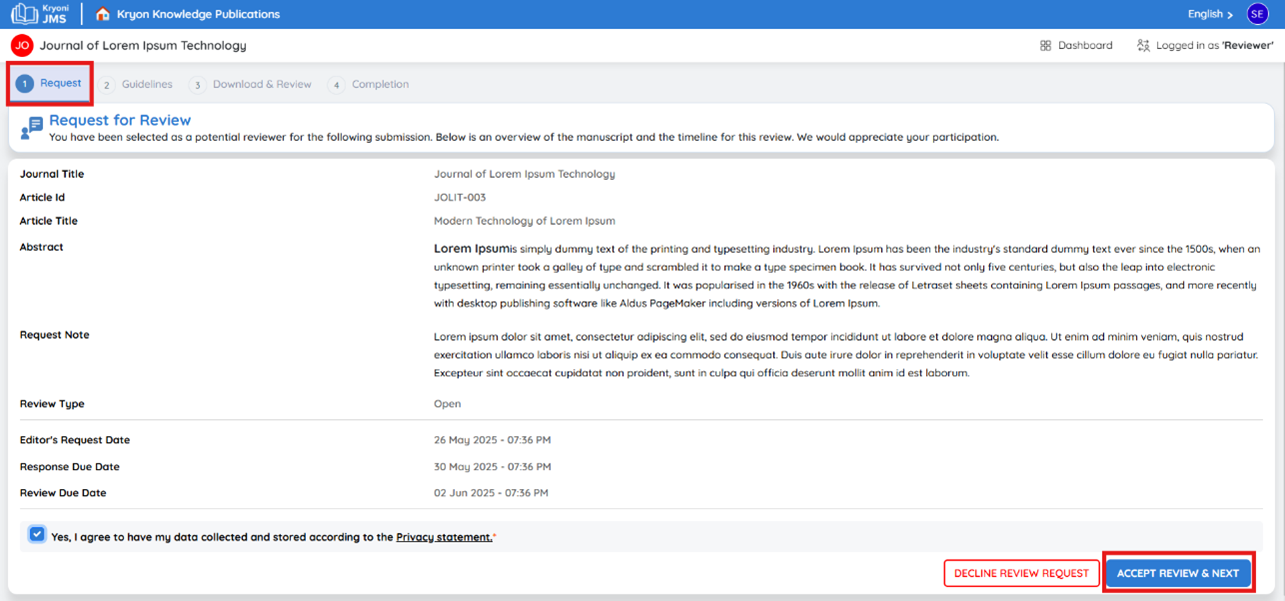
Submission Details
- Journal Short Title: [Journal Name]
- Article ID: [Unique ID]
- Article Title: [Manuscript Title]
- Abstract: [Brief Summary of the Manuscript]
- Request Note: [Editor's Note, if applicable]
Review Details
- Review Type: Double Blind / Single Blind / Open Review
- Editor's Request Date: [Date Sent]
- Response Due Date: [Deadline to Accept/Decline]
- Review Due Date: [Final Submission Deadline]
Privacy & Consent
Yes, I agree to have my data collected and stored according to the Privacy Statement.
Next Step: Accept or Decline the Review Invitation
- Accept – Proceed to the review process.
- Decline – Inform the editor that you are unable to review this submission with the reject reason.
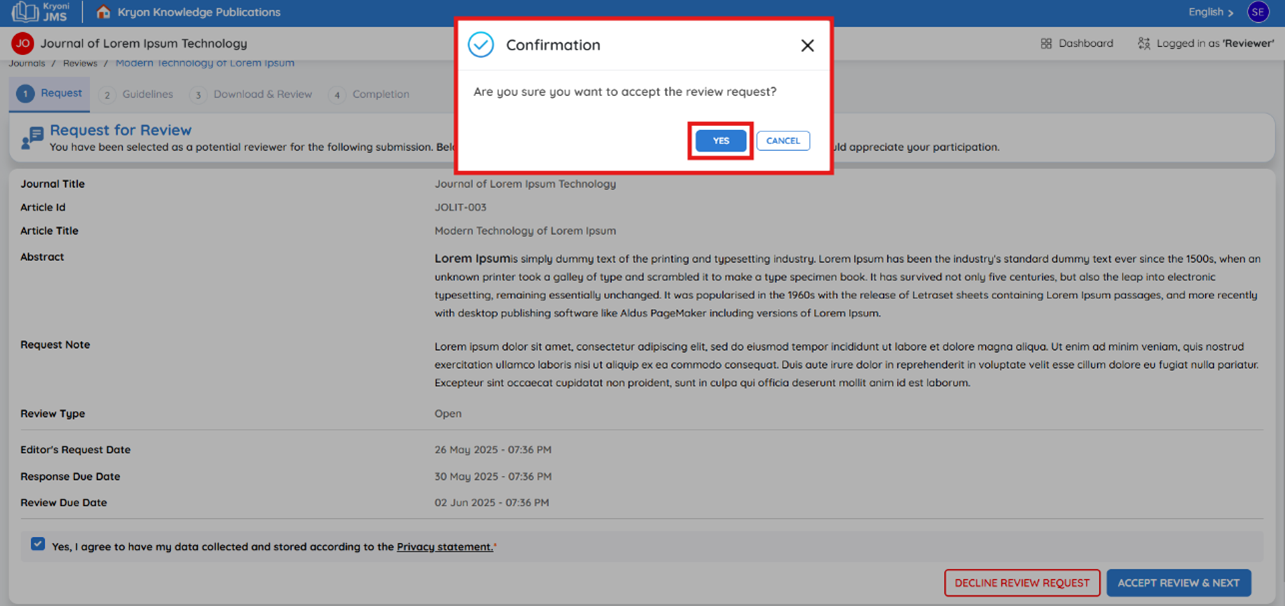

Accept Review & Proceed
- Click “Accept Review” to confirm your participation.
- Click “Next” to proceed to the reviewer guidelines.
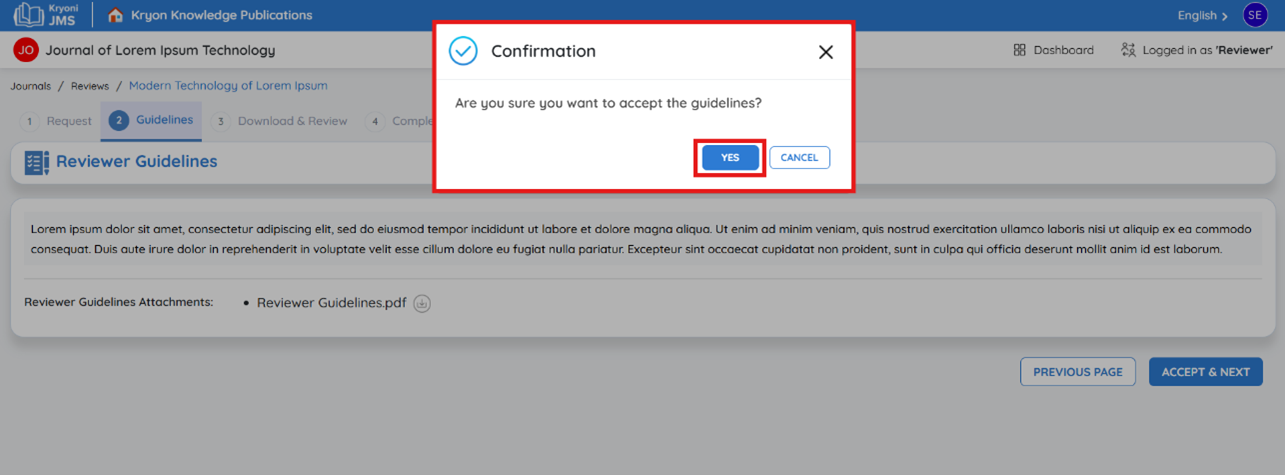
Step 2: Review Guidelines
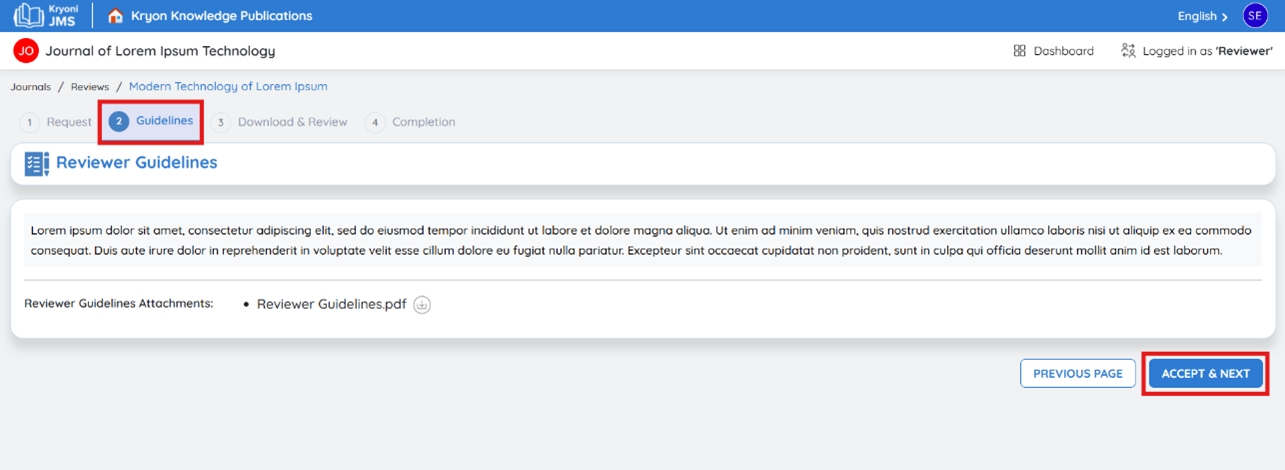
- Carefully read the Reviewer Guidelines provided by the journal.
- These guidelines outline evaluation criteria and expectations.
- Click “Accept and Next” to continue.
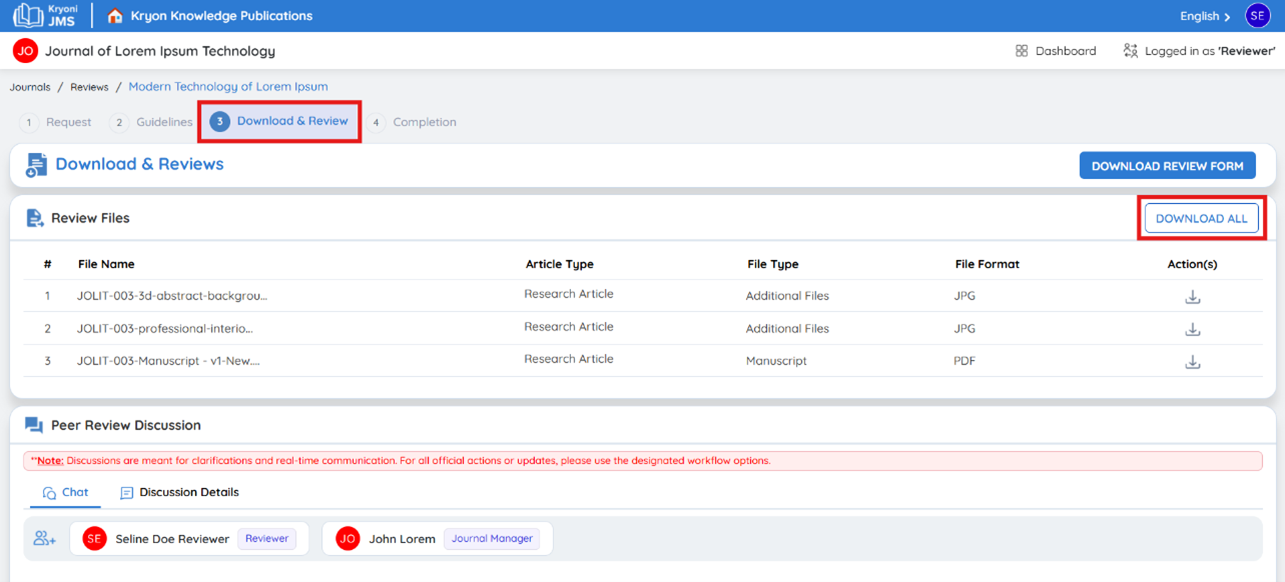
Step 3: Download & Review
After accepting the review, you will see the Review Files section.
Where to Find the Review Files?
The files are listed under the "Download & Reviews" section.
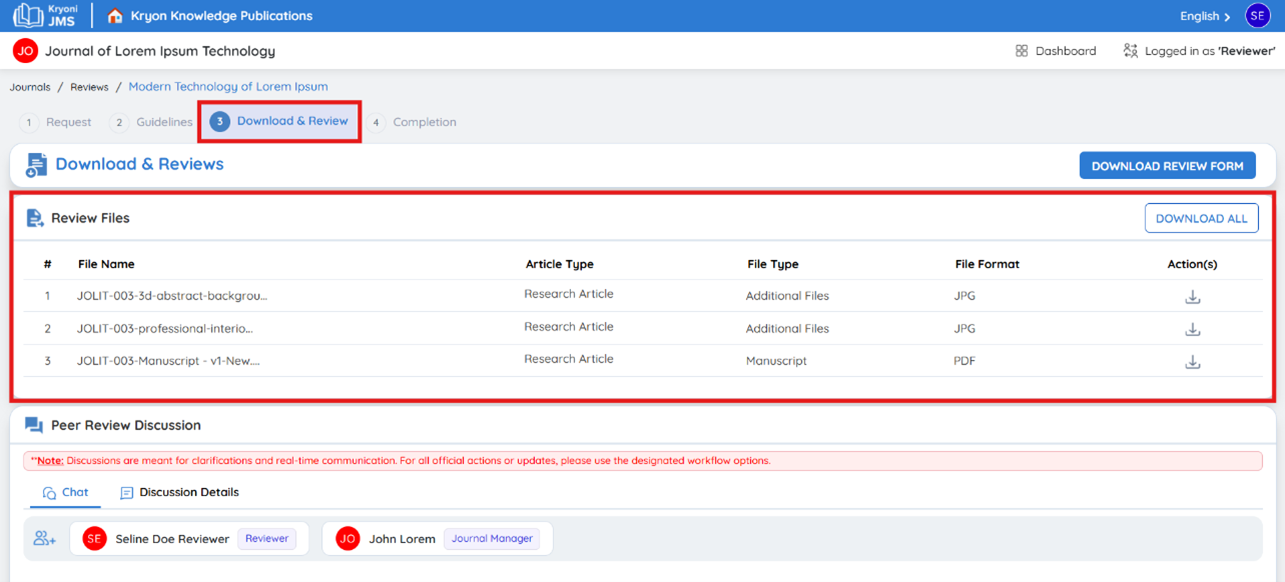
File Information Provided
Each manuscript file will be displayed with the following details:
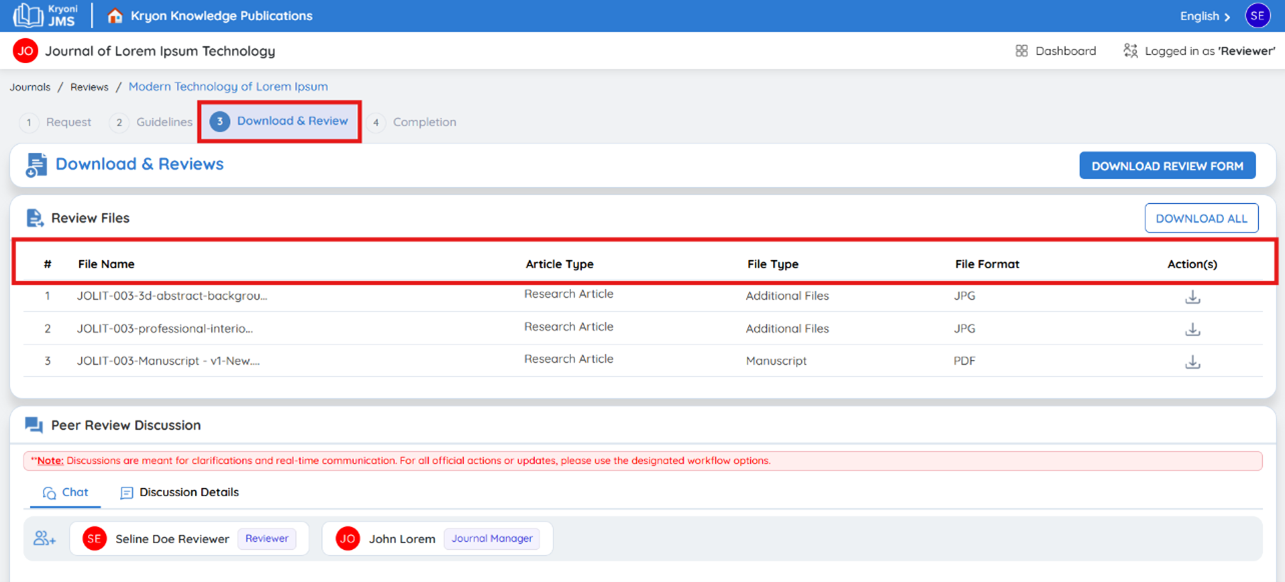
- Article Type – Type of submission (e.g., Research Paper, Review Article).
- File Type – Type of file submitted (e.g., Manuscript, Figures, Supplementary Data).
- File Format – Format of the file (e.g., PDF, DOCX, ZIP).
- Action (Download) – Options to download files.
How to Download Files
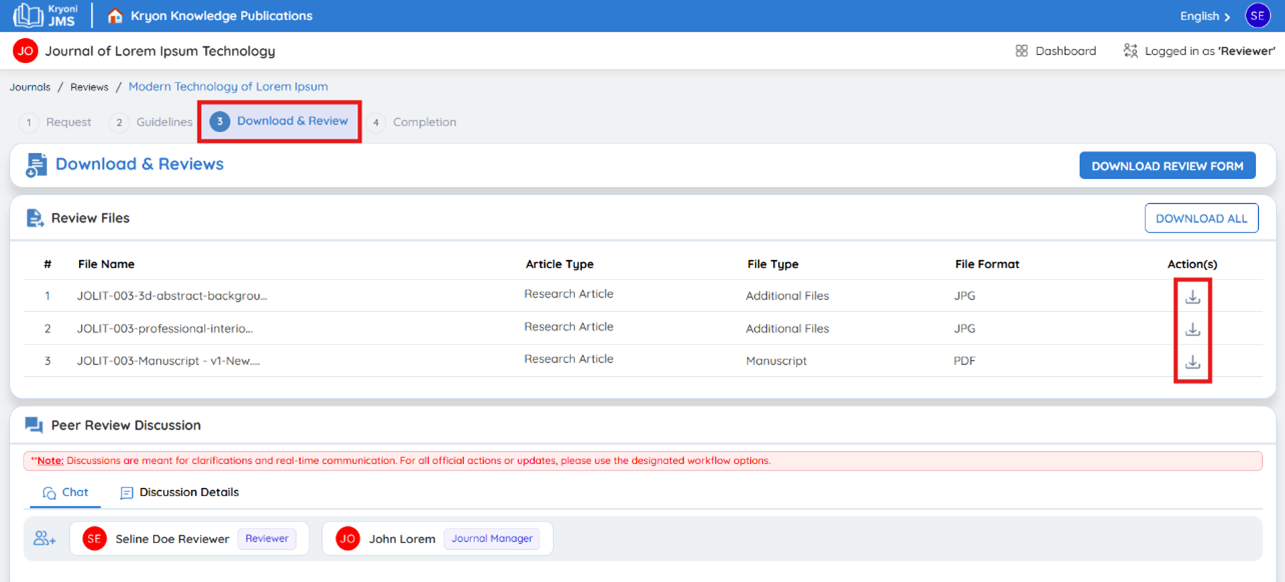
- Individual File Download – Click the Download button next to each file.
- Download All Files – Click "Download All" to download all files as a ZIP archive.
How to Review the Content
- Open each file and evaluate it based on the reviewer guidelines.
- Consider aspects like clarity, methodology, originality, and completeness.
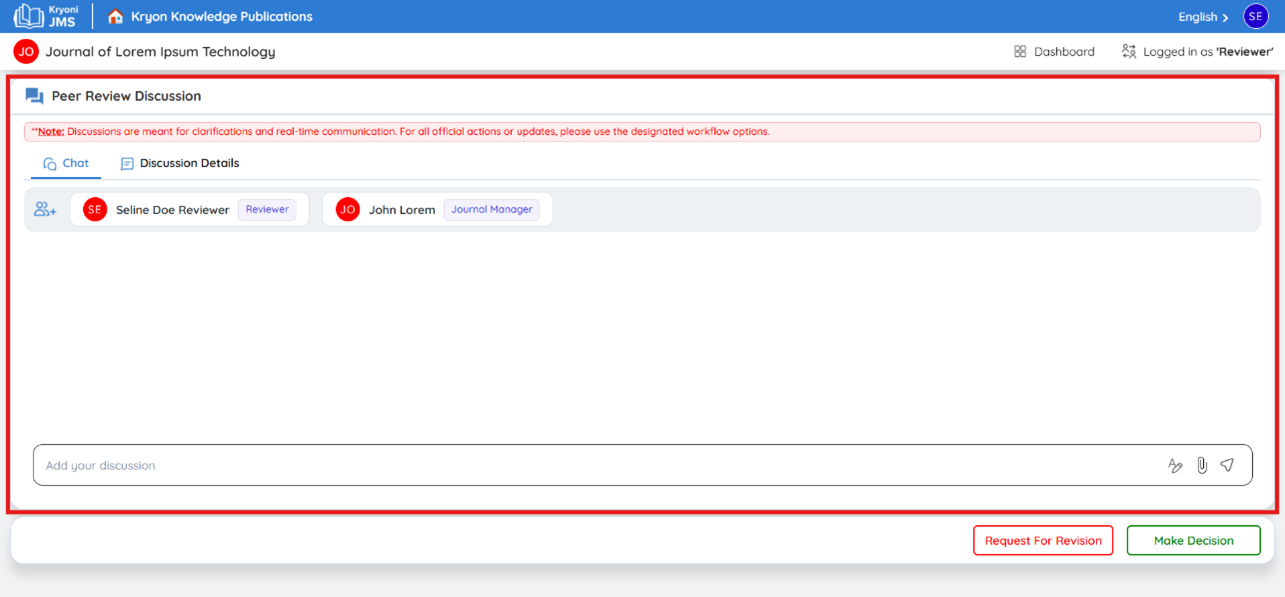
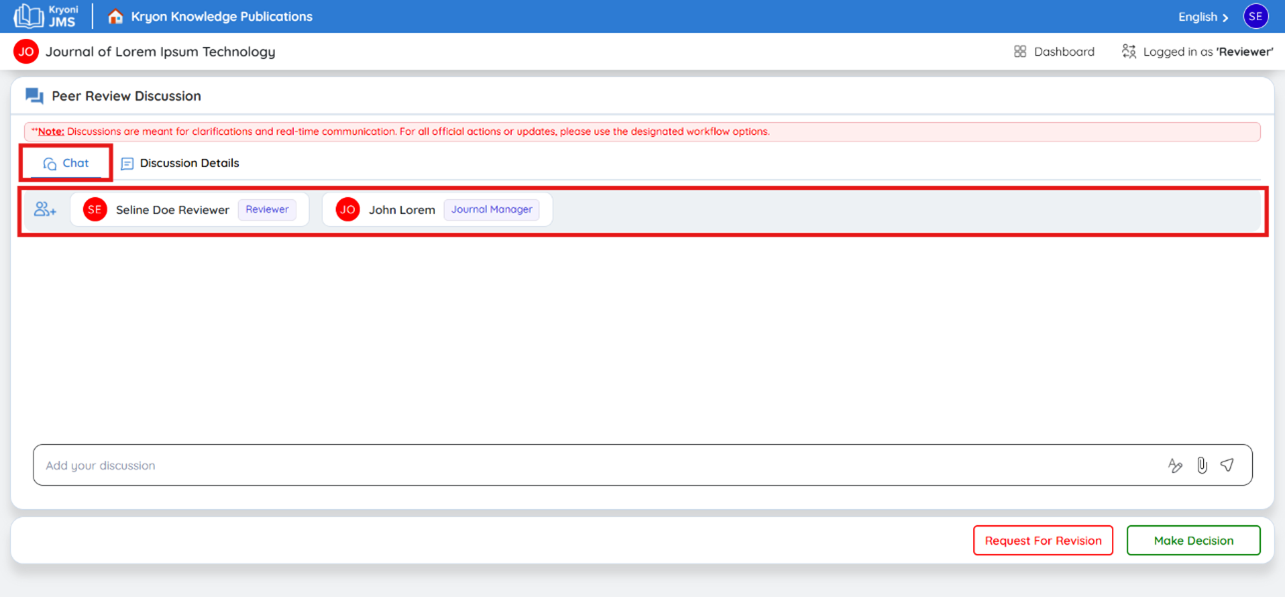
Peer Review Discussion
The Peer Review Discussion section in Kryoni JMS provides a space for quick clarifications and discussions between authors, editors, and reviewers during the manuscript evaluation process.
-
Click on the Chat Section to start or continue discussions with the editorial team.
-
Go to the "Discussion Details" tab to review all discussion records, including:
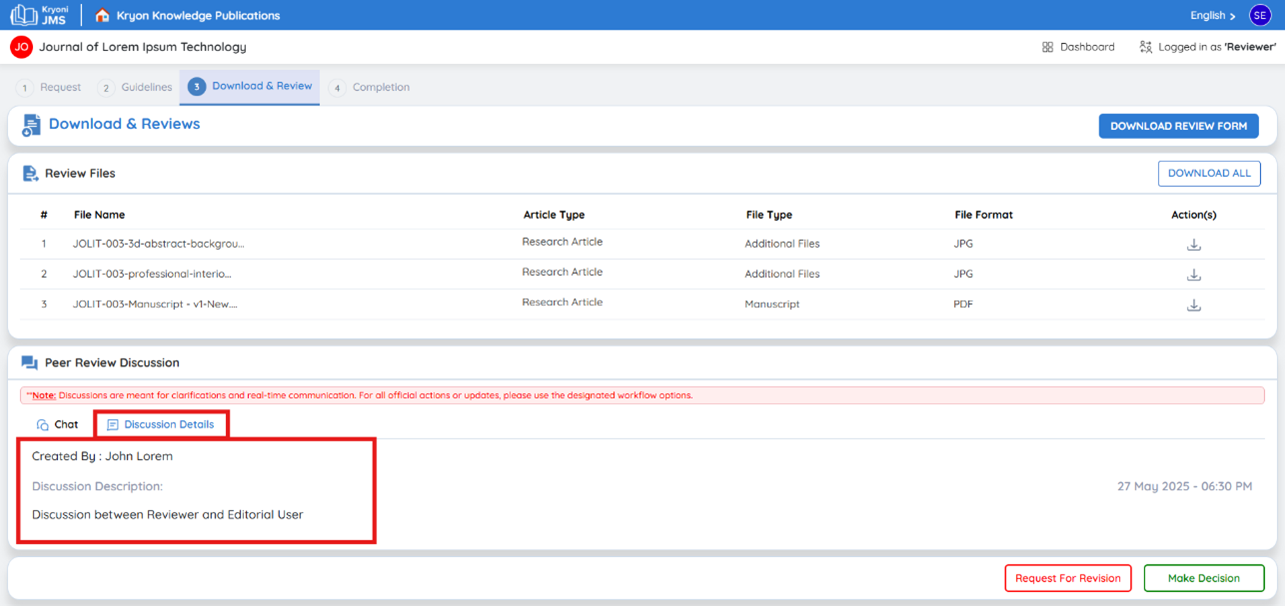
-
Who initiated the discussion
-
Participants involved
-
Discussion timestamps
Best Practices for Using Peer Review Discussion
Use for Clarifications and Quick Queries
- Ask specific questions regarding manuscript formatting, guidelines, or review expectations.
- Seek clarification on minor editorial concerns.
DO NOT Use for Workflow Actions
- Revision Requests: Submit revisions through the Revision Details tab.
- Manuscript Decisions: Accept, reject, or send to review using the appropriate decision workflow.
Completing the Review Form
-
The Review Form helps structure your assessment of the submission. It includes:
- Questions about the quality, relevance, and completeness of the manuscript.
- Ratings for specific aspects such as methodology, clarity, and originality.
- Comments & Recommendations for the author and editor.
-
How to Handle the Review Form
-
Download the Review Form – Click “Download Review Form”.
-
Complete the Form – Provide feedback and fill out all required fields.
Making Decision
Flow 1: Request for Revision
If the manuscript requires improvements, you must request a revision.
How to Request a Revision?
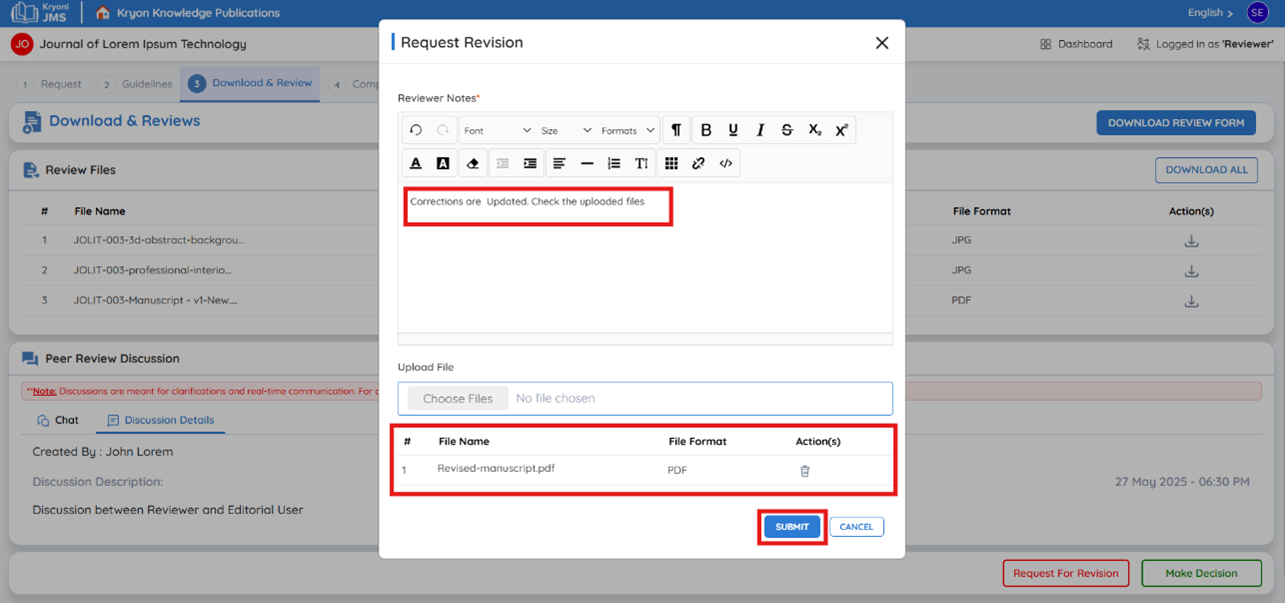
- Click Request for Revision.
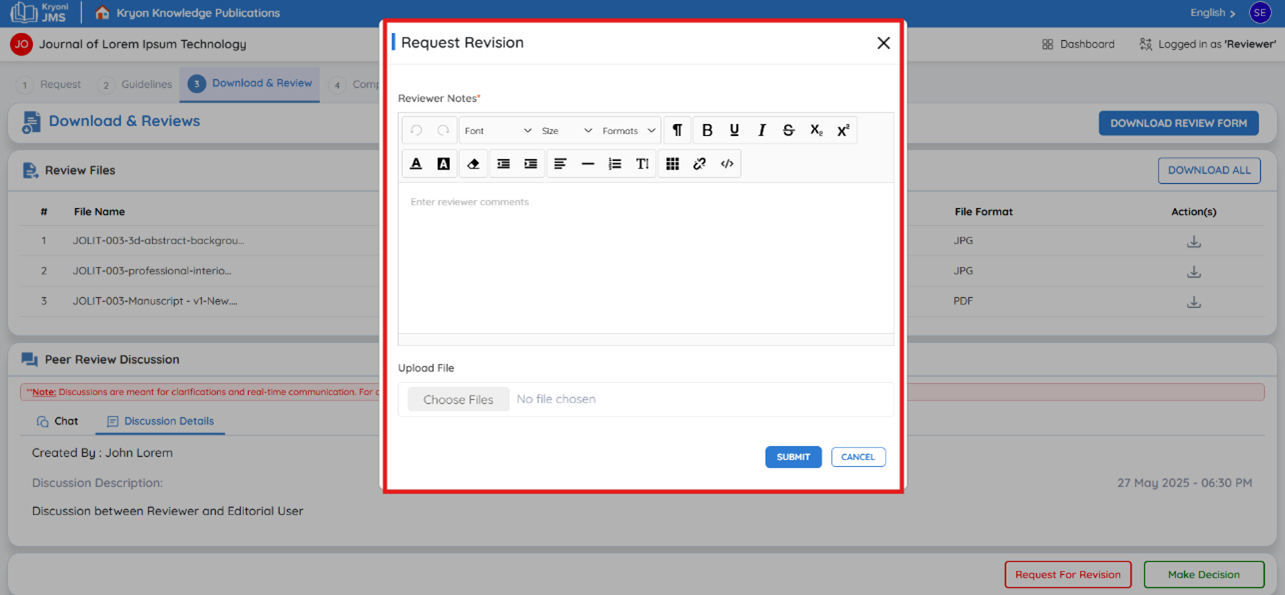
-
Add reviewer commets to specify the changes required.
-
Upload Files (if needed), such as annotated documents or review reports.
-
Click "Submit" to send your revision request to the editorial team.

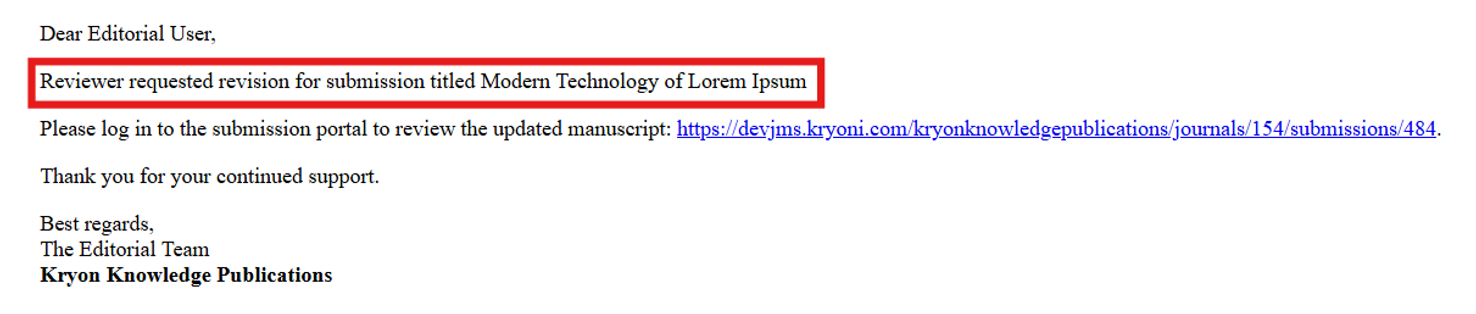
What Happens Next?
- Editorial Review – The editorial team will review your comments and feedback.
- Author Notification – The editorial team will send your comments to the author for revision.
- Manuscript Revision – The author will submit a revised version based on your suggestions.
- Re-Review Process – Once the revised submission is received, you will be notified to review the updated manuscript.
Flow 2: Handling the Revised Manuscript
Once the author submits the revised manuscript, you must review the changes and decide whether further revisions are needed or if the manuscript can be accepted.
How to Review the Revised Submission?
1. Receive Notification
a. You will receive an email regarding the revised submission.
2. Login to the System
a. Use your credentials to log in to the review platform.
3. Download the Revised Manuscript
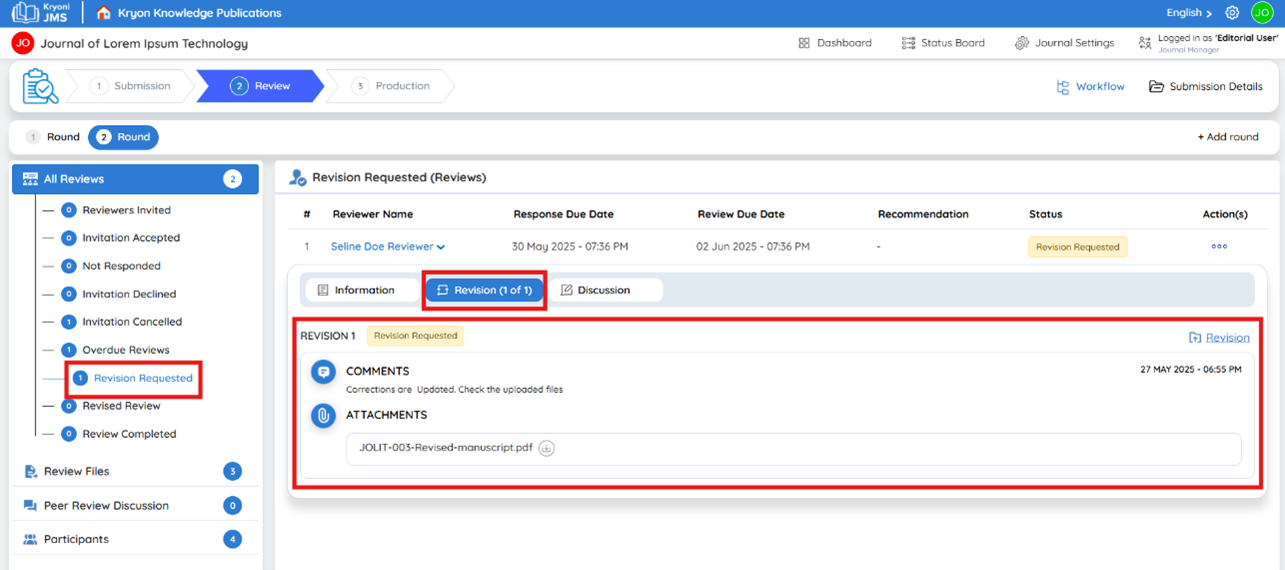
a. Locate the submission and click the "Download" button to access the revised files.
4. Compare with Your Previous Comments
a. Open the revised manuscript and check if the author has addressed all requested changes.
5. Evaluate the Quality of Revisions
a. Ensure that the content, clarity, methodology, and overall quality meet the required standards.
Decision Making for the Revised Submission
- If the changes are still insufficient, select “Request Revision” again and add further comments.
- If the revised manuscript meets the required standards, proceed to acceptance.
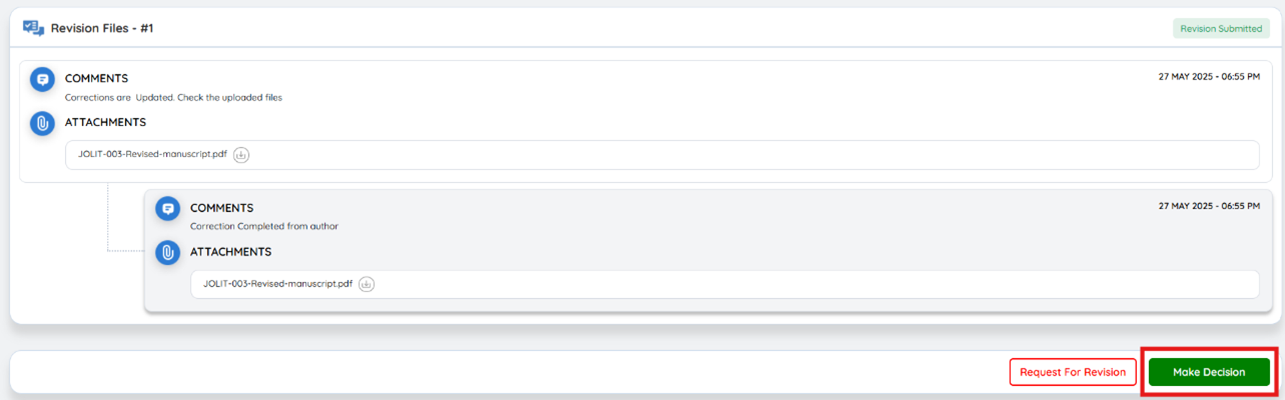
Flow 3: Accepting the Submission
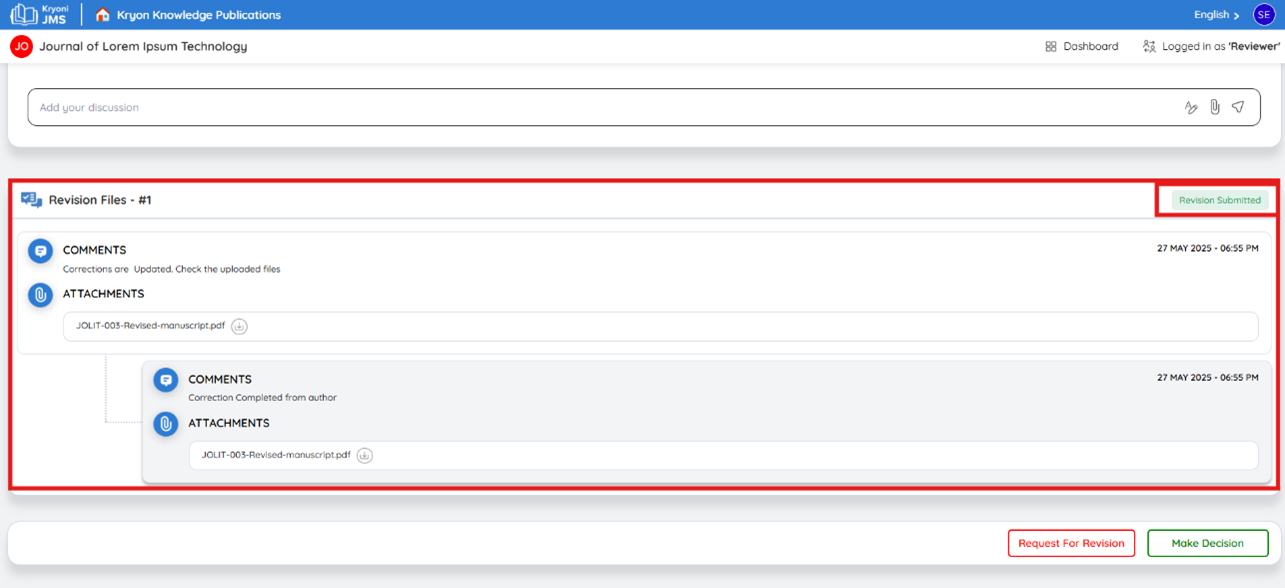
If the manuscript meets all standards and requires no further changes, accept the submission.
Click "Make Decision"
- This option allows you to finalize the review process.
Upload the Reviewer Form
- Attach the completed reviewer form before proceeding.
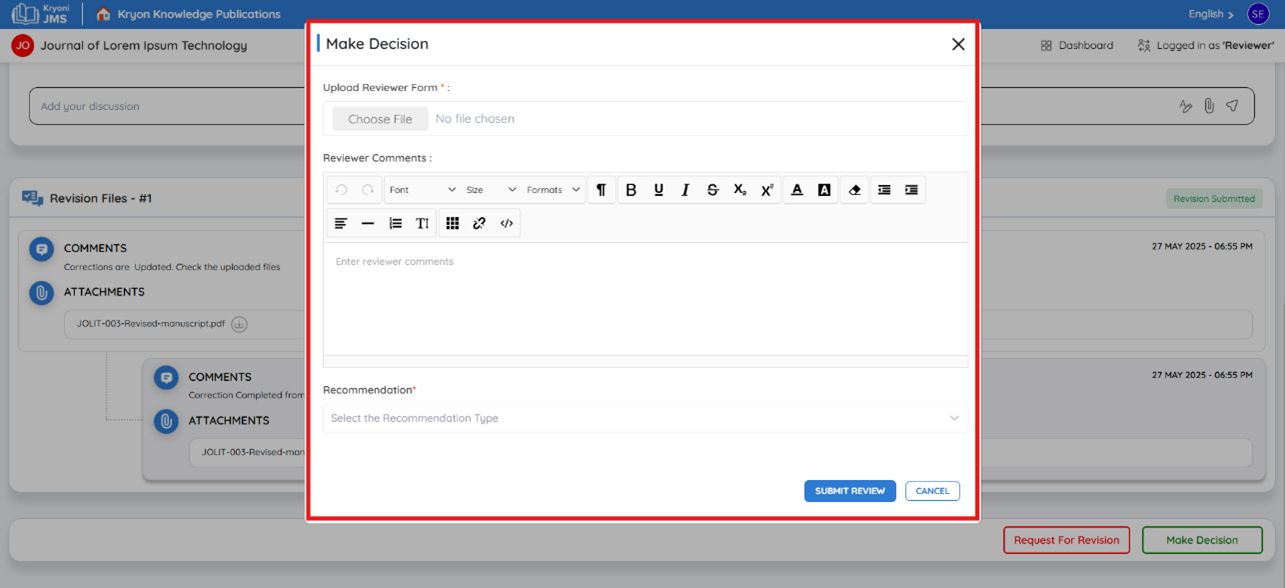
Provide Reviewer Comments
- Add any final comments for the editor or author.
- Ensure feedback is clear, constructive, and concise.
Select Recommendation Type
- Choose the appropriate final decision from the options:
- Accept Submission – If the manuscript meets all requirements.
- Decline Submission – If the manuscript is unsuitable for publication.
- Resubmit for Review – If the author must make substantial changes and undergo another round of review.
What Happens Next?
- The editorial team will receive your final decision.
- If accepted, the manuscript moves forward to the next stage of publication.
- If declined, the author will be notified.
- If resubmission is required, the author will be asked to make major revisions.
How to Submit the Decision?
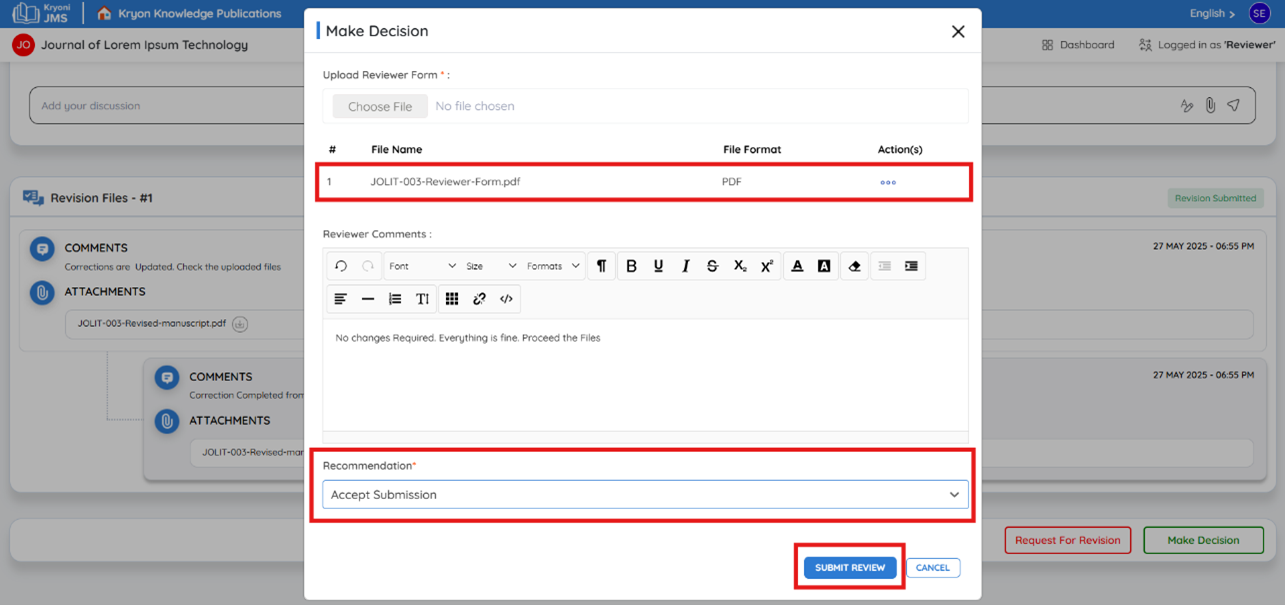
Click "Accept Submission"
- If the manuscript meets all requirements and is ready for publication, select "Accept Submission."
Click "Submit for Review"
Finalize your decision by clicking "Submit Review."
Step 4: Completion
Once you have submitted your review decision, the process is complete.
Confirmation Message
You will see a confirmation message stating:
"Thank you for completing the review. Your feedback has been successfully submitted. The editor may contact you if further clarification is required."

After Review
Once you have submitted your review, follow these steps to confirm and track your completed review:
-
Click "Go to Review"
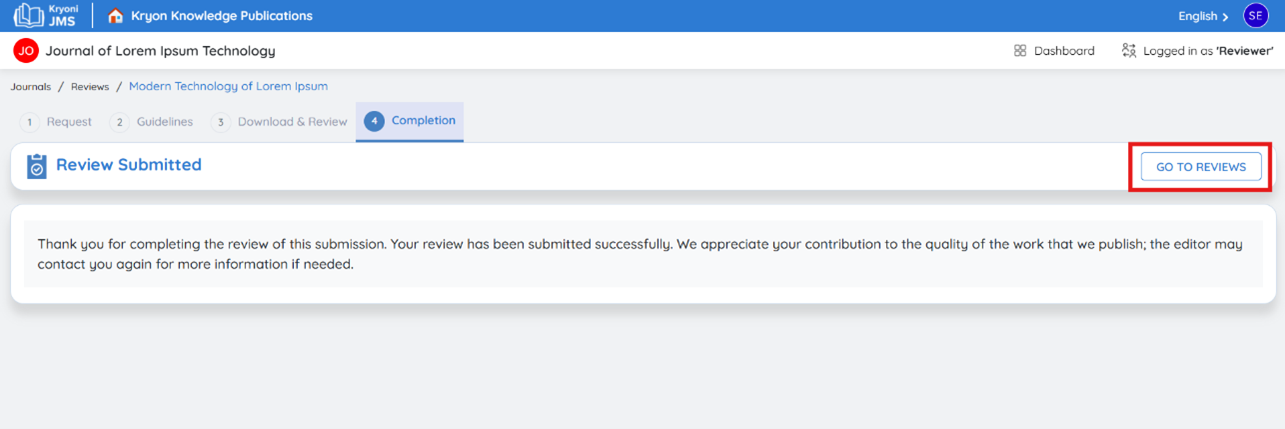
- After submission, click on the "Go to Review" button to verify your completed review.
-
View Completed Reviews
- Navigate to the Completed Reviews section on your Reviewer Dashboard to see your submitted reviews.
-
Your review process is now complete!