Accessing the Journal Management System
Upon successful publishing house registration, you will gain access to the full suite of features within the Journal Management System (JMS). This comprehensive platform is designed to support all aspects of your journal's editorial and publication processes.
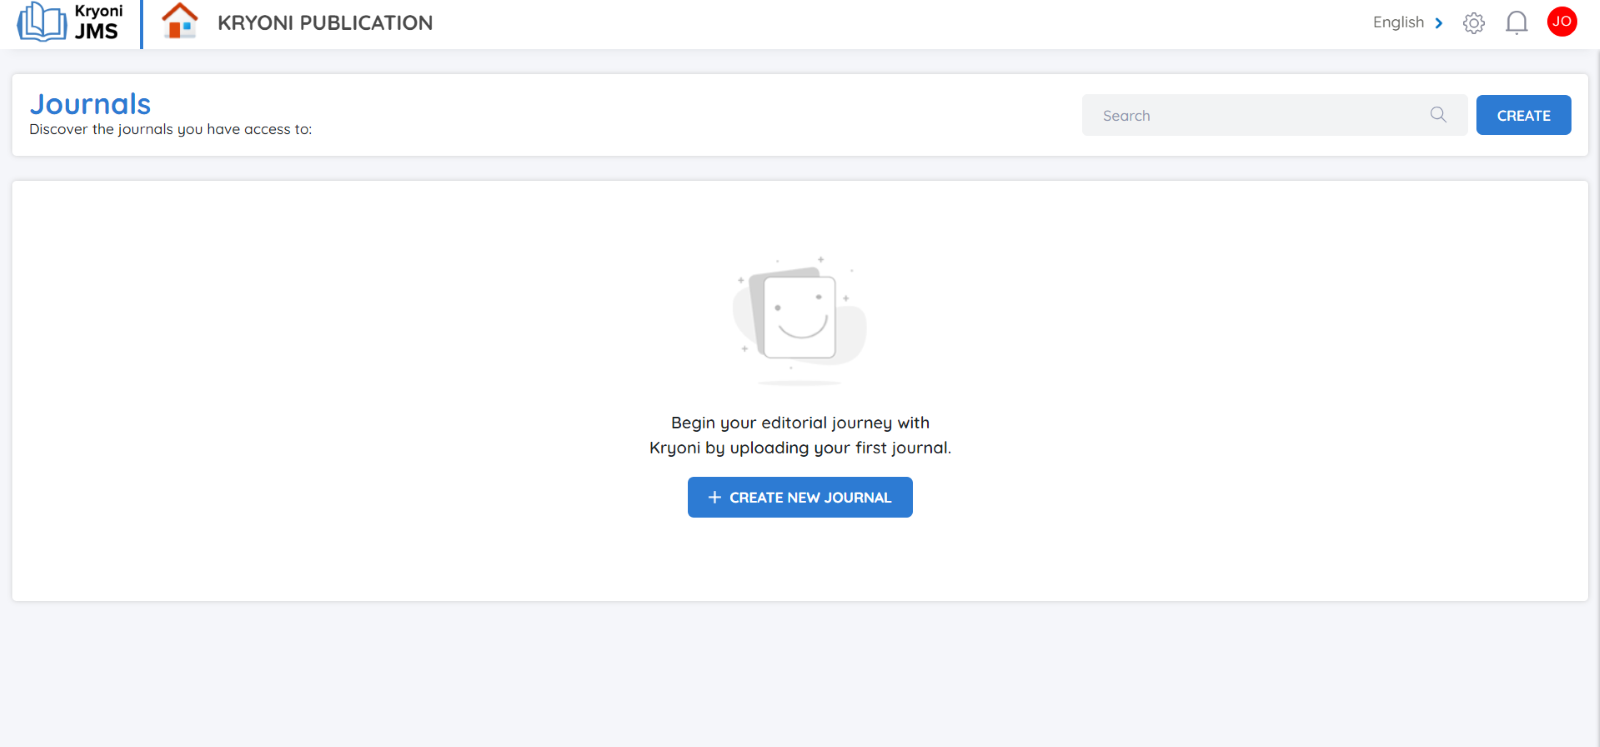
Managing the Global Journal Settings
In this article, you will find a comprehensive guide on how to configure your global journal settings. These settings are essential for customizing the Journal Management System (JMS) to align with the specific operational needs of your publishing house.
-
Please note that these settings are exclusively available to the Journal Manager role.

To begin, click the Settings icon and manage in your dashboard. Here, you will find a list of customizable options that allow you to manage key aspects of your journal.

User Management
A publishing house often requires managing various user roles, such as Journal Managers, Editorial User, Reviewers, and more.
Managing these users can be a complex task, but our JMS provides a user-friendly platform that simplifies this process.
You can invite users, assign tasks, and track feedback—all within a single, intuitive interface.
Inviting a User
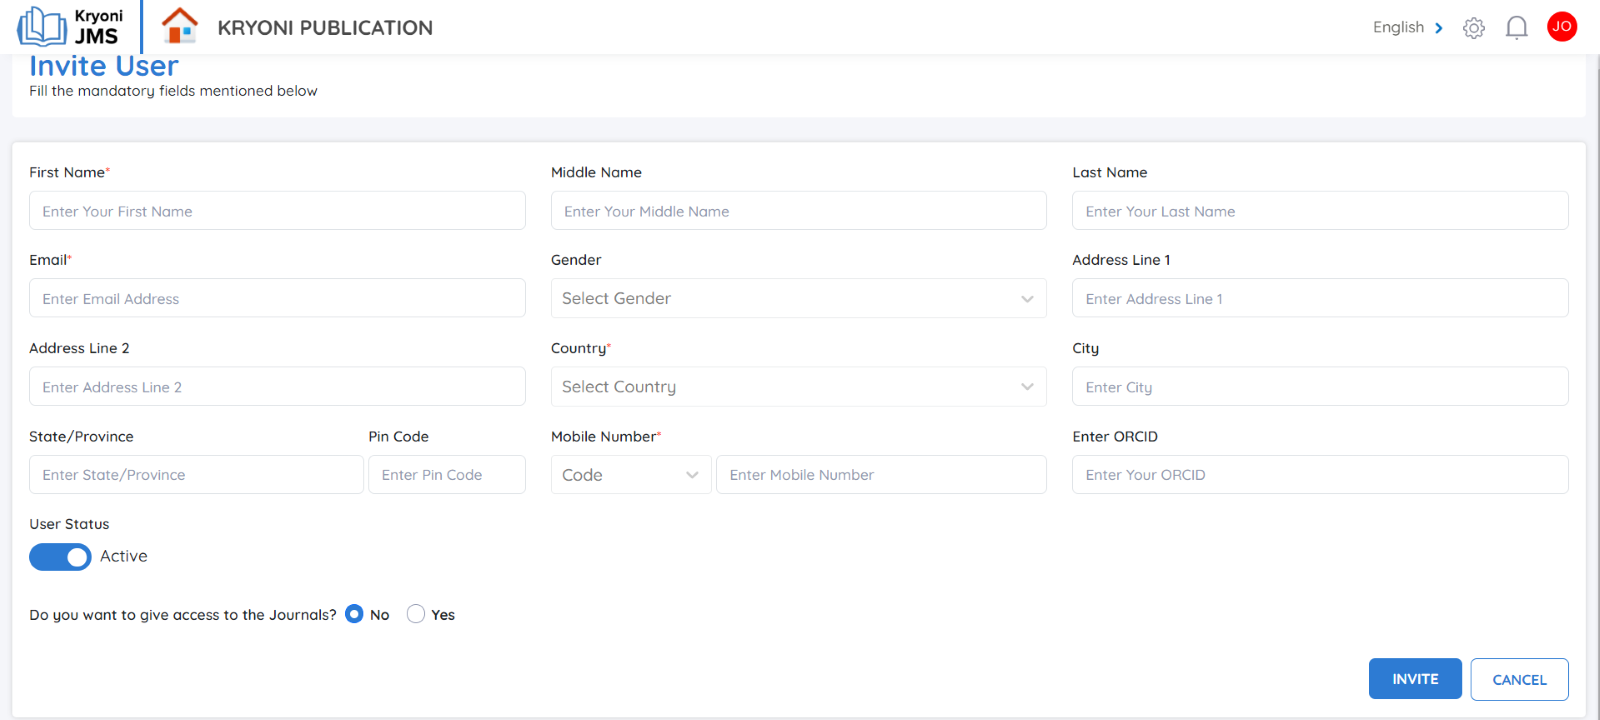
By clicking on the Invite button, you can easily invite new users to your journal by completing the required details, which include:
-
First Name
-
Email Address
-
Country
-
Address
-
Gender
-
State/Province
-
Postal Code
-
Mobile Number
-
ORCID ID
Once the form is completed, you can manage the user's status by selecting either Active or Inactive in the User Status option.
Journal Access Permissions
At the bottom of the page, you will encounter the option: Do you want to grant access to the journal?
This option allows you to control whether the user will have access to the journal’s content. If access is restricted, the user can still register and log in to the system, but they will not have full access to your journal’s content or functionality.
After filling out all the necessary information, click the Invite button. A confirmation email will then be sent to the invited user. They can follow the link in the email to register with the JMS and log in as a user.

User Management Interface
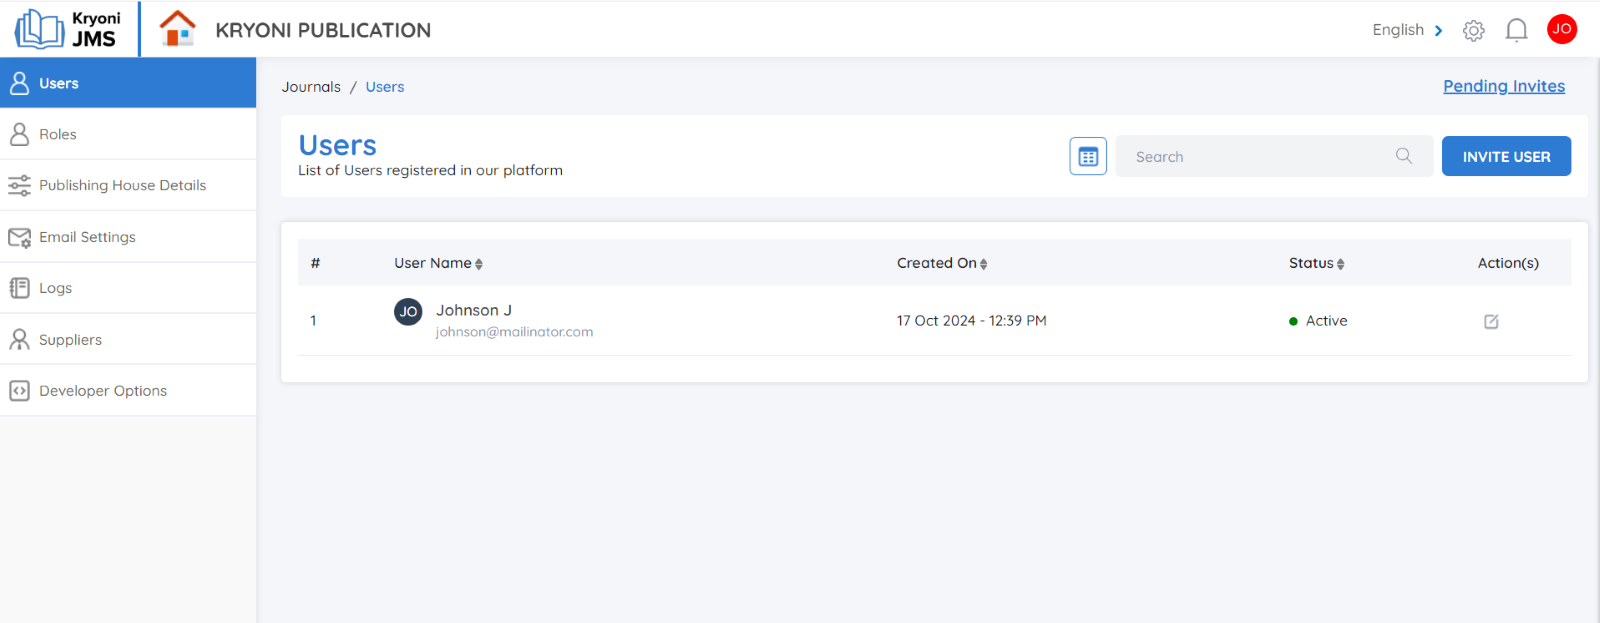
In the Dashboard, you can view and manage user details with the following columns:
Username: Displays the user’s registered name.
Created On: Shows the date when the user account was created.
Status: Indicates whether the user account is Active or Inactive. You can update this status as needed.
Action: Provides the option to Edit user details if modifications are required.

- Pending invites: If a user has been invited but has not yet accepted the invitation, the invite will appear in this column. A notification email is sent to the user, and their status remains pending until they complete the registration process.

- Resend Invite: If needed, you can resend the invitation to users who have not yet accepted. This option allows you to ensure that they receive the necessary information to join.

- Pending Due Date: The due date for pending actions will be clearly mentioned, providing a timeline for users to accept their invites and complete their registration.
Roles
Content of the introduction Roles.
Publishing House Details
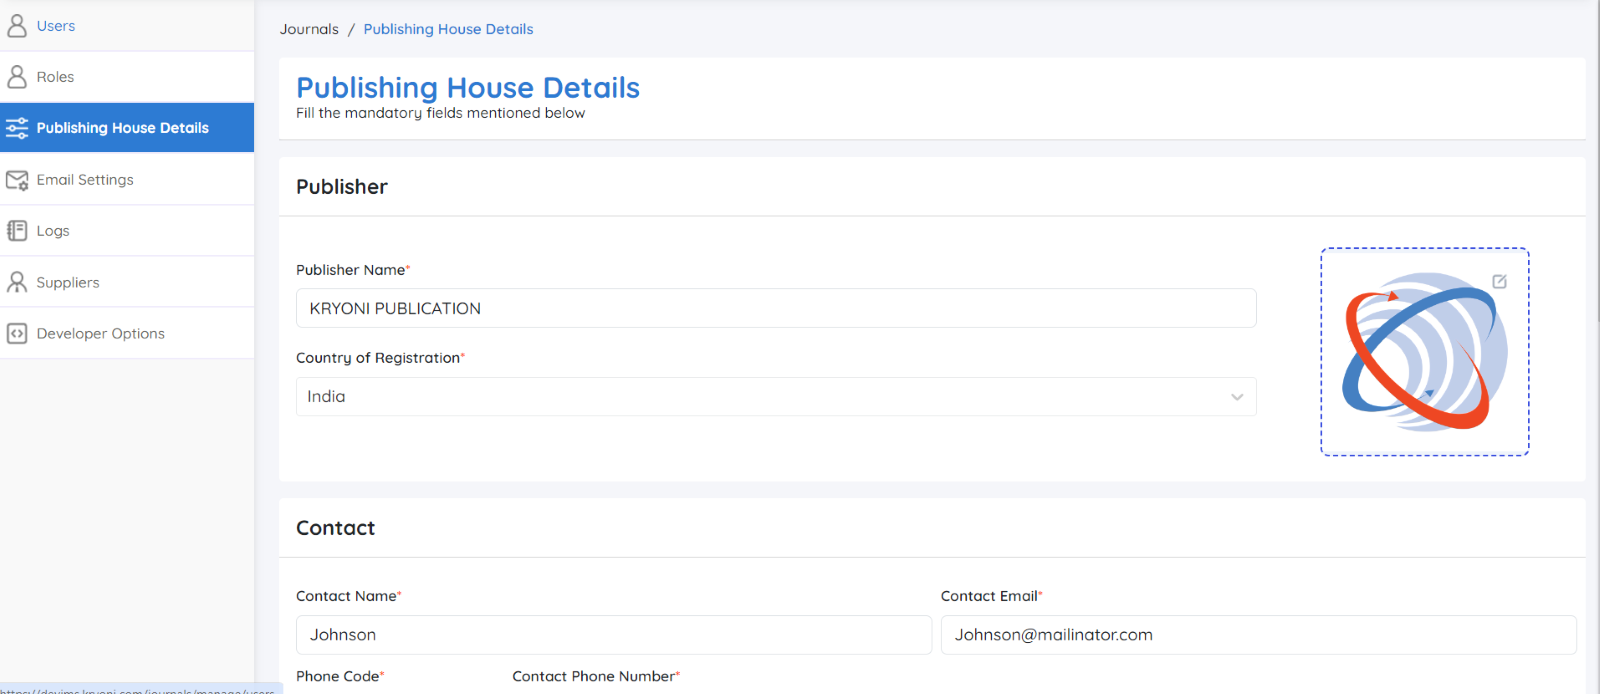
This section allows you to view and edit all essential information related to your publishing house as provided during the registration process. Keeping these details accurate ensures smooth operations and efficient management of publishing workflows within the platform.
Editable Publishing House Information
You can update the following key details:
-
Publishing House Name: The official name of your organization.
-
Contact Information: Include primary email addresses, phone numbers, or any additional contact details.
-
Mailing Address: Ensure your physical or mailing address is current for correspondence and documentation purposes.
Add Your Company Logo
Click on the Image Placeholder
Navigate to the logo upload option near the publishing house name.
Upload Your Logo
-
Choose the logo file from your device.
-
Supported formats include PNG, JPEG.
Confirm:
-
Once uploaded, the logo will reflect next to your publishing house name across the platform.
-
Click Save Changes

Why Keep Your Details Updated?
Accurate Communication: Ensure that all team members and stakeholders have the latest information.
Consistent Branding: The company logo will appear in key areas within the platform, ensuring brand visibility.
Workflow Efficiency: Updated contact details enable smooth collaboration between editors, authors, and reviewers.
By regularly reviewing and updating your publishing house’s details, you maintain a professional presence and ensure seamless operation within the system.
Email settings
Effective communication and timely updates are essential for managing journals, and our Journal Management System (JMS) offers a streamlined way to automate these communications. With predefined email templates, you can configure automatic emails for various actions performed within the JMS.

Editing Email Templates
To tailor the email content to your specific needs, click the Edit icon next to the respective template. This allows you to modify the content as required, ensuring the messaging aligns with your publishing house’s communication style.
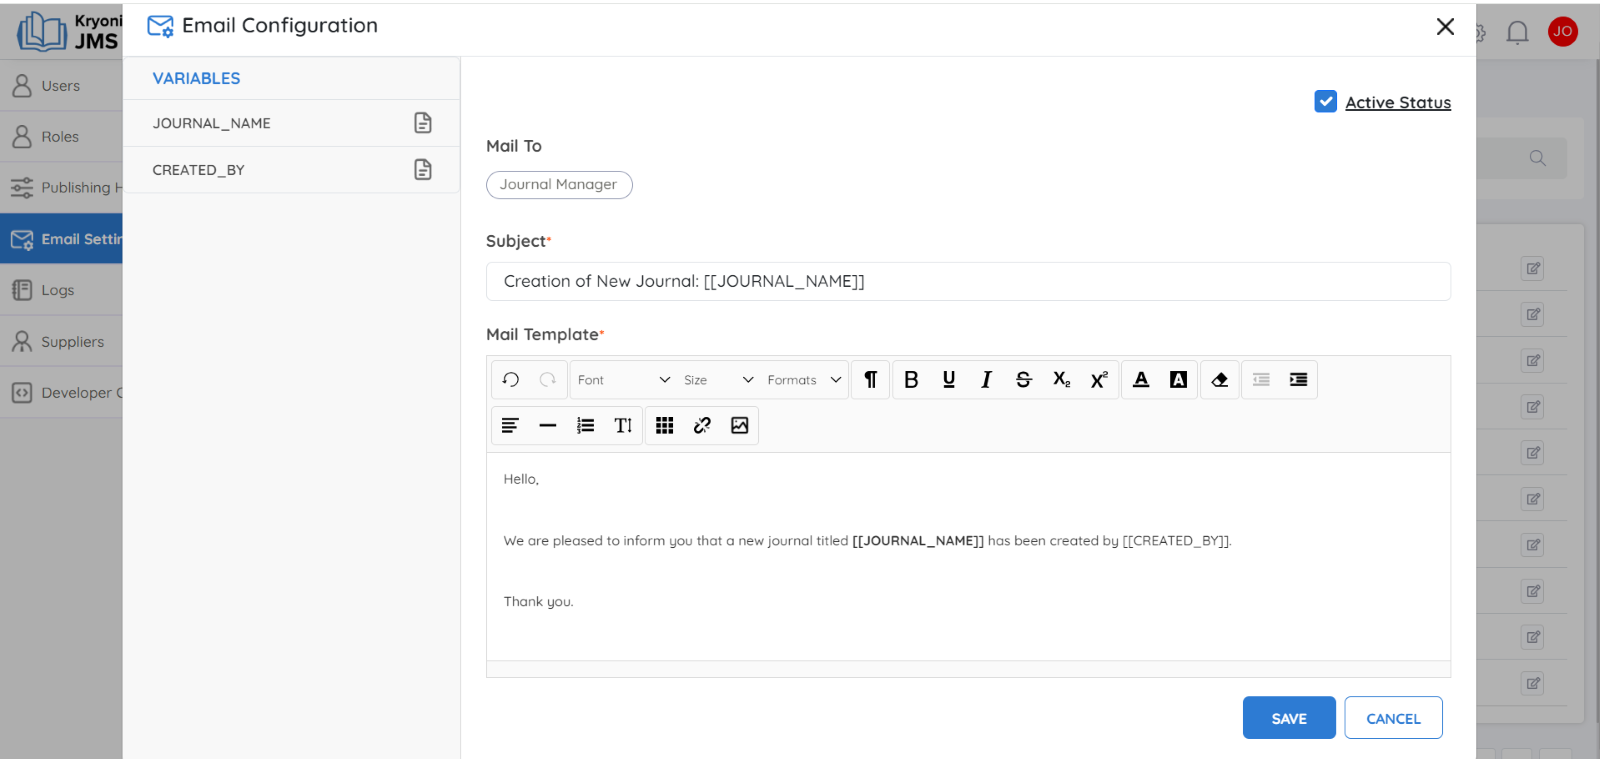
Email Configuration
Configuring the email settings is straightforward. You can utilize the list of available variables, conveniently displayed in the sidebar, to customize the content dynamically. These variables ensure that personalized details (such as user names or journal names) are automatically inserted into the emails.
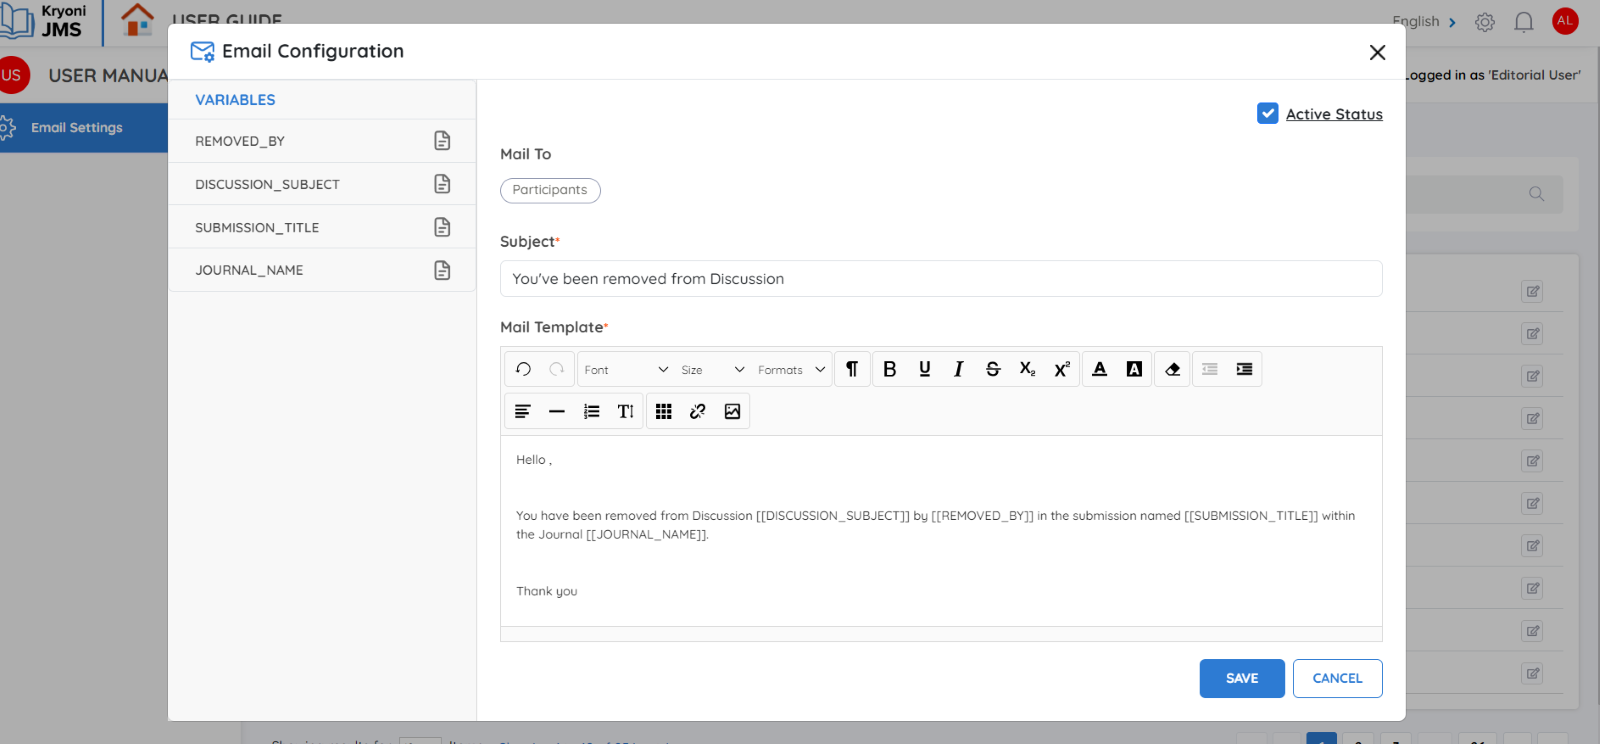
Activating or Deactivating Email
You can easily enable or disable any email by checking the Active Status checkbox. When active, the email will be automatically triggered for the corresponding actions in the system.
By managing these settings, you ensure consistent and efficient communication across all journal activities.

Logs
For security and transparency, all actions performed within our Journal Management System (JMS) are automatically recorded as logs. Every event, from journal creation to publication, is logged with a times, ensuring that every step in the editorial and publishing process is tracked.
Key Features of the Log System:
Permanent Records: Once an action is logged, it cannot be edited or deleted, ensuring all records remain accurate.
Detailed Tracking: Every activity—such as submissions, user management, or publishing—is recorded, giving you a full history of events.
Security and Reference: These logs help maintain security and can be used for future reference, ensuring smooth and clear communication within the system.

Suppliers
After the peer review process is complete, the next step in the publication workflow often involves managing multiple production tasks like copyediting, typesetting, and final proofing.
Manually coordinating with different suppliers for these tasks can be complex and time-consuming. However, with our Journal Management System (JMS), you can handle the entire production process effortlessly from a single, user-friendly interface.
Once the review phase is finalized, you have the option to invite or assign production tasks to your Suppliers directly within the JMS. This enables seamless management of the production workflow, reducing the need for external coordination and follow-ups.
Inviting a Supplier
-
Navigate to the supplier section within your JMS dashboard.
-
Click on Add supplier to invite a service provider to your platform.
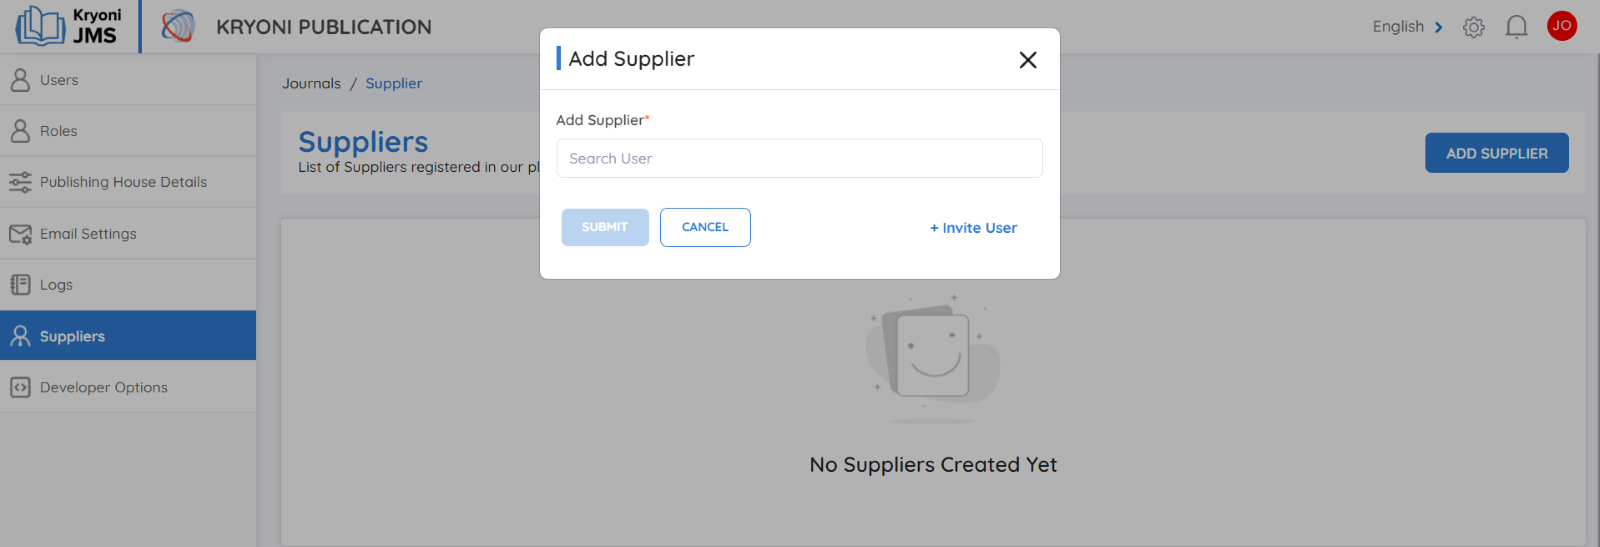
Fill Out the Required Details
For Existing Users:
Enter the supplier's email address in the provided field. This email will be used to send the invitation.
For New Users:
Click on the "Invite User" Link
How To Invite User - Link
This option allows you to invite a new service provider who is not already registered in JMS.
Send the Invitation
Click "Send Invite":
-
An automated email will be sent to the entered email address.
-
The email contains a registration link that the service provider can follow to create their account in the JMS.
User Registration and Assignment
-
Acceptance of Invitation: Once the supplier accepts the invitation, they will be successfully registered in the JMS.
-
Assigning Tasks: The Journal Manager can now assign specific production tasks to the newly registered supplier.
-
Task Notifications: The assigned service provider will receive notifications regarding their tasks and can upload the completed production files directly into the JMS.
Tracking Progress:
-
The JMS offers real-time tracking of the entire production process. You can monitor task statuses, review uploaded files, and provide feedback—all from a centralized dashboard.
-
he system ensures that all communications and submissions are logged for future reference.
Benefits Of Using JMS Ffor Production Management
-
Centralized Workflow: Manage all aspects of the production process in one place, reducing the need for external coordination.
-
Automated Invitations: Quickly onboard service providers with automated email invitations and seamless user registration.
-
Real-time Updates: Track the progress of assigned tasks and receive updates as soon as production files are uploaded.
-
Enhanced Collaboration: Communicate directly with your service providers through the platform, eliminating communication gaps and ensuring timely production.
By utilizing JMS to manage your Publishing Service Providers, you streamline the production workflow, increase efficiency, and ensure a smoother, more coordinated publishing process.
Developer Option
Content of the introduction Developer options.